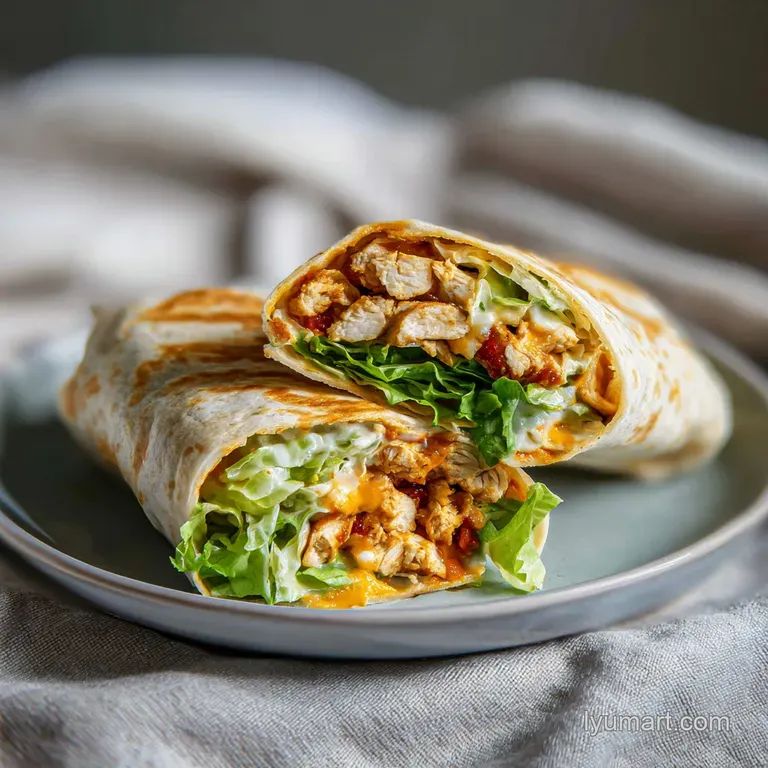
Low Carb Cheesy Garlic Chicken Wrap
- Time: Active 10 minutes, Passive 8 minutes, Total 18 minutes
- Flavor/Texture Hook: Shatter crisp exterior with a velvety, garlic heavy molten cheese core
- Perfect for: High protein meal prep or a quick, comforting weeknight dinner
- Mastering This Low Carb Cheesy Garlic Chicken Wrap
- The Time And Nutrition Specs To Know
- Component Analysis For This Garlic Chicken Wrap
- Culinary Tools For A Golden Crispy Finish
- Step By Step Assembly For Massive Flavor
- Avoiding Common Wrap Mistakes Like A Pro
- Smart Swaps For Your Cheesy Garlic Filling
- Long Term Storage And Fresh Reheating Methods
- Debunking Kitchen Misconceptions
- Restaurant Style Plating For Better Home Dining
- Very High in Sodium
- Recipe FAQs
- 📝 Recipe Card
Mastering This Low Carb Cheesy Garlic Chicken Wrap
The smell of garlic hitting hot butter is one of those kitchen scents that immediately brings people running to the stove. I remember the first time I tried making a low carb wrap, it was a soggy, sad mess because I didn't realize that keto friendly tortillas behave differently than flour ones.
This low carb cheesy garlic chicken wrap recipe is a surefire weeknight winner because it solves the "soggy wrap" problem once and for all.
We have all been there, standing in front of the fridge at 6:00 PM with some leftover rotisserie chicken and zero motivation to cook a complex meal. My first few attempts at this were honestly just "okay," but then I discovered the trick of using cream cheese as a binder rather than just dumping shredded cheese inside.
It creates this decadent, lava like interior that stays put when you take a bite, rather than sliding out the back of the wrap and onto your lap.
The real magic happens when that wrap hits the skillet. We are not just warming it through, we are creating a toasted shell that actually has structural integrity. You get that satisfying sound when your teeth break through the golden crust, followed immediately by the punch of fresh garlic and the creamy mozzarella.
It is a total sensory experience that makes you forget you are actually eating something that fits into a healthy lifestyle.
The Physics of the Melt: By mixing cream cheese with mozzarella, we create a stable emulsion that resists oil separation at high temperatures. This ensures the filling stays velvety rather than becoming a greasy puddle inside the tortilla.
Maillard Reaction Enhancement: Brushing the outside with butter and garlic powder before searing triggers a faster browning process. This allows the tortilla to become shatter crisp in under 2 minutes per side without overcooking the chicken inside.
Moisture Barrier Strategy: Coating the chicken in the cheese mixture before assembly prevents the meat juices from soaking into the tortilla. This "fat barrier" is the secret to a wrap that stays crunchy from the first bite to the last.
| Method | Cook Time | Texture | Best For |
|---|---|---|---|
| Cast Iron Skillet | 4 minutes | Maximum crunch, rustic char | Most flavor and classic feel |
| Air Fryer (400°F) | 6 minutes | Evenly golden, very dry | Hands off cooking and cleanup |
| Panini Press | 3 minutes | Dense, compressed, ridged | Eating on the go or office lunches |
The Time And Nutrition Specs To Know
When we talk about a Carb Cheesy Garlic Chicken Wrap Recipe, we are looking at a serious nutritional powerhouse. With 71 grams of protein per serving, this is not just a light snack, it is a full blown meal that keeps you full for hours. I usually find that one wrap is more than enough for a dinner, especially if you pair it with a light side salad. If you have leftovers from a Honey Garlic Chicken recipe, you can use that shredded meat here to add even more depth of flavor.
The timing is the most attractive part of this whole setup. We are looking at 10 minutes of prep, which is mostly just mixing things in a bowl, and 8 minutes of total cook time.
That is less than 20 minutes from "I'm hungry" to "dinner is served." I've tried many variations of the Garlic Chicken Wrap Recipe, but this specific timing ensures the garlic is fragrant without becoming bitter and the cheese is melted but not burnt.
| Thickness | Internal Temp | Rest Time | Visual Cue |
|---|---|---|---|
| 1.5 inches | 165°F (filling) | 2 minutes | Cheese bubbles at the edges |
| 1 inch | 160°F (filling) | 1 minute | Tortilla is deep golden brown |
| 0.5 inch | 155°F (filling) | 30 seconds | Exterior is firm to the touch |
You can easily adjust this for more people by doubling the ingredients, though you should work in batches when searing to avoid overcrowding the pan. If the pan is too full, the wraps will steam instead of crisping up, and we definitely want to avoid that.
It is better to spend an extra 4 minutes on a second batch than to end up with a limp, soft tortilla.
Component Analysis For This Garlic Chicken Wrap
Every ingredient in this recipe serves a specific purpose, and understanding those roles helps you become a better cook. We are using 2 cups of cooked chicken breast, which provides the lean bulk of the meal.
The 4 oz of cream cheese is the real MVP here, acting as the glue that holds everything together and providing that luxurious mouthfeel we crave.
| Ingredient | Science Role | Pro Secret |
|---|---|---|
| Cream Cheese | Emulsifier | Use full fat for better melt stability |
| Fresh Garlic | Aromatic | Mince finely to release all essential oils |
| Mozzarella | Elasticity | Grate your own for a smoother melt |
| Low carb Tortilla | Structural Base | Microwave for 5 seconds to prevent tearing |
For the garlic component, we are using both fresh cloves and a bit of powder on the exterior. The 3 cloves of fresh garlic provide that sharp, authentic bite in the filling, while the 1 tsp of garlic powder in the butter creates a savory crust.
It's a two pronged approach to flavor that makes this Cheesy Garlic Chicken Wrap Recipe stand out from generic versions.
Culinary Tools For A Golden Crispy Finish
You don't need a professional kitchen to pull this off, but a couple of specific items make it much easier. A heavy bottomed skillet, like a cast iron pan, is your best friend here. It holds heat consistently, which is exactly what you need to get that even, golden brown sear on the low carb tortillas.
I also highly recommend using a wide silicone spatula so you can flip the wraps without the filling falling out.
If you are a fan of that pressed, restaurant style look, a panini press works wonders for a Garlic Chicken Wrap Recipe. It applies heat to both sides simultaneously, which cuts your cook time in half and gives you those beautiful grill marks.
If you don't have one, just use a second heavy pan to weigh down the wraps while they are in the skillet. This "brick chicken" technique ensures every square inch of the tortilla makes contact with the hot surface.
- Large mixing bowl for the filling
- Chef's knife for mincing fresh garlic
- Non stick or cast iron skillet
- Measuring cups and spoons
- Silicone spatula or tongs
step-by-step Assembly For Massive Flavor
Putting this together is straightforward, but the order of operations matters if you want the best results. Start by ensuring your 2 cups of cooked chicken breast are shredded fairly small. Large chunks can poke holes through the low carb tortillas, which leads to cheese leaks.
I like to use two forks to pull the meat apart until it's almost a "pulled chicken" texture.
For the Creamy Garlic Filling
In your mixing bowl, combine the 4 oz of softened cream cheese with the 3 cloves of minced garlic, 1 cup of mozzarella, and 1/4 cup of parmesan. This is where you also add your 1 tbsp of fresh parsley, 1/2 tsp of red pepper flakes, salt, and pepper.
Note: Mixing the spices into the cheese first ensures they are evenly distributed and don't end up in one spicy clump. Once that's smooth, fold in the shredded chicken until every piece is coated in that cheesy goodness.
The Structural Fold
Lay your 2 large low carb tortillas flat on a clean surface. Divide the chicken mixture evenly between them, placing it in the center but slightly toward the bottom half. Fold in the sides about an inch, then roll from the bottom up as tightly as possible.
Why this? Tightly rolled wraps are less likely to burst open during the searing process.
The Surface Treatment
Melt your 1 tbsp of butter or olive oil in the skillet over medium heat and stir in the 1 tsp of garlic powder. Note: We add the powder to the fat to create a seasoned "oil bath" for the tortilla to fry in. Place the wraps in the skillet seam side down first.
This is crucial because the heat will "weld" the seam shut, keeping the filling secure for the rest of the cooking time.
The Thermal Finish
Cook for 3 to 4 minutes per side. You are looking for a deep golden color and a surface that feels firm when you tap it with a spatula. If you find the cheese isn't melting fast enough, you can put a lid on the pan for 60 seconds to trap the steam, then remove it for the final minute to re crisp the exterior. This technique is similar to how I handle the cheese in my Juicy Garlic Parmesan recipe to get that perfect internal temperature.
Avoiding Common Wrap Mistakes Like A Pro

The most common issue people face with a Carb Cheesy Garlic Chicken Wrap Recipe is the tortilla tearing. Low carb wraps are often made with more fiber and less gluten, which makes them less elastic than standard ones. If you try to fold them cold, they will crack every single time.
A quick 5 to 10 second zap in the microwave or a few seconds over a gas flame makes them pliable and easy to work with.
Why Your Wrap Is Soggy
If your wrap comes out soft or greasy, it's usually because the pan wasn't hot enough when you started or you used too much oil. The tortilla needs to hit a hot surface to immediatey begin the crisping process. If it sits in lukewarm oil, it just absorbs the fat like a sponge.
Always wait until the butter is foaming or the oil is shimmering before adding your wraps.
| Problem | Root Cause | Solution |
|---|---|---|
| Tearing Tortilla | Lack of elasticity in low carb dough | Heat for 10 seconds before folding |
| Leaking Cheese | Wrap was rolled too loosely | Sear seam side down first to seal |
| Cold Center | Chicken was too cold when assembled | Let filling reach room temp before cooking |
Another trap is overfilling. We all want a giant, restaurant style wrap, but low carb tortillas have their limits. If you overstuff them, the seam won't stay closed, and the filling will spill out the moment it starts to melt.
It is much better to have two medium sized, perfectly sealed wraps than one giant disaster that falls apart on the plate.
- ✓ Pat the shredded chicken dry if it was stored in liquid or broth
- ✓ Use fresh garlic instead of the jarred stuff for a cleaner flavor profile
- ✓ Don't walk away from the stove; butter and garlic powder can burn quickly
- ✓ Let the wraps rest for 2 minutes before slicing to allow the cheese to set
- ✓ Use a serrated knife for the cleanest cut through the crispy shell
Smart Swaps For Your Cheesy Garlic Filling
I'm a big believer in using what you have on hand. While the mozzarella and parmesan combo is classic, you can easily swap things out depending on your cravings. If you want something with a bit more bite, a sharp white cheddar works beautifully in place of the mozzarella.
Just keep in mind that cheddar has a higher oil content, so it might be slightly messier.
| Original Ingredient | Substitute | Why It Works |
|---|---|---|
| Mozzarella (1 cup) | Sharp Cheddar (1 cup) | Bolder flavor. Note: May be slightly more oily when melted |
| Cream Cheese (4 oz) | Greek Yogurt (thick, 1/2 cup) | Lower calorie. Note: Much tangier and less stable under high heat |
| Fresh Parsley (1 tbsp) | Fresh Cilantro (1 tbsp) | Changes the profile. Best if adding lime or jalapeños |
For those looking for a different protein, this method works perfectly with leftover turkey or even canned tuna. If you are doing a turkey version, I'd suggest adding a tiny bit of cranberry sauce (the sugar-free kind if you're keto) into the cheese mixture for a "leftover Thanksgiving" vibe.
The Garlic Chicken Wrap Recipe is just a template; the technique of the cheesy binder is the real lesson here.
If you are following a specific plan, like Weight watchers Cheesy garlic chicken wraps, you might want to swap the full fat cream cheese for a Neufchâtel or a light version. Just be aware that lower fat cheeses tend to have more moisture and less stability, so your filling might be a bit more "runny" than the original version.
Long Term Storage And Fresh Reheating Methods
This is one of my favorite recipes for meal prep because the filling actually tastes better the next day once the garlic has had time to permeate the chicken. You can make a big batch of the filling and keep it in the fridge for up to 3 days.
However, I highly recommend only assembling and searing the wraps right before you are ready to eat. A pre seared wrap will lose its crunch in the fridge.
For storage, keep the filling in an airtight container. If you have already cooked the wraps and have leftovers, don't use the microwave to reheat them! The microwave is the enemy of the crispy tortilla; it will turn your beautiful golden wrap into a rubbery, chewy mess.
Instead, use a toaster oven or an air fryer at 350°F (180°C) for about 5 minutes. This will dry out any moisture that moved into the shell and bring back that signature "shatter" texture.
Zero waste tip: If you have leftover filling but no tortillas, it makes an incredible hot dip! Just put it in a small oven safe dish, top with a little extra mozzarella, and bake until bubbly. Serve it with celery sticks or low carb crackers.
You can also toss it with some zucchini noodles for a quick "alfredo" style meal.
Debunking Kitchen Misconceptions
One myth I hear all the time is that you can't get a "real" crunch out of a low carb tortilla. People think you're stuck with soft, floppy wraps forever. That’s simply not true. The key isn't just the tortilla itself, it's the fat you use to sear it.
Butter contains milk solids that brown and create a crust, while oil provides a higher smoke point for a faster sear. Using a combination of the two gives you the best of both worlds: flavor and texture.
Another misconception is that you need to cook the garlic for a long time to get rid of the "bite." In this wrap, the quick sear is actually enough. Because the garlic is minced finely and encased in fat (the cheese), it mellows out quickly without losing its personality.
You don't need to pre-sauté it, which saves you a dish and 5 minutes of your life.
Finally, some people think you have to use raw chicken and cook it inside the wrap. Please don't do this! The tortilla would be burnt to a crisp long before the chicken reached a safe temperature. This recipe is designed specifically for pre cooked chicken, which is why it's so fast.
It's about assembly and texture, not long form roasting.
Restaurant Style Plating For Better Home Dining
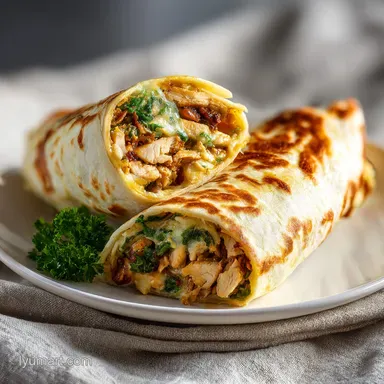
We eat with our eyes first, and a wrap can sometimes look a bit plain on a plate. To give it that "bistro" look, always slice your wrap on a sharp diagonal. This exposes that beautiful, molten cheesy center and makes the portion look more generous.
I like to stack the two halves slightly offset from each other to create some height on the plate.
A little garnish goes a long way. Save a tiny bit of the fresh parsley to sprinkle over the top after cooking. The green pop against the golden brown tortilla makes it look fresh and intentional. If you want to go the extra mile, serve it with a small ramekin of dipping sauce.
A simple garlic aioli or even a spicy ranch pairs perfectly with the flavors here.
For a final touch, serve it on a wooden board or a slate plate if you have one. There is something about the rustic look of a toasted wrap that feels right at home on a textured surface.
If you are serving this for guests, a few lemon wedges on the side can provide a bright acidity that cuts through the richness of the 807 kcal per serving. It is all about balance, and that little squeeze of citrus can really make the garlic sing.
If you enjoyed the flavor profile of this dish, you might also love the aromatic depth found in a Chicken Shawarma with recipe, which uses similar garlic forward notes but with a Mediterranean twist. Whether you are making this for a quick Tuesday lunch or a Friday night treat, the Low Carb Cheesy Garlic Chicken Wrap is a reliable, high protein solution that never feels like "diet food." It is just good, honest cooking that happens to be healthy.

Very High in Sodium
1280 mg mg of sodium per serving (56% of daily value)
The American Heart Association recommends limiting sodium intake to about 2,300mg per day for most adults. This recipe significantly exceeds that recommendation.
Tips to Reduce Sodium
-
Lower Sodium Cheese-20%
Opt for low-sodium mozzarella and parmesan cheese. This simple swap can significantly reduce sodium since regular cheeses are a major source of sodium in this recipe.
-
Reduce Added Salt-25%
Eliminate the added sea salt completely. Taste the dish before adding any salt, and remember that other ingredients already contribute sodium.
-
Unsalted Chicken-15%
Ensure the cooked chicken breast is unsalted. If you are buying pre-cooked chicken, check the label and select a low-sodium option or use freshly cooked chicken without added salt.
-
Unsalted Butter-5%
Use unsalted butter or olive oil. Even small amounts of salt in butter can add up, so opting for unsalted is a simple way to cut back.
-
Spice it Up!
Use a variety of herbs and spices like garlic, black pepper, parsley, and red pepper flakes to enhance flavor without adding sodium. Experiment with other flavors like smoked paprika or onion powder.
Recipe FAQs
Can I substitute a different type of low carb tortilla?
Yes, but texture will vary. Choose a higher fat content tortilla if possible, as they tend to crisp better in the pan; thinner tortillas are prone to tearing during folding.
How to prevent the melted cheese filling from leaking out during searing?
Place the wrap seam side down first in the hot skillet. The initial heat will quickly seal the seam shut, trapping the molten cheese inside the wrap structure.
Is it possible to use raw chicken instead of pre-cooked chicken?
No, this is highly inadvisable. The exterior searing time is too short to safely cook raw chicken through, which would result in a burnt tortilla and undercooked poultry.
How to properly reheat leftover wraps to maintain crispiness?
Use an air fryer or toaster oven at 350°F (180°C). The microwave will steam the tortilla and make it soggy; dry heat methods help restore the crisp exterior quickly.
How do I ensure the garlic flavor is strong but not overpowering?
Use fresh minced garlic in the filling and garlic powder on the exterior butter. This dual application provides deep flavor in the core and a fragrant crust without bitterness.
What can I use instead of cream cheese if I need a tangier, lower fat binder?
Use thick, full fat Greek yogurt, but reduce the cooking time slightly. Greek yogurt is tangier, though it has less fat stability than cream cheese, so watch closely to prevent runoff.
What is the best way to make this filling taste even richer, similar to a baked casserole?
Incorporate a small amount of shredded hard cheese like Parmesan or Romano. This mimics the deep umami flavor achieved in recipes like the Baked Chicken and recipe, enhancing the overall savory depth.
Cheesy Garlic Chicken Wrap
Ingredients:
Instructions:
Nutrition Facts:
| Calories | 807 kcal |
|---|---|
| Protein | 71 g |
| Fat | 51 g |
| Carbs | 20 g |
| Fiber | 5 g |
| Sugar | 4 g |
| Sodium | 1280 mg |
