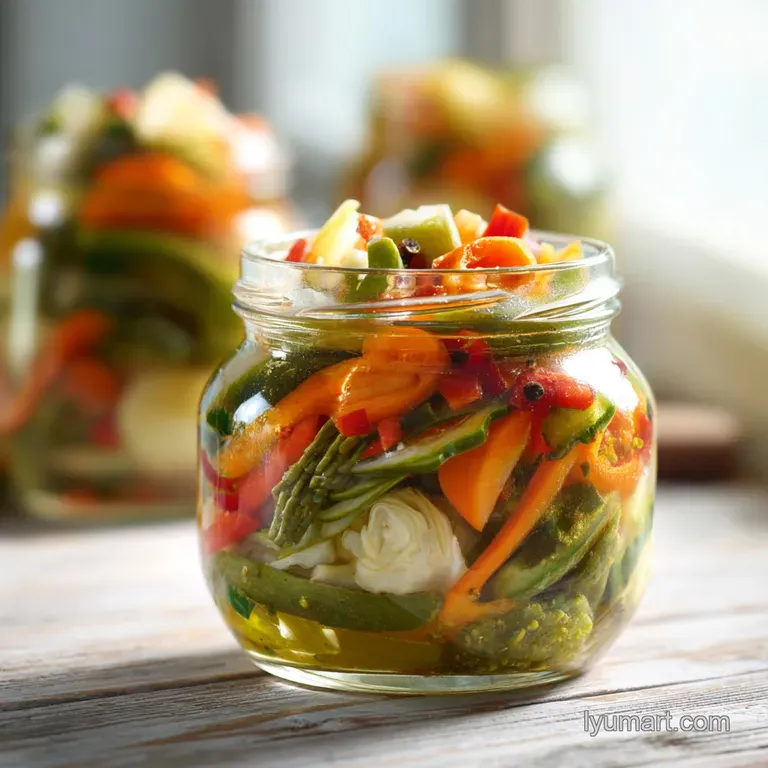
Easy Refrigerator Pickled Vegetables
- Time: Active 20 minutes, Passive 5 minutes, Total 25 minutes
- Flavor/Texture Hook: Shatter crisp vegetables with a zingy, garlic infused finish
- Perfect for: Busy weeknight meal prep, budget-friendly snacking, or beginner fermenters
- The Secret to Making Ultra Crisp Pickled Vegetables at Home
- The Science Behind the Perfect Brine and Crunch
- Component Analysis of Your Brine and Produce
- Selecting Your Produce for the Best Pickled Vegetables
- The Minimalist Tools for Stress Free Fridge Pickling
- A Step by Step Guide to Perfect Brine Infusion
- Solving Common Texture and Flavor Issues with Pickles
- Creative Ways to Customize Your Homemade Pickle Batches
- Storage Guidelines and Zero Waste Kitchen Strategies
- How to Pair Your Pickles with Every Meal
- Recipe FAQs
- 📝 Recipe Card
The Secret to Making Ultra Crisp Pickled Vegetables at Home
The first time I tried making pickles, I ended up with a jar of mushy, sad looking cucumbers that tasted like straight vinegar. It was a disaster. I remember standing in my kitchen, staring at the soggy mess, and wondering where I went wrong. Then I heard that distinct "snap" from a jar my neighbor had made.
That sound changed everything. It wasn't about some fancy equipment or secret family recipe, it was about the temperature of the brine and the way the vegetables were sliced.
Now, I make a fresh batch of these every single Sunday. It takes me less than half an hour, and honestly, it's the ultimate weeknight hack for adding flavor to literally anything. Whether you're tossing them on a salad or just snacking on them while you wait for your pasta to boil, they bring that needed hit of acid.
This recipe is built for the busy cook who wants results fast without spending a fortune on specialty vinegars or jars.
We're going to focus on a refrigerator method today. That means no boiling jars for forty minutes or worrying about airtight seals for long term pantry storage. We want something you can eat by tomorrow.
We'll use simple, affordable ingredients from your local market, and I'll show you exactly how to keep that "shatter" texture that makes homemade pickles so much better than the store-bought stuff.
The Science Behind the Perfect Brine and Crunch
Understanding the "how" helps you stop guessing in the kitchen. When we make Pickled Vegetables, we're essentially performing a quick salt and acid bath that transforms the cell structure of the produce.
- Acetic Acid Barrier: The vinegar lowers the pH level of the vegetables, which prevents spoilage bacteria from growing while softening the tough cellulose just enough to let flavors in.
- Osmotic Pressure: The 25g of sea salt draws moisture out of the vegetable cells, which is then replaced by the seasoned brine, ensuring flavor goes all the way to the core.
- Thermal Shock: Pouring hot brine over cold vegetables "sets" the color and texture, partially cooking the exterior while keeping the interior raw and snappy.
The Stovetop vs Countertop Method
| Method | Time | Texture Result | Best For |
|---|---|---|---|
| Heated Brine (Stovetop) | 5 minutes | Tender crisp and deeply infused | Carrots, Cauliflower, Onions |
| Cold Brine (Countertop) | 0 minutes | Maximum raw crunch, slower flavor | Cucumbers, Radishes, Peppers |
| Oven Infusion (Not Recommended) | 20 minutes | Soft, roasted, and vinegary | Only for immediate warm salads |
1. The 1:1 Ratio Rule
For a balanced brine that isn't eye watering, we use a 1:1 ratio of vinegar to filtered water. This provides enough acidity to keep things safe and tangy but leaves room for the natural sweetness of the carrots and onions to shine through.
2. The Science of the "Cold Snap"
To ensure your cucumbers don't turn into mush, we keep them cold until the very last second. Adding cold vegetables to a jar and then hitting them with hot (but not boiling for ten minutes) brine creates a texture that's firm on the outside and juicy on the inside.
3. Osmotic Exchange and Salt Selection
We use sea salt specifically because it lacks the anti caking agents found in table salt, which can turn your brine cloudy and leave a metallic aftertaste. The salt's job is to travel into the vegetable fibers, carrying the mustard seed and garlic oils along with it.
Component Analysis of Your Brine and Produce
Choosing the right ingredients is the difference between a side dish and a centerpiece. Here is why we use these specific items for our refrigerator pickled vegetables recipe.
| Ingredient | Science Role | Pro Secret |
|---|---|---|
| Apple Cider Vinegar | Provides the acid base and fruity depth | Use "with the mother" for a more complex, funky tang. |
| Sea Salt | Regulates microbial growth and draws out water | Fine grain dissolves faster; avoid iodized salt at all costs. |
| Raw Honey | Balances the sharp acidity of the vinegar | Add it to the warm brine so it integrates without clumping. |
| Mustard Seeds | Acts as a natural preservative and adds "pop" | Toast them in the dry pan for 30 seconds before adding liquids. |
Selecting Your Produce for the Best Pickled Vegetables
You don't need a huge budget for this. In fact, some of the best batches I've made used the "ugly" carrots from the back of the crisper drawer. But if you want that professional look, consistency is key.
- 2 cups (approx. 250g) Carrots
- Peel them and slice into 1cm thick coins or sticks. Why this? They provide the structural "crunch" and a natural earthy sweetness.
- 1 medium (approx. 110g) Red Onion
- Thinly sliced into half moons. Why this? They turn the brine a beautiful pink color over time.
- 1 cup (100g) Cauliflower florets
- Cut into bite sized pieces. Why this? The nooks and crannies hold onto the mustard seeds perfectly.
- 1 cup (120g) Persian Cucumbers
- Sliced into thick rounds. Why this? These have thinner skins and fewer seeds than standard cucumbers.
- 0.5 cup (60g) Radishes
- Thinly sliced. Why this? They add a peppery bite that cuts through the honey's sweetness.
- 1.5 cups (350ml) Apple Cider Vinegar
- You can swap for White Wine Vinegar if you want a cleaner look.
- 1.5 cups (350ml) Filtered Water
- Tap water works, but filtered avoids any chlorine taste.
- 1.5 tablespoons (25g) Sea Salt
- This is our primary preservative.
- 1 tablespoon (12g) Raw Honey
- Sugar works too, but honey adds a velvety mouthfeel.
- 1 teaspoon (3g) Mustard Seeds
- Adds a subtle nutty flavor.
- 0.5 teaspoon (1g) Red Pepper Flakes
- For just a hint of back of-the throat heat.
- 2 cloves (6g) Garlic
- Smashed to release the allicin and essential oils.
| Original Ingredient | Substitute | Why It Works |
|---|---|---|
| Apple Cider Vinegar | Rice Vinegar | Milder and sweeter. Note: Best for Asian inspired flavor profiles. |
| Raw Honey | Maple Syrup | Adds a woody, autumnal depth to the carrots and onions. |
| Sea Salt | Kosher Salt | Same clean flavor. Note: Use 2 tablespoons as it's less dense than sea salt. |
| Persian Cucumbers | English Cucumbers | Similar thin skin. Just avoid the thick skinned waxy garden variety. |
The Minimalist Tools for Stress Free Fridge Pickling

You don't need a pantry full of specialized equipment to master Pickled Vegetables. If you have a decent knife and some clean jars, you're 90% of the way there.
- Wide Mouth Mason Jars: I prefer the 500ml size. The wide mouth makes it so much easier to pack the cauliflower and carrots in without breaking them.
- A Sharp Chef's Knife: Precision matters here. If your slices are uneven, some will be mushy while others stay raw.
- Small Stainless Steel Saucepan: For heating the brine. Avoid reactive metals like aluminum, which can leach a metallic taste when in contact with vinegar.
- Mandoline Slicer (Optional): If you're doing a big batch, this is a lifesaver for the radishes and onions, but a knife works just fine.
- Glass Weights (Optional): If your vegetables keep floating to the top, these keep them submerged. You can also just use a clean cabbage leaf wedged at the top.
Similar to how I prep for my Creamy Cucumber Salad recipe, I like to have all my vegetables sliced and ready before I even touch the stove. Efficiency is the name of the game here.
A step-by-step Guide to Perfect Brine Infusion
This is our roadmap. Follow this flow and you'll have jars ready for the fridge in under 25 minutes.
- 1. Prep (0-15 mins)
- Wash and slice all vegetables; smash the garlic.
- 2. Cook (15-20 mins)
- Combine brine ingredients and bring to a simmer.
- 3. Finish (20-25 mins)
- Pack jars, pour brine, and let cool before refrigerating.
1. The Precision Prep
Wash all your produce thoroughly. Peel the 250g of carrots and slice them into 1cm coins. Cut the 100g of cauliflower into small, uniform florets. Thinly slice the 110g red onion, 120g cucumbers, and 60g radishes. Note: Uniformity ensures every vegetable pickles at the same rate.
2. Packing the Jars
Layer the vegetables into your clean jars. I like to start with the garlic and spices at the bottom, then pack the carrots and cauliflower tightly, finishing with the onions and cucumbers on top. Pack them in tightly until they reach about 2cm below the rim.
3. Creating the Brine
In your saucepan, combine the 350ml apple cider vinegar, 350ml filtered water, 25g sea salt, and 12g raw honey. Stir over medium high heat until the salt and honey have fully dissolved and the mixture just starts to bubble.
4. The Infusion Pour
Carefully pour the hot brine over the vegetables in the jars. Cover them completely while leaving about 1cm of headspace at the top. Note: You might hear a slight "sizzle" as the hot liquid hits the cold vegetables that's normal!
5. Releasing Air Bubbles
Gently tap the jars on the counter or use a clean chopstick to poke around the sides. This releases trapped air bubbles that can cause spoilage or uneven pickling.
6. The "Cold Snap" Seal
Let the jars sit on the counter undisturbed until they reach room temperature (usually about 30 minutes). Once cool, screw the lids on tight and move them to the back of the fridge.
7. The Patience Phase
While you can eat these after 4 hours, they are significantly better after 24 hours. The cauliflower, in particular, needs that extra time for the brine to penetrate the dense florets.
Solving Common Texture and Flavor Issues with Pickles
Even with a simple refrigerator pickled vegetables recipe, things can occasionally go sideways. Here is how to fix it.
1. Why are my vegetables soft?
If your pickles lack that "shatter" crunch, it's usually because the brine was boiling for too long or the vegetables were sliced too thin. High heat breaks down pectin, the glue that holds plant cells together.
2. Why is my brine cloudy?
Cloudy brine usually comes from using table salt with additives or from minerals in hard tap water. While it's usually safe to eat in a refrigerator recipe, it doesn't look very appetizing.
3. Why is there a white film on top?
This is often Kahm yeast. It’s not harmful, but it can affect the flavor. It usually happens if the vegetables aren't fully submerged in the brine.
| Problem | Root Cause | Solution |
|---|---|---|
| Soft/Mushy texture | Brine was too hot for too long | Pour brine immediately after salt dissolves; don't boil. |
| Too salty | Evaporation during boiling | Add a splash of filtered water to the jar to dilute. |
| Bitter flavor | Garlic or spices scorched | Smash garlic gently; don't sauté it before adding to brine. |
Common Mistakes Checklist: ✓ Always pat your cucumbers dry if they seem extra watery after slicing. ✓ Never use "decorative" jars that don't have a proper seal for the fridge. ✓ Ensure the salt is 100% dissolved before pouring the liquid.
✓ Let the jars reach room temperature before putting them in the fridge to avoid cracked glass. ✓ Keep the vegetables submerged; if they float, use a "weight" like a thick slice of onion.
Creative Ways to Customize Your Homemade Pickle Batches
Once you've got the base down, you can start playing with the flavors. It's like a choose your own adventure for your taste buds.
1. The "Spicy Umami" Twist
If you want a bit more kick, double the red pepper flakes and add a teaspoon of soy sauce to the brine. This version pairs incredibly well with grilled meats or inside a spicy chicken sandwich. For a different kind of heat, you might even try a variation of the Pickled Jalapeno Peppers recipe by adding sliced peppers directly into this mix.
2. The "Herbal Garden" Swap
Instead of mustard seeds, use fresh dill sprigs and black peppercorns. This gives you that classic "dill pickle" profile that everyone loves. I find this works best when you increase the cucumber ratio and leave out the cauliflower.
3. Keto Friendly Substitution
To make this strictly keto, simply swap the 12g of raw honey for a pinch of monk fruit sweetener or just leave the sweetener out entirely. The vegetables themselves have enough natural sugars to keep things balanced if the vinegar isn't too harsh.
4. The Low Sodium Alternative
While salt is a preservative, you can reduce it to 10g if you plan on eating the pickles within 5 days. Just be aware that they won't stay as crisp for as long, as the salt is what helps maintain that firm cell structure.
Storage Guidelines and Zero Waste Kitchen Strategies
Since these are refrigerator pickles, they don't have the indefinite shelf life of canned goods, but they still last a surprisingly long time.
Storage Tips:Fridge Life: These will stay perfectly crisp and safe for up to 3 weeks in the refrigerator. After that, the vegetables may start to soften, though they are still fine to eat for another week or two.
The Golden Rule: Always use a clean fork to grab your pickles. Introducing bacteria from your fingers or a used spoon will make the brine go bad much faster.
- 1. Marinate Chicken
- Use the leftover brine to soak chicken breasts for 2 hours before grilling. The acid tenderizes the meat while the salt and garlic infuse it with flavor.
- 2. Vinaigrette Base
- Whisk 2 tablespoons of the brine with olive oil and a dash of Dijon mustard for the fastest salad dressing ever.
- 3. Pickle Backs
- For the adventurous adults, a shot of this brine after a shot of whiskey is a classic for a reason.
- 4. Vegetable Scraps
- Save your carrot peels and onion ends in a bag in the freezer. When the bag is full, boil them with water to make a quick vegetable stock.
How to Pair Your Pickles with Every Meal
These Pickled Vegetables are the "little black dress" of the culinary world they go with everything.
1. The Ultimate Charcuterie Lift
Place a small bowl of the pickled cauliflower and radishes next to some sharp cheddar and salty prosciutto. The acidity cuts through the fat of the cheese and meat, cleansing your palate between every bite. It's much more interesting than a standard olive tray.
2. The Grain Bowl Brightener
If you're making a bowl with quinoa, roasted sweet potatoes, and kale, a handful of these pickled onions and carrots will wake the whole dish up. If you're looking for more inspiration for roasted bases, check out my roasted vegetables recipe which provides the perfect smoky contrast to these tangy pickles.
3. Taco Night Essential
The pickled red onions are mandatory for tacos. Whether it's carnitas or black bean tacos, that pink onion adds the necessary crunch and zing.
Quick Decision Shortcut: If you want maximum crunch, eat the cucumbers and radishes first. If you want deep flavor, let the cauliflower and carrots sit for at least 3 days.
If you want the best color, ensure the red onions are tucked in the middle of the jar so their pigment bleeds into the surrounding brine.
Making your own pickles is one of those small kitchen wins that makes you feel like a total pro. It's fast, it's cheap, and the flavor is lightyears ahead of anything you'll find in a plastic jar at the supermarket.
Trust me, once you hear that first "shatter" crunch of a carrot you pickled yourself, there's no going back. Happy pickling!

Recipe FAQs
What vegetables are best suited for quick refrigerator pickling?
Carrots, radishes, onions, and cucumbers are ideal. These firm vegetables maintain their crisp texture well when submerged in the hot brine, especially Persian cucumbers which have thinner skins.
What is the 321 rule for pickles?
No formal 321 rule exists for quick refrigerator pickling. This ratio (3 parts water, 2 parts vinegar, 1 part sugar/salt) is often cited for traditional fermentation but is usually too sweet and low on acid for safe, fast refrigeration.
How do I make quick pickled vegetables using the hot brine method?
Combine vinegar, water, salt, and sweetener in a saucepan and bring to a simmer. Dissolve all solids completely, then immediately pour the hot liquid over your tightly packed, room temperature vegetables in clean jars.
What are common pickling mistakes to avoid for maximum crunch?
Do not boil your brine for more than one minute after the salt dissolves. Boiling the vinegar mixture for too long reduces the acetic acid, compromising preservation and turning your produce soft.
Is it true that I must use pickling salt, or can I substitute sea salt?
No, you can safely substitute fine grain sea salt. Stick to non-iodized salts like fine sea salt or kosher salt, as the anti caking agents in standard table salt can make the finished brine cloudy.
How long must refrigerator pickles sit before they are ready to eat?
Ideally, wait 24 hours, though they are safe after 4 hours. The flavor exchange is extremely slow for dense items like cauliflower, so allowing an overnight rest ensures full flavor penetration across all vegetables.
What can I use the leftover pickle brine for instead of throwing it out?
Use the brine as a vinaigrette base or a marinade tenderizer. The acidity works wonderfully to break down proteins; if you enjoyed the flavor profile here, try using the leftover liquid to tenderize meat for a Carne Asada Marinade recipe.
Easy Refrigerator Pickled Vegetables
Ingredients:
Instructions:
Nutrition Facts:
| Calories | 10 kcal |
|---|---|
| Protein | 0.2 g |
| Fat | 0.1 g |
| Carbs | 1.8 g |
| Fiber | 0.4 g |
| Sugar | 0.9 g |
| Sodium | 307 mg |
