Chicken Tenderloin Recipe: Garlic and Herb Basted
- Time: Active 10 minutes, Passive 8 minutes, Total 18 minutes
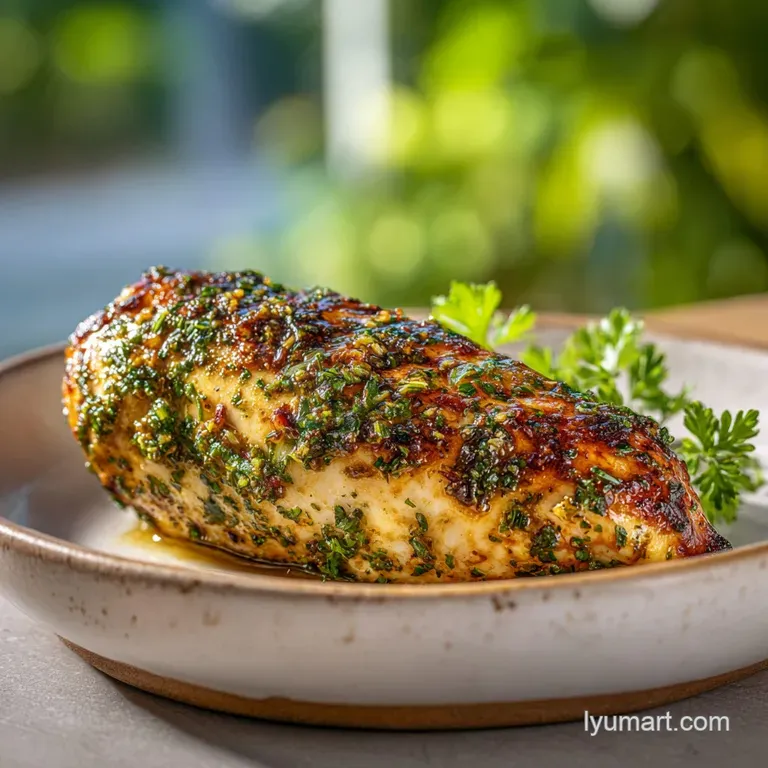
- Flavor/Texture Hook: A velvety, herb infused butter coating over a deeply seared, savory crust.
- Perfect for: Stress free weeknight dinners or quick high protein meal prep.
- Master the Ultimate Chicken Tenderloin Recipe with Garlic and Herbs
- Why the Butter Baste Works
- Analyzing Our Key Flavor Components
- Selecting the Best Ingredients Today
- Crucial Tools for Better Searing
- Executing the Eight Minute Cook
- Fixing Common Tenderloin Cooking Errors
- Flavor Variations and Method Swaps
- Storage and Zero Waste Methods
- Perfect Sides for Your Chicken
- The Myth of Searing Juices
- Recipe FAQs
- 📝 Recipe Card
Master the Ultimate Chicken Tenderloin Recipe with Garlic and Herbs
The moment the sprig of rosemary hits the foaming butter in my cast iron skillet, the kitchen transforms. There is a specific, aggressive sizzle that signals the start of something special a scent that bridges the gap between a hectic Tuesday evening and a cozy weekend feast.
It is the aroma of woodsy herbs mingling with smashed garlic, a fragrance so potent it usually brings my kids running to the kitchen before the timer even goes off.
Discover the ultimate Chicken Tenderloin Recipe with Garlic and Herbs for a truly sensational meal. I used to think tenderloins were just the "discard" part of the breast, something to be breaded and fried until unrecognizable.
But once I learned the "nappe" technique that beautiful French method of continuously spooning hot, aromatic butter over the meat everything changed. These little strips became the star of the show, offering a texture that is far more supple than a standard chicken breast.
In our house, this has become the go to solution for those "what's for dinner?" panics. It’s affordable, fast, and feels significantly more expensive than it actually is. We are talking about a meal that goes from the fridge to the table in under 20 minutes, yet delivers the kind of mahogany crust and herb forward punch you’d expect from a white tablecloth restaurant.
Let’s get into why this method is a total win for busy parents and budget conscious cooks alike.
Why the Butter Baste Works
- The Nappe Technique: Continuously bathing the chicken in hot butter ensures even cooking and adds a velvety fat layer that prevents the lean meat from drying out.
- Thermal Conductivity: Using avocado oil for the initial sear allows for a higher smoke point, while finishing with butter adds flavor at a lower temperature to prevent burning.
- Tendon Tension Release: Removing the white tendon allows the muscle fibers to relax during cooking, preventing the chicken from "curling" or becoming tough.
- Aromatic Infusion: Sashing the garlic cloves releases essential oils into the butter, which then coats every millimeter of the meat through the basting process.
| Thickness | Internal Temp | Rest Time | Visual Cue |
|---|---|---|---|
| 0.5 inch | 165°F | 2 minutes | Firm to touch, juices run clear |
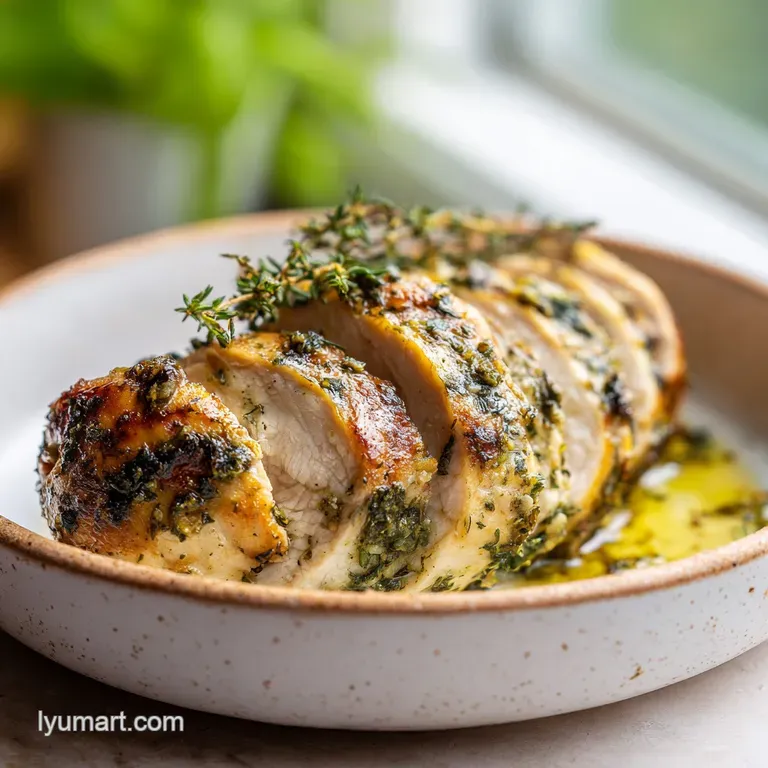
| 0.75 inch | 165°F | 3 minutes | Opaque center, golden exterior |
| 1.0 inch | 165°F | 3 minutes | Springy resistance, deep mahogany |
Adding a rest time is non negotiable here. When you pull the chicken off the heat, the muscle fibers are tight and constricted. Giving them just 120 to 180 seconds allows those juices to redistribute, ensuring that the first bite is as moist as the last.
Analyzing Our Key Flavor Components
| Ingredient | Science Role | Pro Secret |
|---|---|---|
| Avocado Oil | High Smoke Point | Prevents the pan from smoking while you hunt for that perfect dark sear. |
| Unsalted Butter | Emulsion & Flavor | Use unsalted to control the seasoning; the milk solids provide the nutty brown flavor. |
| Smoked Paprika | Color & Depth | Provides a "grilled" appearance and earthy undertone without the need for a BBQ. |
| Fresh Rosemary | Oil Solubility | The heat of the butter extracts the fat soluble compounds for a piney, savory finish. |
The combination of these elements creates a layering effect. The oil handles the heavy lifting of the sear, the paprika provides the visual appeal, and the butter herb duo acts as a finishing sauce that clings to the meat.
Selecting the Best Ingredients Today
For this Chicken Tenderloin Recipe with Garlic and Herbs, we are focusing on accessible items that deliver maximum impact. If you can't find fresh herbs, the dried versions work in a pinch, though they won't provide that same "shatter" of texture when fried in the butter.
- 1.5 lbs chicken tenderloins: These are the small strips attached to the underside of the breast. Why this? They are naturally more tender and cook much faster than whole breasts.
- Substitute: Sliced chicken breast. Note: It may be slightly drier than true tenderloins.
- 1 tsp kosher salt: Essential for drawing out moisture for a better sear.
- Substitute: Sea salt (use slightly less if the grain is very fine).
- 0.5 tsp coarse black pepper: Adds a bite that cuts through the rich butter.
- Substitute: White pepper for a more subtle, floral heat.
- 0.5 tsp smoked paprika: This gives the chicken a beautiful reddish gold hue.
- Substitute: Sweet paprika (adds color but loses the smoky depth).
- 2 tbsp avocado oil: Chosen for its over high heat stability.
- Substitute: Grapeseed oil or light olive oil.
- 3 tbsp unsalted butter: The vehicle for all our aromatics.
- Substitute: Ghee (clarified butter). Note: Higher smoke point but loses the milky browning effect.
- 4 cloves garlic: Smashed to release juices without burning.
- Substitute: Garlic confit for a milder, sweeter flavor.
- 3 sprigs fresh thyme & 1 sprig fresh rosemary: The aromatic backbone.
- Substitute: 1 tsp dried Italian seasoning (add this to the dry rub instead of the butter).
- 1 tbsp fresh parsley: For a bright, clean finish.
- Substitute: Fresh chives or cilantro.
Crucial Tools for Better Searing
I cannot stress enough how much a cast iron skillet helps with this recipe. The way it retains heat means that when you drop 1.5 lbs of cold chicken into the pan, the temperature doesn't plummet.
If you use a thin non stick pan, the chicken tends to "steam" in its own juices rather than searing, leaving you with grey meat instead of that glorious mahogany crust.
A pair of kitchen shears is also your best friend here. Trying to remove that pesky white tendon with a chef's knife often results in losing half the meat. By gripping the tip of the tendon with a paper towel and "zipping" it out with shears, you keep the tenderloin intact and looking professional.
Chef's Tip: Freeze your butter for 10 minutes before adding it to the pan. This delay in melting allows the garlic and herbs more time to infuse the fat before it starts to brown too deeply.
Executing the Eight Minute Cook
- Remove the tendon. Identify the white tendon protruding from the end of the tenderloin; grip it with a paper towel and use kitchen shears to snip it out. Note: This prevents the chicken from toughening up and curling as it hits the heat.
- Dry the meat. Pat the chicken completely dry with paper towels on all sides. Note: Moisture is the enemy of a good sear; any water left on the surface will create steam.
- Apply seasoning. Sprinkle the kosher salt, coarse black pepper, and smoked paprika over the chicken, pressing it in slightly so it adheres.
- Heat the pan. Pour the avocado oil into a large cast iron skillet over medium high heat. Wait until the oil is shimmering and just starting to wisps of smoke.
- Initial sear. Place the chicken in the pan in a single layer. Cook for 3-4 minutes without moving until a deep brown crust forms.
- The flip. Turn the tenderloins over. Immediately reduce the heat to medium low to prepare for the butter.
- Add aromatics. Drop in the unsalted butter, smashed garlic cloves, thyme sprigs, and rosemary sprig.
- The nappe. Tilt the pan slightly so the melting butter pools at the bottom with the herbs. Use a large spoon to continuously pour the foaming butter over the chicken for 2-3 minutes.
- Temperature check. Remove the chicken from the heat as soon as the internal temperature hits 165°F.
- Final touch. Garnish with the finely chopped fresh parsley and serve immediately while the butter is still liquid and glossy.
Fixing Common Tenderloin Cooking Errors
Why Your Chicken Is Rubbery
Overcooking is the primary culprit here. Because tenderloins are small, they can go from juicy to rubbery in about sixty seconds. Always use a digital thermometer. If you don't have one, the chicken is usually done when it feels springy like the fleshy part of your palm rather than soft.
Why the Garlic Tastes Bitter
Garlic burns very quickly, especially at the high temperatures needed to sear chicken. This is why we smash the cloves rather than mincing them. Smashed cloves flavor the oil and butter without the tiny pieces charring.
If you find your garlic is browning too fast, simply slide the cloves on top of the chicken pieces to keep them away from the direct heat of the pan.
| Problem | Root Cause | Solution |
|---|---|---|
| Pale, grey meat | Pan wasn't hot enough | Wait for the oil to shimmer/smoke before adding chicken. |
| Herbs are charred | Added too early | Only add fresh herbs during the last 3 minutes of cooking. |
| Chicken is dry | No resting period | Let the meat sit for 3 minutes before serving to keep juices in. |
Common Mistakes Checklist:
- ✓ Skipping the drying step (results in soggy chicken)
- ✓ Overcrowding the pan (causes the temperature to drop and the meat to boil)
- ✓ Moving the chicken too soon (prevents the Maillard crust from forming)
- ✓ Using high heat for the butter (burns the milk solids and makes the sauce bitter)
- ✓ Forgetting to remove the tendon (makes the chicken unpleasantly chewy)
Flavor Variations and Method Swaps
If you want a different textural experience, you can easily adapt this into Garlic Parmesan Chicken Meatloaf recipe. For the oven version, preheat to 400°F (200°C) and bake the seasoned chicken on a wire rack for 12-15 minutes. You won't get the same intense "nappe" finish, but it’s a great hands off approach for meal prepping in large batches.
For a spicy kick, I love adding a pinch of cayenne pepper or red chili flakes to the initial dry rub. The heat blooms in the avocado oil and is then tempered by the richness of the butter at the end.
If you are looking for a more "one pan" meal feel, you could even toss in some halved cherry tomatoes or thin asparagus spears during the final basting stage. They will cook in that herb butter and become the perfect built in side dish.
For a Zesty Mediterranean Twist
Swap the rosemary for dried oregano and add a squeeze of fresh lemon juice right at the very end. The acidity of the lemon cuts through the butter and makes the whole dish feel lighter and brighter. This version is particularly good served over a bed of quinoa or a simple Greek salad.
For a Low Carb Power Meal
If you are sticking to a strict keto or low carb lifestyle, this recipe is already a champion. To make it even more substantial, serve it inside a Cheesy Garlic Chicken Wrap using a low carb tortilla. The herb butter from the pan acts as a built in sauce that keeps the wrap from feeling dry.
Storage and Zero Waste Methods
Leftover chicken tenderloins are a gift for your future self. They stay remarkably juicy because of the butter coating. Store them in an airtight container in the fridge for up to 3 days. When reheating, I highly recommend using a skillet over low heat with a splash of water or more butter.
Avoid the microwave if possible, as it tends to turn the chicken into a rubbery texture.
Freezing: You can freeze these for up to 2 months. Wrap them individually in plastic wrap then place them in a freezer bag. This prevents them from sticking together, allowing you to pull out just one or two for a quick salad topper.
Zero Waste Tip: Don't throw away those herb stems or the butter left in the pan! Toss the leftover herb garlic butter with some pasta or roasted potatoes the next day. If you have herb stems left over, throw them into a bag in the freezer to use next time you make a chicken stock or bone broth.
Perfect Sides for Your Chicken
This dish is incredibly versatile. Because the flavor profile is savory and buttery, it pairs naturally with starches that can soak up that extra sauce. A pile of fluffy mashed potatoes is the classic choice, but a wild rice pilaf or even a simple piece of crusty sourdough bread works wonders for mopping up the pan juices.
If you are looking for a bit more "fire" in your meal, serving these tenderloins alongside a Cajun Chicken Linguine creates a beautiful contrast between the herb heavy chicken and the spicy, creamy pasta. The herbs in the chicken actually help bridge the gap between the heat of the Cajun spices and the richness of the cream sauce.
- If you want a crunchier crust, dredge the seasoned chicken in a tablespoon of cornstarch before searing.
- If you want a deeper garlic flavor, use a garlic press for one of the cloves and rub it directly onto the meat before cooking.
- If you want a lighter sauce, substitute half of the butter with a splash of dry white wine (like Sauvignon Blanc) to deglaze the pan.
The Myth of Searing Juices
Many people believe that searing meat "seals in the juices" by creating a physical barrier. This isn't actually true; moisture is lost during the searing process due to the high heat. However, the reason we sear is for the Maillard reaction, which creates hundreds of new flavor compounds and that irresistible crust.
The "juiciness" actually comes from not overcooking the internal proteins, which is why pulling the chicken at 165°F is the most important step in this entire process.
Another common misconception is that "tenderloins" are just sliced chicken breast. In reality, the Pectoralis minor (the tenderloin) is a distinct muscle that is used less than the main breast muscle, making it naturally more tender and less prone to becoming "stringy." Respecting the ingredient means understanding that it needs less time on the heat than a standard breast.
This efficiency is what makes it the ultimate weeknight savior for any busy home cook.

Recipe FAQs
What is the best way to cook chicken tenderloins?
Use a cast iron skillet over medium high heat. This method creates the ideal mahogany crust through a rapid Maillard reaction, sealing in juices that a gentle bake often misses.
What should I season my chicken tenderloins with?
Stick to kosher salt, coarse black pepper, and smoked paprika. These three seasonings provide the necessary base for a flavorful crust without burning during the high heat searing phase.
What herb goes with chicken and garlic?
Fresh thyme and rosemary are the best pairings. Adding these during the basting phase infuses the foaming butter with earthy aromatics that complement the garlic perfectly.
Is it better to bake or pan fry chicken tenderloins?
Pan frying is superior for texture. If you enjoyed mastering the pan-searing technique here, you can apply similar heat control principles to our sauteed vegetables for perfectly tender results.
How to remove the tough white tendon from the chicken?
Hold the tip of the tendon with a paper towel and use kitchen shears to snip it out. This gives you better leverage and grip compared to using your fingers, ensuring the entire fibrous piece is removed.
How to ensure the chicken stays juicy when reheating?
Reheat in a skillet over low heat with a splash of water. Avoid the microwave, which often creates a rubbery texture by unevenly vibrating the protein molecules in the meat.
Is it true I must leave the chicken alone while it sears?
Yes, this is essential for a proper crust. Letting the chicken sit undisturbed for 3-4 minutes allows the surface proteins to develop a deep brown color; moving it too early causes the meat to stick and tear.
Garlic Herb Chicken Tenderloins

Ingredients:
Instructions:
Nutrition Facts:
| Calories | 346 kcal |
|---|---|
| Protein | 39.2 g |
| Fat | 20.1 g |
| Carbs | 1.2 g |
| Fiber | 0.3 g |
| Sugar | 0.1 g |
| Sodium | 485 mg |
