Old Fashioned Buttermilk Pie: Creamy and Tangy
- Time: Active 15 minutes, Passive 50 minutes, Total 65 minutes
- Flavor/Texture Hook: Zesty lemon kissed custard with a buttery, flaky foundation
- Perfect for: Sunday dinner, holiday gatherings, or a cozy weekend treat
- Mastering the Southern Buttermilk Pie Recipe
- Official Specs and Timing Guide
- Essential Ingredients for Success
- Tools Required for Best Results
- From Initial Prep to Plate
- Troubleshooting and Common Baker Mistakes
- Dietary Substitutions and Clever Adaptations
- Storing and Saving Every Slice
- Serving with Style and Flair
- Myths About Buttermilk Baking
- Recipe FAQs
- 📝 Recipe Card
Mastering the Southern Buttermilk Pie Recipe
Nothing hurts more than pulling a golden brown treasure out of the oven, letting it cool with high hopes, and then watching it collapse into a puddle of sugary soup the second your knife hits the crust.
I remember watching Grandma Lucille in her Atlanta kitchen, her hands dusted with flour, shaking her head at a "weeping" pie. It happened to me more times than I care to admit before I realized that this dish isn't just about mixing ingredients; it's about managing moisture and heat.
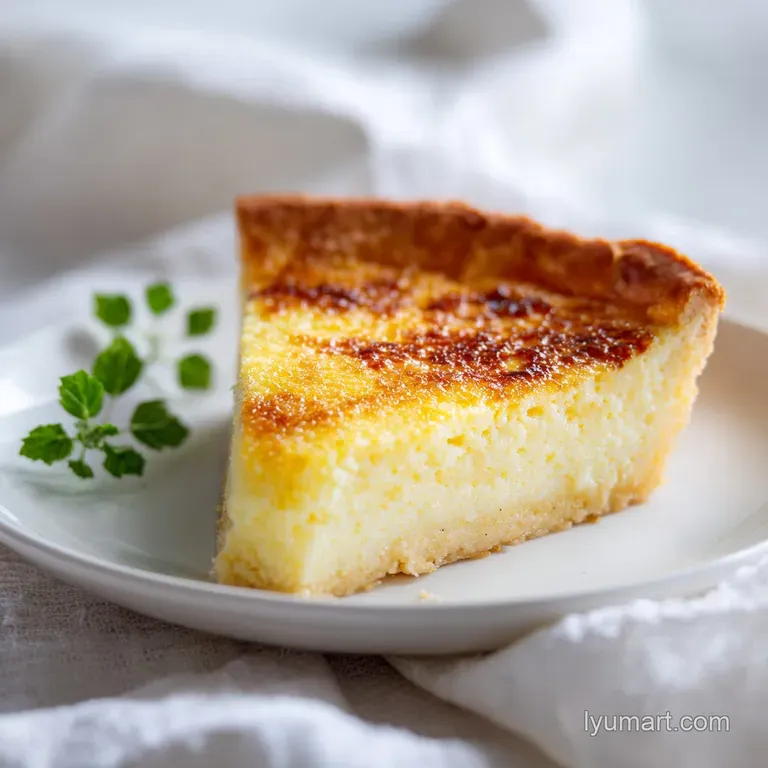
The aroma of this buttermilk pie recipe is something that truly lingers the scent of toasted butter, fresh nutmeg, and that sharp, bright zing of lemon juice. It's a "desperation pie" by history, born from a time when fresh fruit was scarce, but there is nothing desperate about the flavor.
It is rich, nostalgic, and deeply satisfying. We are looking for that specific contrast: a top layer that crackles ever so slightly under the fork, giving way to a center that feels like silk on the tongue.
If you've ever struggled with a soggy bottom or a custard that feels more like scrambled eggs, you're in the right place. We're going to treat this with the respect a soul food staple deserves. We'll focus on the science of the set and the importance of the par bake.
Trust me, once you see that clean, sharp slice stand up on its own, you'll never go back to those watery, store-bought imitations. Let's get into the details of what makes this specific version work so well.
Official Specs and Timing Guide
To get this right, we have to be precise. Baking is a conversation between chemistry and temperature, and this pie is a sensitive listener. The goal is a custard that is set but still has a gentle wobble in the very center when you pull it from the oven.
If it's stiff, you've overcooked it; if it's sloshing, it needs more time.
Sugar Density: The high sugar content doesn't just provide sweetness; it actually helps stabilize the egg proteins, preventing them from curdling too quickly. This allows the custard to stay velvety rather than turning rubbery.
The acidity in the buttermilk and lemon juice then cuts through that sugar, creating a bright profile that keeps you coming back for a second slice.
| Method | Total Time | Texture | Best For |
|---|---|---|---|
| Traditional Oven | 65 minutes | Crackly top, silky center | Authentic Southern results |
| Stovetop Pre cook | 45 minutes | Dense, pudding like | Quick set, no crack surface |
| Individual Tartlets | 35 minutes | Mostly crust focused | Party portions, easy serving |
The difference between a stovetop started custard and a traditional bake is all in the aeration. When we whisk the eggs and sugar vigorously as the recipe demands, we're incorporating tiny air bubbles.
In the oven, these bubbles expand and rise, creating that characteristic thin, crisp "crust" on top of the custard itself. A stovetop method bypasses this, resulting in a heavier, more uniform texture that lacks the soul of a classic buttermilk pie recipe.
Essential Ingredients for Success
The soul of this dish lies in the quality of your buttermilk. Don't even think about using the "milk and lemon juice" hack here; you need the thick, cultured viscosity of real whole milk buttermilk to get the right fat to acid ratio.
It’s what gives the pie its signature tang and helps the flour hydrate properly for a stable structure.
For the Tangy Custard Filling
The eggs act as the primary binder, but the way we introduce the butter is the real secret. By melting and cooling the butter before whisking it in, we create a stable emulsion. If the butter is too hot, it will cook the eggs prematurely (scrambled egg pie, anyone?).
If it’s too cold, it won't integrate, leading to oily pockets in your finished dessert.
| Ingredient | Science Role | Pro Secret |
|---|---|---|
| Whole Buttermilk | Acidic Tenderizer | Use room temp to prevent the butter from seizing during the mix. |
| Large Eggs | Protein Structure | Whisk until frothy to create the signature crackly top layer. |
| Granulated Sugar | Moisture Retention | Sugar prevents the egg proteins from bonding too tightly and getting tough. |
| Fresh Nutmeg | Aromatic Depth | Grate it fresh; the oils in pre ground nutmeg vanish quickly. |
Using a sweet cornbread recipe as a side for a Southern dinner is a classic move, but this pie is the ultimate finisher. When you sift in your flour, you're providing just enough starch to "catch" the liquid as the eggs reach their setting point. It's a safety net that prevents the custard from weeping.
For the Flaky Foundation
A pre chilled pie crust is non negotiable. We want the fat in the crust to stay in solid chunks until the very moment it hits that 200°C (400°F) oven. That’s how you get those distinct, flaky layers. The egg white wash we use after par baking acts as a waterproof sealant.
It's a thin protein barrier that stops the wet custard from soaking into the pastry, ensuring the bottom stays crisp enough to shatter.
Ingredients List: 1 9 inch pre chilled pie crust (approx. 23cm) 1 large egg white Why this? Seals the crust to prevent sogginess. 3 large eggs, room temperature Why this? Provides the structural set for the custard. 200g (1 cup) granulated sugar 15g (2 tbsp) all purpose flour Why this? Stabilizes the liquid during the bake. 115g (1/2 cup) unsalted butter, melted and cooled 240ml (1 cup) whole milk buttermilk 5ml (1 tsp) pure vanilla extract 15ml (1 tbsp) fresh lemon juice 1.5g (1/4 tsp) fine sea salt 0.5g (1/8 tsp) freshly grated nutmeg
Tools Required for Best Results
You don't need a kitchen full of gadgets, but a few specific items make a world of difference. A deep dish pie plate is essential because this custard likes to climb as it bakes. If you use a shallow tin, you’ll end up with a mess on your oven floor.
I prefer ceramic or glass because they conduct heat more evenly than thin metal, which helps prevent the edges from burning before the center is set.
A fine mesh sifter is another one of those "don't skip" tools. Sifting the flour and salt into the egg mixture ensures there are zero lumps. In a custard this delicate, a stray clump of flour is a texture killer. Also, get yourself a microplane for that nutmeg.
The difference between the jarred powder and a fresh grating is like the difference between a black and white photo and Technicolor.
Chef Tip: If you find your pie crust edges browning too quickly, don't panic. Gently tent the edges with strips of aluminum foil or use a silicone pie shield. This allows the center to continue cooking without turning the fluted edges into charcoal.
From Initial Prep to Plate
Preheat your oven to 200°C (400°F). Fit your chilled dough into a 23cm deep dish pie plate and crimp the edges firmly. Line the dough with parchment paper and fill it with ceramic pie weights or dried beans.
Bake for 10 minutes until the edges are pale gold. Note: This sets the structure of the crust.
Carefully remove the weights and parchment. Brush the bottom and sides of the crust with your egg white. Return it to the oven for exactly 2 minutes until the egg white is dry and shiny. Reduce the oven temperature to 180°C (350°F).
In a large glass bowl, whisk the 3 whole eggs and granulated sugar. Do this vigorously for 2 full minutes until the mixture is pale, frothy, and doubled in volume. Note: This aeration creates the delicate top crust.
Sift the all purpose flour and sea salt directly into the egg mixture. Whisk gently until no white streaks remain.
Slowly stream in the melted (and cooled!) butter. Keep whisking constantly to ensure the fat integrates fully into the sugar egg base without separating.
Stir in the buttermilk, vanilla extract, lemon juice, and freshly grated nutmeg. Use a spatula to ensure everything is combined until the liquid is uniform and creamy.
Place your par baked shell on a rimmed baking sheet (for easy transport). Pour the buttermilk filling into the shell, filling it nearly to the top.
Bake at 180°C (350°F) for 40 to 50 minutes. Check at the 40 minute mark; the pie is ready when the edges are puffed and the center has a slight, jelly like jiggle.
Transfer the pie to a wire rack. Let it cool completely for at least 2 hours. The custard will finish setting as the temperature drops, becoming firm enough to slice cleanly.
Troubleshooting and Common Baker Mistakes
The most frequent complaint with any buttermilk pie recipe is the "watery" bottom. This almost always comes down to skipping the par bake or not using the egg white seal. If your custard is separating, it’s likely a temperature issue either the buttermilk was ice cold and broke the butter emulsion, or the oven was too hot, causing the eggs to "weep" liquid.
Why Your Custard Is Runny
If your pie looks done on top but flows like lava when cut, the internal temperature didn't reach the magic window where the egg proteins and starch bond. This usually happens if the oven isn't calibrated or if the pie was pulled too early. Remember, the "jiggle" should be like firm gelatin, not like a bowl of milk.
| Problem | Root Cause | Solution |
|---|---|---|
| Separated Filling | Ingredients were different temps | Ensure buttermilk and eggs are room temperature before mixing. |
| Soggy Bottom | Crust soaked up custard | Par bake longer and use a thorough egg white seal. |
| Cracked Surface | Overbaked or cooled too fast | Pull when the center still jiggles; cool away from drafts. |
Common Mistakes Checklist
- ✓ Pat the butter dry: If using a homemade crust, ensure the butter bits are cold and dry before mixing.
- ✓ Whisk for the full 2 minutes: Don't skimp on the egg sugar whisking; it's the only way to get that crackly top.
- ✓ Cool on a wire rack: Air needs to circulate under the pie plate to prevent condensation from softening the crust.
- ✓ Check oven temp: Use an oven thermometer; many ovens run 10-15 degrees off, which ruins custard.
Dietary Substitutions and Clever Adaptations
If you're looking for a different profile, you can easily tweak this recipe without destroying the chemistry. For instance, swapping the lemon juice for a tablespoon of bourbon adds a deep, smoky caramel note that pairs beautifully with the buttermilk.
If you're out of nutmeg, a pinch of mace or cardamom offers a more exotic, floral spice profile.
For those who want to avoid traditional flour, a 1:1 gluten-free baking blend works remarkably well here because the amount of flour is so small. It’s mostly there for moisture control rather than structure. Just ensure your blend contains xanthan gum to help with the "set."
| Original Ingredient | Substitute | Why It Works |
|---|---|---|
| All Purpose Flour | Cornstarch (1 tbsp) | Provides a cleaner, more translucent set. Note: Custard may be slightly firmer. |
| Granulated Sugar | Brown Sugar (packed) | Adds a molasses depth and chewier top crust. |
| Lemon Juice | Apple Cider Vinegar | Provides the necessary acid punch if you're out of citrus. |
If you find yourself craving another creamy treat that requires zero oven time, my No Bake Peanut Butter Pie is a fantastic alternative for hot summer days. However, for that authentic Southern soul food experience, the baked buttermilk version is the gold standard.
Storing and Saving Every Slice
Buttermilk pie is actually better on the second day. The flavors have time to meld, and the custard firms up into a dense, fudge like consistency that is absolutely divine. You can store it in the fridge for up to 4 days.
I recommend keeping it loosely covered with foil rather than plastic wrap, which can trap moisture and turn the top layer sticky.
Freezing Guidelines: You can freeze this pie, though the texture of the custard may change slightly (it can become a bit more "porous"). To do it right, wrap the cooled pie tightly in several layers of plastic wrap and then a layer of heavy duty foil. It will stay good for up to 2 months.
Thaw it overnight in the fridge never on the counter to prevent the crust from getting mushy.
Zero Waste Tip: If you have leftover buttermilk, don't let it sit until it spoils. Use it to soak chicken for frying or mix it into your next batch of biscuits. Even the egg yolk left over from the crust seal can be whisked into a morning scramble so nothing goes to waste in your Atlanta kitchen.
Serving with Style and Flair
While a plain slice of this buttermilk pie recipe is a masterpiece on its own, a few simple additions can make it feel like a high end restaurant dessert. A dollop of lightly sweetened whipped cream (the real stuff, please!) helps balance the richness.
If you want to lean into the "bright/rich" contrast, serve it with a handful of fresh raspberries or a thin slice of candied lemon peel.
- If you want a rustic look
- Dust the top with a heavy layer of powdered sugar just before serving.
- If you want a gourmet finish
- Serve slightly warm with a scoop of salted caramel ice cream.
- If you want the classic Southern way
- Cold, straight from the fridge, with a strong cup of black coffee.
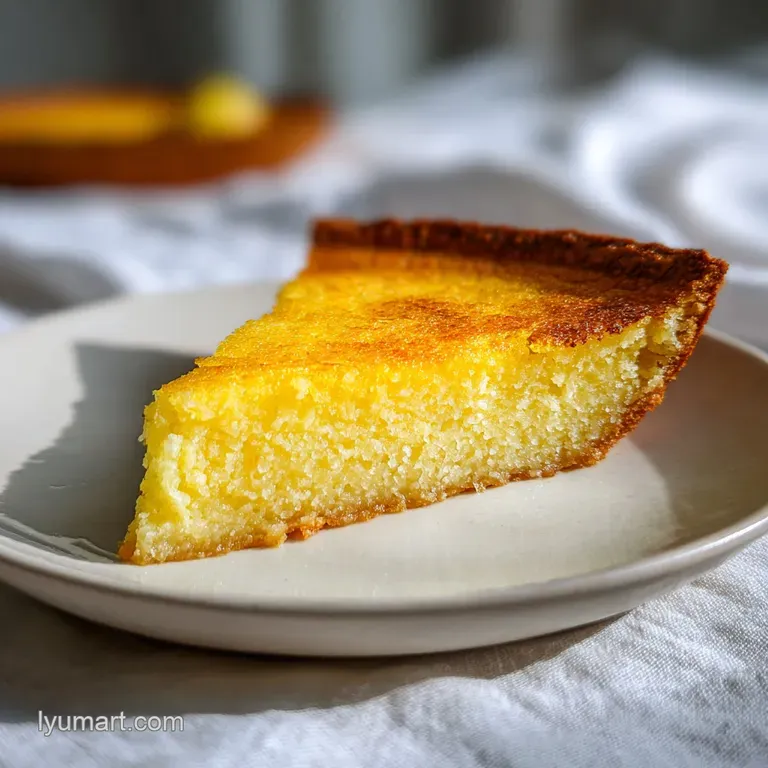
My Grandma Lucille always said that the first bite is with the eyes. When you slice into this pie, use a sharp knife dipped in hot water and wiped clean between every cut. This ensures those beautiful, distinct layers of flaky crust and pale yellow custard remain perfectly defined on the plate.
It's the small details that turn a simple bake into a legendary tradition.
Myths About Buttermilk Baking
One of the biggest misconceptions is that buttermilk pie and chess pie are the same thing. They are cousins, certainly, but not twins. Chess pie typically uses cornmeal as a thickener and rarely contains buttermilk.
The cornmeal gives chess pie a grainier, more textured bite, while our buttermilk version is prized specifically for its smooth, pudding like elegance.
Another myth is that you can "fix" a runny pie by putting it back in the oven after it has already cooled. Unfortunately, once the proteins have set and then cooled, re heating them often causes them to tighten up too much, squeezing out moisture and resulting in a grainy, separated mess.
If your pie is a bit soft, embrace it as a "custard sauce" style dessert this time, and simply adjust your bake time for the next batch! over High heat baking doesn't "seal" the custard; it's the gentle, steady 180°C (350°F) environment that allows the eggs to cook evenly from the edge to the center without curdling.

Recipe FAQs
What ingredients do I need for buttermilk pie?
You need a precise set of pantry staples. Gather one 9 inch pre-chilled pie crust, one egg white for the seal, three room temperature eggs, 1 cup granulated sugar, 2 tablespoons all-purpose flour, 1/2 cup melted and cooled unsalted butter, 1 cup whole milk buttermilk, 1 teaspoon vanilla extract, 1
tablespoon fresh lemon juice, 1/4 teaspoon fine sea salt, and 1/8 teaspoon freshly grated nutmeg.
What is the difference between a chess pie and a buttermilk pie?
Buttermilk pie relies on the acidity of the milk to create a specific tang. While both are custard style pies using eggs, sugar, and fat, the buttermilk provides a lighter, more complex flavor profile than the straightforward sweetness of a classic chess pie.
Is it true that buttermilk pie is Dolly Parton's favorite?
Yes, this is a well documented favorite of hers. She has often cited it as a nostalgic Southern comfort food that reminds her of her upbringing.
Does a buttermilk pie need to be refrigerated?
Yes, it must be stored in the refrigerator. Since the filling is an egg-based custard, it is not shelf stable and should be kept cold for up to 4 days; keep it loosely covered with foil to maintain the top layer's texture.
How to achieve a perfectly stable custard without a watery bottom?
Par-bake your crust and create an egg white seal. First, bake the crust at 400°F for 10 minutes with weights, then brush the bottom with egg white and bake for 2 more minutes. If you mastered this savory technique for ensuring structural integrity, you will find it prevents the crust from becoming soggy when you pour in your custard filling.
How to prevent the custard from separating during baking?
Use room temperature ingredients and whisk constantly while adding melted butter. The key is maintaining a stable emulsion; if your buttermilk is ice cold, it can break the butter emulsion, so ensure all components are properly tempered before mixing.
How to tell when the pie is finished baking?
Look for a center that is slightly jiggly while the edges are fully set. Bake at 350°F for 40 50 minutes, then remove it from the oven and allow it to cool completely on a wire rack, which allows the custard to firm up to its ideal consistency.
Old Fashioned Buttermilk Pie

Ingredients:
Instructions:
Nutrition Facts:
| Calories | 351 kcal |
|---|---|
| Protein | 5.4 g |
| Fat | 19.6 g |
| Carbs | 38.9 g |
| Fiber | 0.4 g |
| Sugar | 26.3 g |
| Sodium | 285 mg |
