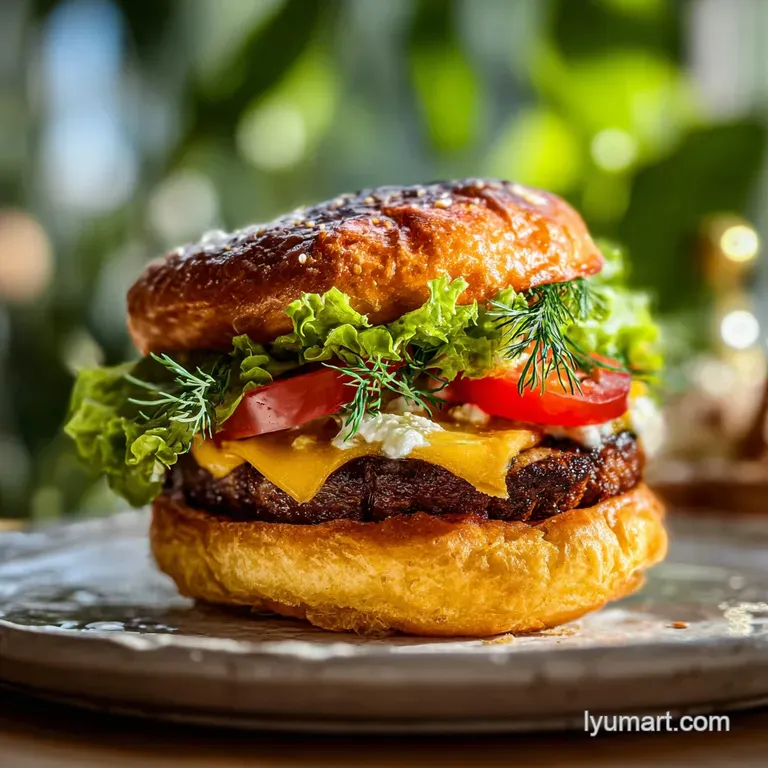
Soft Brioche Burger Bun Recipe
- Time: Active 30 minutes, Passive 2 hours 45 mins, Total 3 hours 15 mins
- Flavor/Texture Hook: Cloud like, velvety crumb with a golden, buttery crust
- Perfect for: Weekend cookouts or meal prepping premium sandwiches on a budget
- A Foolproof Soft Homemade Burger Bun Recipe
- Why This Dough Truly Shines
- The Starch Gelatinization Secret
- Essential Specs for Success
- High Quality Budget Friendly Components
- Tools for Professional Results
- Step By Step Baking Guide
- Fixes for Common Dough Issues
- Simple Ways to Customize Buns
- Scaling the Batch
- Myths About Bread Making
- Storing and Preserving Freshness
- Best Ways to Serve Them
- Recipe FAQs
- 📝 Recipe Card
A Foolproof Soft Homemade Burger Bun Recipe
The first time I pulled a tray of these out of the oven, the aroma of yeast and toasted sugar filled my tiny kitchen, and I knew I could never go back to the plastic wrapped stuff from the store. You know that specific "give" a high end bun has when you press it?
It shouldn't just squash and stay flat; it should spring back like a sponge. When you tear into these, the crumb is so velvety it almost feels like pulling apart a cloud.
We’ve all been there: you buy the "premium" buns for five dollars a pack, only for them to crumble the second the burger juice hits them. This burger bun recipe changes the game because it focuses on structural integrity without sacrificing that melt in-your mouth feel.
Best of all, we’re using basic pantry staples no "specialty" dough conditioners or gourmet additives required.
Honestly, don't even bother with the pre sliced grocery store rolls once you've tried these. It’s one of those kitchen wins that makes you feel like a pro, even if you’re just baking in your pajamas on a Sunday afternoon.
You’ll get eight beautiful, mahogany topped buns that can stand up to the juiciest patty while staying incredibly tender. Let’s get into the "how" so you can stop settling for mediocre bread.
Why This Dough Truly Shines
- Pre Gelatinization: By cooking a small portion of flour and liquid first, we lock moisture into the starch, keeping the buns soft for days.
- Protein Framework: Using bread flour instead of all purpose provides a stronger gluten network that prevents the bun from disintegrating under heavy toppings.
- Enrichment Balance: The specific ratio of whole milk and unsalted butter creates a rich mouthfeel without making the dough too heavy to rise.
- Fat Distribution: Incorporating softened butter at the end of the kneading process coats the gluten strands, ensuring a crumb that is tender rather than chewy.
| Premium Ingredient | Budget Alternative | Flavor Impact | Savings |
|---|---|---|---|
| Whole Milk | Water + 1 tbsp Dry Milk | Slightly less creamy | Save $1-2 |
| European Butter | Standard Store Brand Butter | Minimal in a dough | Save $3-5 |
| Organic Bread Flour | Store Brand Bread Flour | No noticeable difference | Save $2-3 |
Finding ways to save a few dollars here and there makes home baking so much more sustainable for a busy family. While the premium stuff is nice, you really don't need it to get a result that puts restaurant buns to shame.
As long as you have the right technique, the budget friendly versions of these ingredients work beautifully.
The Starch Gelatinization Secret
The Physics of the Pillow: Cooking the Tangzhong starter causes the starch in the flour to absorb significantly more liquid than cold mixing ever could. This creates a stable internal structure that holds onto moisture during the bake, preventing that "stale" feeling.
Essential Specs for Success
| Ingredient | Science Role | Pro Secret |
|---|---|---|
| Bread Flour (450g) | Provides the structure | Weigh it in grams for consistent results every time. |
| Instant Yeast (1 tbsp) | Responsible for the rise | Ensure your milk is lukewarm, not hot, to keep the yeast happy. |
| Unsalted Butter (56g) | Softens the crumb | Add it slowly after the initial gluten has already formed. |
One thing I've learned the hard way is that volume measurements for flour are wild. One cup can be 120g or 160g depending on how you scoop it! If you want your burger bun recipe to turn out exactly like mine, a cheap kitchen scale is your best friend.
It’s the difference between a bun that’s a brick and one that’s a pillow.
high-quality Budget Friendly Components
To get started, gather these essentials. Remember, we aren't going for "fancy" here just reliable.
- Bread Flour (3.5 cups / 450g plus 2 tbsp for the starter): Why this? Higher protein content ensures the buns don't collapse under the weight of a burger. (Substitute: All purpose flour, but reduce total liquid by 1 tbsp.)
- Whole Milk (0.5 cup plus 3 tbsp): Why this? The fat and lactose create a tender crumb and a beautifully browned crust. (Substitute: 2% milk works fine.)
- Water (2 tbsp): Why this? Used in the starter to help hydrate the flour quickly.
- Instant Yeast (1 tbsp / 9g): Why this? No proofing required, making the process much faster for busy cooks. (Substitute: Active dry yeast, but dissolve in warm milk for 10 mins first.)
- Granulated Sugar (2 tbsp): Why this? Feeds the yeast and aids in the Maillard reaction for color.
- Fine Sea Salt (1.5 tsp): Why this? Essential for tightening gluten and making the flavor pop. (Substitute: Table salt, but use slightly less.)
- Large Egg (1 for dough, 1 for glaze): Why this? Adds structure and that signature glossy finish.
- Unsalted Butter (4 tbsp / 56g): Why this? Softened butter creates that rich, brioche adjacent texture. (Substitute: Margarine or vegan butter sticks.)
- Sesame Seeds (1 tsp): Why this? For that classic aesthetic and a tiny bit of crunch.
Chef's Tip: If you forgot to take your butter out of the fridge, don't microwave it into a puddle. Instead, grate the cold butter with a cheese grater directly into the dough. It will soften almost instantly as you knead it.
Tools for Professional Results
You don't need a bakery full of equipment to make a great burger bun recipe. I usually reach for my stand mixer because it saves my arms, but you can absolutely do this by hand if you're looking for a workout. You'll also need a small saucepan for the starter and a couple of baking sheets.
If you are planning to pair these with something like a Burgers in Air Fryer recipe, make sure your baking sheets are lined with parchment paper. It’s the easiest way to ensure you don't leave the best part of the bun stuck to the bottom of the pan.
step-by-step Baking Guide
1. Create the Moisture Secret
Mix 3 tbsp whole milk, 2 tbsp water, and 2 tbsp bread flour in a small saucepan. Whisk constantly over medium low heat for about 2 minutes until a thick, translucent paste forms. Note: This is the Tangzhong; it's the secret to the softest buns ever.
2. Mix and Knead the Foundation
In your mixer bowl, combine the paste with 3.5 cups bread flour, 1 tbsp instant yeast, 2 tbsp sugar, 1.5 tsp salt, 0.5 cup lukewarm milk, and 1 egg. Mix on low until a shaggy dough forms.
3. The Butter Incorporation
Add the 4 tbsp softened butter one tablespoon at a time while kneading. Continue kneading for 8-10 minutes until the dough is smooth and passes the windowpane test.
Note: The windowpane test means you can stretch a piece of dough thin enough to see light through it without it tearing.
4. The Bulk Ferment
Place the dough in a lightly oiled bowl and cover with a damp cloth. Let it sit in a warm spot for about 1 hour 30 mins until it has doubled in size.
5. Shape for Success
Divide the dough into 8 equal pieces (about 95g-100g each). Roll each into a tight, smooth ball and place on a lined baking sheet. Press down lightly until they look like thick discs.
6. The Final Rise
Cover the shaped buns and let them rise again for 45 minutes to 1 hour until they look puffy and light.
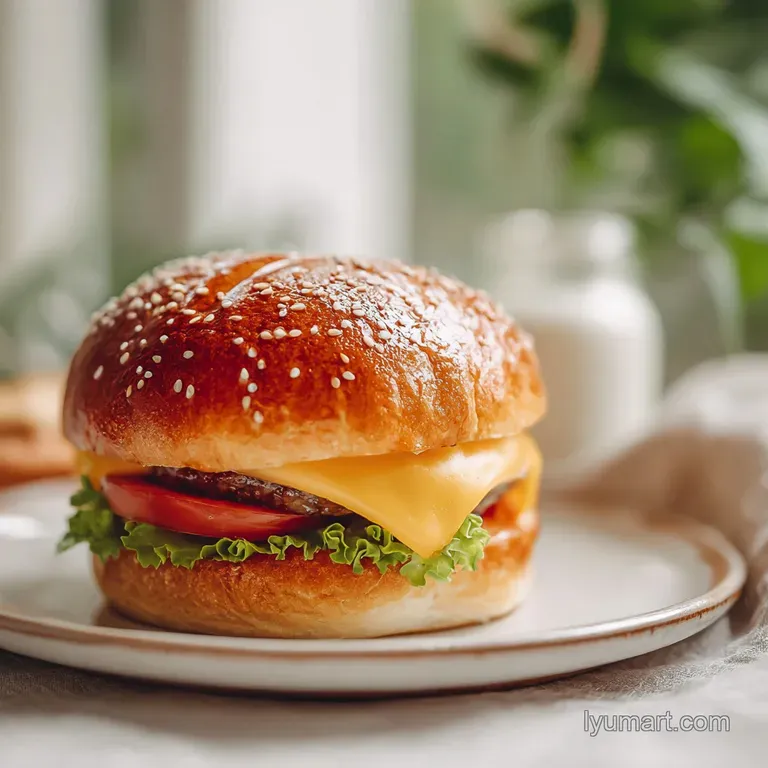
7. The Mahogany Finish
Whisk the remaining egg with 1 tbsp milk and brush gently over the tops. Sprinkle with sesame seeds. Bake at 375°F for 15 minutes until the tops are dark golden brown.
8. The Cooling Phase
Transfer the buns to a wire rack immediately. Note: Letting them cool on the hot pan will make the bottoms soggy from trapped steam.
Fixes for Common Dough Issues
Why is my dough too sticky to handle?
It’s tempting to keep adding flour, but resist! This dough is high hydration by design. If you add too much flour, you’ll end up with a dry, crumbly bun instead of a velvety one. Use lightly oiled hands rather than floured hands when shaping.
My buns didn't rise properly.
Check your yeast and your temperature. Yeast is a living organism; if your milk was too hot (over 120°F), you might have killed it. Conversely, if your kitchen is chilly, the rise might take twice as long.
Try putting your dough in the oven with just the oven light on it’s the perfect proofing box.
| Problem | Root Cause | Solution |
|---|---|---|
| Buns are dense | Under proofing | Let them rise longer in the second stage until they feel like air filled balloons. |
| Crust is too hard | Oven too dry | Toss a few ice cubes onto a separate tray in the oven floor to create steam. |
| Buns collapsed | Over proofing | If they rise too much, the air bubbles pop. Watch for them to double, no more. |
Common Mistakes Checklist:
- ✓ Always use room temperature eggs to ensure they emulsify properly into the fat.
- ✓ Don't skip the Tangzhong step; it’s the only way to get that specific professional texture.
- ✓ Let the buns cool completely before slicing, or the insides will become gummy.
- ✓ Brush the egg wash gently; pressing too hard can deflate all that hard earned air.
Simple Ways to Customize Buns
If you want to change things up, this dough is incredibly versatile. For a savory twist, try adding 1 tsp of garlic powder and 1 tbsp of chopped fresh parsley to the dry ingredients. You could also swap the sesame seeds for an "everything bagel" seasoning mix for a massive flavor boost.
If you’re out of eggs or trying to save a bit more, you can make a "burger bun recipe no egg" by substituting the egg in the dough with 1/4 cup of plain yogurt. For the glaze, use a simple brush of melted butter or just plain milk. It won't be quite as shiny, but the flavor will still be fantastic. This is also a great base for a Steak Sandwich Recipe where you need a sturdier, slightly larger bun.
Scaling the Batch
- To Scale Down (Make 4 buns): Halve all ingredients exactly. For the egg, whisk one egg in a small bowl and use exactly half (about 25g) for the dough.
- To Scale Up (Make 16 buns): Double all ingredients, but keep an eye on your mixer's capacity. You may need to knead in two batches. Increase the yeast and salt to only 1.5x the original amount to prevent a "yeasty" aftertaste and ensure the dough doesn't rise too fast to handle.
| If you want... | Then do this... |
|---|---|
| A sweeter bun | Increase granulated sugar to 3 tbsp. |
| A glossier finish | Double brush the egg wash (once before proofing, once after). |
| Mini sliders | Divide the dough into 16 pieces instead of 8. |
Myths About Bread Making
One huge misconception is that you must use "bread flour" or the recipe will fail. While bread flour gives the best structure, you can use all purpose flour in a pinch. The result will just be a slightly softer, more "fragile" bun that might struggle with a triple stack burger. Another myth is that salt kills yeast.
While direct contact isn't great, salt is actually necessary to control the yeast's growth so the dough doesn't expand uncontrollably and then collapse.
Storing and Preserving Freshness
Storage: These buns stay fresh in an airtight bag at room temperature for up to 3 days. Because of the Tangzhong method, they won't dry out as fast as standard bread. If they do feel a bit firm, 10 seconds in the microwave will bring back that "just baked" softness.
Freezing: This is my favorite "pro move." Once cooled, wrap individual buns in plastic wrap and store them in a freezer bag for up to 3 months. When you're ready for a burger, just let them thaw on the counter for an hour.
Zero Waste: If you have leftovers that are starting to go stale, don't throw them away! These make the most incredible French toast or bread pudding because of their high fat and egg content. You can also blitz them in a food processor for premium, buttery breadcrumbs.
Best Ways to Serve Them
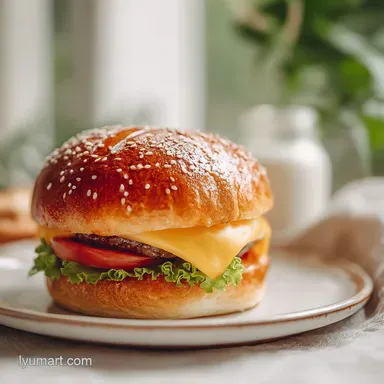
To truly honor your hard work, always toast your buns before serving. Smear a little butter on the cut sides and place them on a hot skillet until they are golden and "shatter" slightly when you bite into them. This creates a barrier so the burger juices don't soak immediately into the bread.
These are perfect for a classic beef patty, but they also elevate a Chicken Burger Recipe to something truly special. The sweetness of the bun pairs beautifully with the savory, seasoned chicken. Trust me, once you master this burger bun recipe, you'll be the designated bread baker for every family cookout from now on!

Recipe FAQs
How to make burger buns at home?
Create a Tangzhong starter first by cooking flour, milk, and water into a thick paste. Incorporate the paste with the remaining flour, yeast, sugar, salt, milk, and egg; knead until shaggy, then slowly add softened butter until the dough is smooth and passes the windowpane test.
After a bulk rise, divide, shape into tight balls, allow a second rise, brush with an egg wash, and bake at 375°F for 15 minutes.
What makes a good burger bun?
A good burger bun has a soft, velvety crumb that springs back when pressed and a stable structure. The secret is locking moisture into the starch via a pre-cooked starter, like the Tangzhong used here, which keeps the texture soft for days.
Toasting the cut side before serving is also crucial to prevent the bun from getting soggy.
What are the ingredients in hamburger buns?
The core ingredients are flour, yeast, milk, sugar, salt, eggs, and butter. The higher protein bread flour provides necessary gluten structure to support heavy toppings. If you are looking for a side dish that contrasts the richness of the butter in these buns, consider serving them alongside our French Fried Onions recipe for added savory crunch.
Is bread flour or all-purpose better for hamburger buns?
Bread flour is strongly recommended for the best structure and height. Bread flour has a higher protein content, which creates a stronger gluten network to prevent the bun from collapsing under the weight of a burger.
All-purpose flour will work, but the final bun will be noticeably softer and potentially more fragile.
Why are my homemade buns dense and not fluffy?
Your buns are likely dense because they were under proofed or the yeast was inactive. Ensure your milk is lukewarm, not hot, which can kill the yeast; if it’s too cold, the rise will stall. If you master the proofing stage here, applying the same patience to controlling the rise time is key when working with casseroles, such as in our Broccoli Cheese Rice Casserole recipe.
Can I make these buns ahead of time?
Yes, refrigerating the dough overnight yields even better flavor development. After the initial knead, place the dough in the fridge for its bulk fermentation (up to 24 hours); this slow, cold proof deepens the yeasty flavor notes.
Shaping and baking the following day is simple once the dough warms slightly.
Is it necessary to brush the buns with an egg wash before baking?
No, an egg wash is not strictly necessary, but it achieves the signature glossy, mahogany crust. Brushing the dough with a mixture of one egg and a splash of milk creates the desirable color and sheen through the Maillard reaction during baking.
If you skip it, the buns will still bake fine but will have a duller, matte finish.
Soft Burger Bun Recipe
Ingredients:
Instructions:
Nutrition Facts:
| Calories | 303 kcal |
|---|---|
| Protein | 9.8 g |
| Fat | 8.6 g |
| Carbs | 47.2 g |
| Fiber | 1.6 g |
| Sugar | 4.1 g |
| Sodium | 412 mg |
