Brown Butter Sugar Cookies: Chewy and Nutty
- Time: Active 15 minutes, Passive 10 minutes, Total 25 minutes
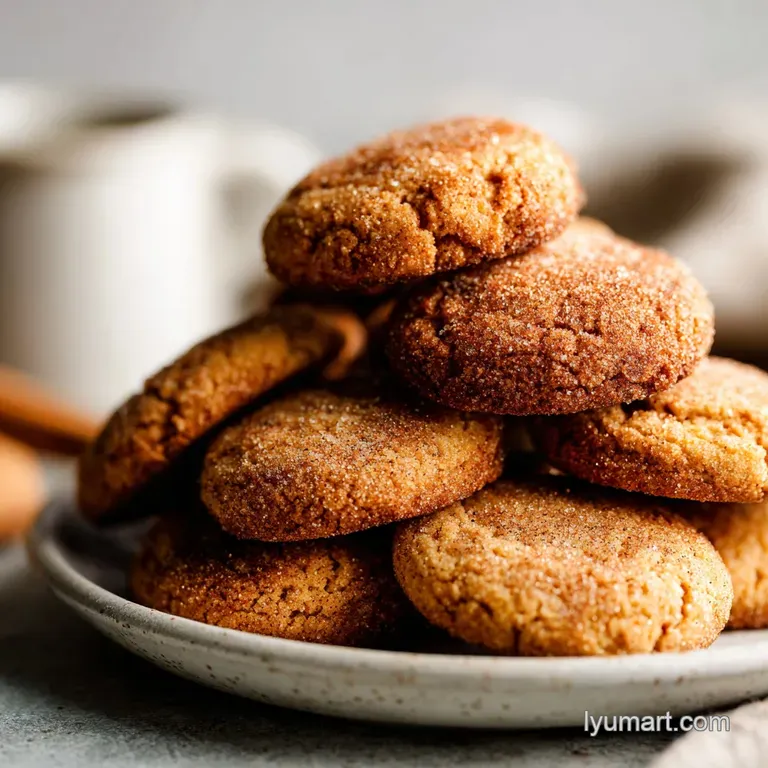
- Flavor/Texture Hook: Toasted, nutty sweetness with a chewy, velvety crumb
- Perfect for: Holiday gift boxes, elegant tea parties, or a cozy weekend treat
- Mastering This Toasted Amber Brown Butter Sugar Cookies Recipe
- Precision Timing And Metrics For Achieving The Perfect Bake
- Selecting The Finest Elements For A Gourmet Dessert Experience
- Essential Tools Required For Professional Grade Homemade Baking Results
- Step By Step Guide To Crafting These Chewy Sweet Treats
- Solving Common Texture Issues And Baker Mistakes For Success
- Customizing The Dough To Fit Your Specific Dietary Requirements
- Preserving The Quality And Freshness Of Your Baked Goods
- Artistic Garnish Strategy To Create A Beautiful Color Balance
- Recipe FAQs
- 📝 Recipe Card
Mastering This Toasted Amber Brown Butter Sugar Cookies Recipe
Have you ever walked into a kitchen and been hit by a scent so intoxicating it felt like a warm hug from a professional baker? That scent is the unmistakable aroma of browning butter a nutty, toasted perfume that signals something extraordinary is about to happen.
For the longest time, I wondered why my standard cookies tasted "flat" compared to the ones from that tiny bakery downtown. Then I realized the secret wasn't more sugar; it was changing the state of the fat itself.
This brown butter sugar cookies recipe is my love letter to that discovery, focusing on depth rather than just sweetness.
Most people think sugar cookies are just a vehicle for frosting, but we're changing that narrative today. We are building a cookie that stands entirely on its own, with a complex flavor profile that dances between salty, sweet, and toasted.
It's about finding that magic where the butter nearly burns but stops right at the edge of perfection, turning a pale yellow stick into liquid mahogany. It’s a simple shift in technique that yields a massive reward in every bite.
We've all been there making a batch of cookies that come out looking like thin, greasy pancakes or, worse, dry hockey pucks. I’ve made those mistakes so you don't have to.
We're going to use a few specific tricks, like adding an ice cube to the hot butter and incorporating dry milk powder, to ensure these are the softest, most flavorful treats you've ever pulled out of your oven. Get ready to fall in love with your oven all over again.
Precision Timing And Metrics For Achieving The Perfect Bake
The beauty of this dough lies in its temperature management and structural integrity. By browning the butter, we are essentially cooking off the water content, which is why we add an ice cube back in it replaces that lost moisture while instantly halting the cooking process so the butter doesn't turn bitter.
The milk powder acts as "extra credit" for the Maillard reaction, providing more protein solids to toast and turn into those gorgeous brown bits that carry all the flavor.
- Thermal Control
- Using an ice cube to cool the butter ensures the fats don't stay too hot, which prevents the eggs from curdling when mixed.
- Protein Enrichment
- Dry milk powder increases the available solids for browning, creating a deeper "toffee" flavor without extra sugar.
- Acid Activation
- Cream of tartar provides a slight tang and prevents sugar crystallization, ensuring the center stays soft and chewy rather than crunchy.
| Thickness | Internal Temp | Rest Time | Visual Cue |
|---|---|---|---|
| 1/2 inch | 175°F (80°C) | 5 minutes | Golden edges, pale soft center |
| 3/4 inch | 180°F (82°C) | 8 minutes | Slight cracking on top surface |
| 1 inch | 185°F (85°C) | 10 minutes | Firm edges with a matte finish |
When you are aiming for that perfect texture, the rest time is just as important as the bake time. Cookies continue to "set" on the hot baking sheet even after they leave the oven. If you pull them out when they look fully cooked, they will likely end up too hard once they cool.
You want to see the edges just starting to take on a golden hue while the middle still looks a bit puffed and underdone. That is the sweet spot for a velvety finish.
Selecting The Finest Elements For A Gourmet Dessert Experience
Using high-quality ingredients makes a world of difference when the flavor profile is this focused. I always reach for grass fed butter because it has a higher fat content and a more vibrant yellow color, which translates to a richer toasted flavor once browned.
For the sugars, the dark brown variety is non negotiable here; the extra molasses content plays beautifully with the nutty notes of the butter, making the whole experience feel much more intentional and balanced.
| Component | Science Role | Pro Secret |
|---|---|---|
| Grass Fed Butter | Primary Fat Source | Using a light colored pan helps you see the solids change color before they burn. |
| Dark Brown Sugar | Moisture & Flavor | Pack it tightly to ensure you get the full molasses hit for that chewy texture. |
| Dry Milk Powder | Caramelization Boost | Whisk it in at the very end of browning to create "flavor bombs" in the dough. |
If you find yourself missing an ingredient, don't panic. Baking is a science, but it's also about being resourceful in your own kitchen. While the original list is designed for a specific "gourmet" outcome, you can certainly pivot based on what's in your pantry.
Just keep in mind that sugar cookies are sensitive to moisture changes, so try to stick to the ratios as closely as possible to maintain that perfect spread.
- 1 cup (227g) Unsalted Grass Fed Butter: Use European style for best results. Why this? Higher fat content means more flavor and a better melt.
- Substitute: Standard unsalted butter works, though the flavor is slightly less intense.
- 1 tbsp (15g) Non fat Dry Milk Powder: The secret to extra browning. Why this? Adds extra solids that toast along with the butter.
- Substitute: Malted milk powder for a "malty" nostalgic twist.
- 1 cup (200g) Dark Brown Sugar: Provides the chew. Why this? Higher molasses content creates a moist, fudgy center.
- Substitute: Light brown sugar is fine, but the cookie will be slightly paler.
- 2 tsp (10ml) Pure Vanilla Bean Paste: For those beautiful black flecks. Why this? Concentrated flavor that holds up against the strong butter notes.
- Substitute: Standard vanilla extract (use the same amount).
Essential Tools Required For Professional Grade Homemade Baking Results
You don't need a high tech laboratory to make these, but a few specific pieces of equipment will make your life much easier. First and foremost, a light colored skillet (like stainless steel or white ceramic) is a lifesaver when browning butter.
If you use a dark cast iron or non stick pan, it is nearly impossible to tell when the butter solids have turned that perfect mahogany color, and you risk burning the batch. Trust me, I've lost many sticks of butter to dark pans!
A #40 cookie scoop is my other "must have" tool. Consistency is the key to even baking. If some of your cookies are larger than others, the small ones will burn while the large ones stay raw. A scoop ensures every single portion is exactly 1.5 tablespoons, leading to a tray of uniform, beautiful treats. If you are looking to branch out into other shapes, you might find inspiration in this giant cookie cake which uses similar dough principles for a celebration sized dessert.
Chef's Tip: Freeze your butter for 10 minutes before starting if your kitchen is very warm. This helps the butter melt more evenly rather than just separating into oil and water immediately.
step-by-step Guide To Crafting These Chewy Sweet Treats

- Master the Mahogany Butter. Place your butter in a light colored skillet over medium heat. Whisk it constantly as it foams and bubbles. Once that foam subsides, watch for dark amber bits forming at the bottom and wait for that signature nutty aroma.
- Cool the Fat. Remove from the heat immediately when it smells like toasted hazelnuts. Stir in the dry milk powder and drop in that large ice cube. The sizzle is normal! This cools the butter so you can move on without waiting an hour for it to chill.
- Emulsify the Sugars. Pour that glorious liquid gold into a large bowl, making sure to scrape out every single dark speck that's where the flavor lives. Add the dark brown and white sugars and whisk vigorously for 2 full minutes until it looks like a thick, grainy paste.
- Incorporate the Binder. Add your room temperature egg, the extra yolk, and the vanilla. Continue whisking until the mixture lightens in color and starts to look like a glossy, thick caramel. This step is vital for a smooth cookie surface.
- Whisk the Dry Foundation. In a separate bowl, combine the flour, baking soda, salt, and cream of tartar. Whisking them separately ensures the leavening agents are evenly distributed so you don't get a "soapy" bite of baking soda later.
- Fold Gently. Add the dry ingredients to the wet emulsion. Use a silicone spatula to fold them together just until the last streak of flour disappears. Over mixing here will lead to a tough, bread like cookie.
- Portion the Dough. Use your #40 scoop to drop rounds of dough onto parchment lined sheets. Give them about 2 inches of space, as they will spread into perfect circles.
- Execute the Perfect Bake. Slide the trays into a preheated 350°F (180°C) oven. Bake for 9 to 10 minutes until the edges are golden and set but the centers still look slightly soft and puffed.
- The Final Touch. Let the cookies sit on the hot pan for at least 5 minutes before moving them to a cooling rack. This "carryover cooking" finishes the centers without drying out the edges.
Solving Common Texture Issues And Baker Mistakes For Success
Even with a foolproof recipe, the kitchen can be a fickle place. One of the most common issues people face with this brown butter sugar cookies recipe is excessive spreading. This usually happens if the butter was still too hot when the sugars and eggs were added, or if the dough became too warm during the scooping process.
If your kitchen is particularly steamy, popping the scooped dough into the fridge for 15 minutes before baking can be a total savior.
Another heartbreak is the "greasy" cookie. This happens when the butter isn't properly emulsified with the sugars. You really have to put some muscle into that whisking step! You’re looking for the mixture to transform from a separated oil and sugar mess into a cohesive, pale, and thick ribbon. If you've mastered this technique, you might want to try applying it to these oat flour cookies for a different textural experience that still hits those comforting notes.
Why Your Cookies Came Out Flat
When cookies spread too much, it's often a sign that the oven temperature was too low or the butter was too liquid. A low oven temp allows the fat to melt completely before the flour structure has a chance to "set," resulting in a puddle.
| Problem | Root Cause | Solution |
|---|---|---|
| Excessive Spreading | Butter was too hot or oven too cool | Chill dough for 20 mins; check oven temp with a thermometer. |
| Gritty Texture | Sugar didn't dissolve | Whisk the sugar and butter longer before adding flour. |
| Hard/Tough Cookie | Over mixed the flour | Fold flour in by hand and stop as soon as it's incorporated. |
Common Mistakes Checklist
- ✓ Always use a light colored pan for browning butter to prevent burning.
- ✓ Don't skip the extra egg yolk; it's the key to that "fudgy" center.
- ✓ Ensure your eggs are at room temperature so they emulsify properly with the fat.
- ✓ Measure your flour by weight (280g) rather than volume to avoid a dry dough.
- ✓ Let the baking sheets cool completely between batches to prevent the dough from melting prematurely.
Customizing The Dough To Fit Your Specific Dietary Requirements
Baking for friends with different needs? You can still achieve a fantastic result with a few thoughtful swaps. For a gluten-free version, a high-quality 1 to-1 flour blend (the kind that includes xanthan gum) works remarkably well here because the brown butter provides so much flavor that you won't notice the absence of wheat.
The texture will be slightly crispier, but it's still a total winner.
If you are looking for a lower sugar profile, you can reduce the granulated white sugar by 2 tablespoons without affecting the structure significantly. However, I don't recommend reducing the brown sugar, as it is essential for the moisture and the chemical reaction with the baking soda.
For those who love a bit of texture, adding a half cup of toasted pecans or walnuts can turn these into a "brown butter nut" cookie that feels very sophisticated.
- Scaling Down (makes 12 cookies): Use half of all ingredients. For the egg, whisk one whole egg in a cup and use exactly 2 tablespoons of the liquid.
- Scaling Up (makes 48-72 cookies): Double the ingredients, but only use 1.5x the salt and baking soda to prevent a metallic aftertaste. Work in batches so the dough doesn't sit out at room temperature for too long.
- High Altitude: Increase the flour by 2 tablespoons and decrease the sugar by 1 tablespoon to prevent the cookies from collapsing in thinner air.
Preserving The Quality And Freshness Of Your Baked Goods
To keep that "just baked" shatter and chew, storage is everything. These cookies are quite high in moisture thanks to the brown sugar and extra yolk, which means they can get soft if left in a humid environment. I always store mine in an airtight glass container with a single piece of white bread.
The bread acts as a sacrificial lamb, giving up its moisture so the cookies stay soft while the bread turns hard as a rock. It’s an old school trick that works like a charm every time.
If you find yourself with leftover "brown butter bits" or extra milk powder, don't throw them out! The toasted solids are pure flavor. You can whisk them into a morning bowl of oatmeal or even stir them into a bit of honey for a world class toast spread.
We’re all about zero waste in this kitchen, and when the ingredients are this good, every gram counts.
- Fridge: Not recommended, as it can make the cookies go stale faster due to starch retrogradation.
- Freezer: These freeze beautifully! Place baked cookies in a freezer bag for up to 2 months. To eat, let them thaw at room temperature or pop them in a 300°F (150°C) oven for 3 minutes.
- Room Temp: Keep in an airtight container for up to 5 days.
| Premium Ingredient | Budget Alternative | Flavor Impact | Savings |
|---|---|---|---|
| Vanilla Bean Paste | Vanilla Extract | Less visual "flecking" | Save $15-20 |
| Grass Fed Butter | Store Brand Butter | Slightly less creamy | Save $3-5 |
| Dark Brown Sugar | Light Brown + 1 tsp Molasses | Virtually identical | Save $1-2 |
Artistic Garnish Strategy To Create A Beautiful Color Balance
Because these cookies are simple in shape, the garnish is where you can really show off your eye for detail. We want to aim for a palette that reflects the flavors inside: warm golds, deep ambers, and clean whites.
This isn't just about looking pretty; it's about signaling to the eater what kind of experience they are about to have. When you add a finishing touch of salt, it cuts through the richness and makes the toasted notes "pop."
To achieve a perfect color balance, I use three specific accents at different stages. The first is the Golden Amber bits from the butter itself. By whisking in the milk powder during the browning stage, you create these tiny, concentrated nuggets of caramel flavor that distribute throughout the dough.
They appear as little freckles of gold once the cookies are baked.
The second accent is the Deep Vanilla specks. By using vanilla bean paste instead of clear extract, you introduce tiny black caviar like dots that contrast beautifully against the pale dough. This is a classic "pastry chef" move that immediately makes a homemade cookie look professional.
Finally, I finish with Bright White sea salt flakes. Adding these immediately after the cookies come out of the oven ensures they stick to the surface. The stark white crystals against the golden brown cookie provide a visual and textural highlight that is absolutely irresistible.
- Myth
- You must let the butter solidify before using it in cookies.
- Truth
- Not for this recipe! Using the butter in its liquid, cooled state creates a denser, chewier "fudgy" texture that we love.
- Myth
- Browning butter removes all the fat content.
- Truth
- It only removes the water. The fat remains, just concentrated and toasted. The ice cube we add replaces that lost water for structural balance.
- Myth
- Salt in the dough is enough; you don't need it on top.
- Truth
- Flaky salt on top hits the tongue first, creating a "salt sweet" contrast that enhances the perception of the butter's nuttiness.
Cooking these is more than just following a recipe; it's about learning to trust your senses. When the butter smells like a toasted hazelnut and the kitchen is filled with that sweet, heavy aroma, you know you've done something right.
These cookies are a reminder that the best things often come from the simplest ingredients, treated with a little bit of extra care and a lot of love. Now, go grab a glass of cold milk and enjoy the fruits of your labor you’ve earned it!
Common Questions About This Technique
Can I use a microwave to brown the butter? Technically yes, but I strongly advise against it. Microwaves heat unevenly, and butter can "explode" due to the water content. Plus, you lose the ability to see the color change in real time, which is the most important part of the process.
Why is my dough so oily? If your dough looks like it's sweating oil, the butter was likely too hot when you added the sugar. If this happens, don't worry just put the whole bowl in the fridge for 30 minutes and give it a good stir.
It should come back together once the fats firm up.
Do I really need the ice cube? The ice cube is a specific "insurance policy" for this recipe. It halts the browning so the butter doesn't burn, and it replaces the exact amount of water that usually evaporates during the browning process. Without it, your cookies might be too dry and crumbly.
Is dark brown sugar really that different from light brown? Yes! Dark brown sugar contains nearly double the molasses of light brown sugar. This acidity reacts with the baking soda to create a more tender, moist crumb.
If you use light brown, the flavor will be more like a traditional butter cookie rather than a toffee like treat.
How do I get those perfect "ripples" on the edges? For those Instagram worthy ripples, try the "pan banging" technique. About 2 minutes before the cookies are done, lift the baking sheet and drop it firmly on the oven rack.
This causes the puffed up edges to collapse and create those beautiful, concentric circles.

Recipe FAQs
Why is my butter bubbling and foaming so much during browning?
This is a normal part of the process. The bubbling occurs as the water content in the butter evaporates, and the foaming is the milk solids separating. Keep whisking constantly over medium heat until the foam subsides and you see those dark amber bits at the bottom of the skillet.
How to ensure the cookies stay soft after baking?
Remove the cookies from the oven when the centers still look slightly soft. They will finish setting on the hot baking sheet for a few minutes. If you enjoyed the texture control used here to keep these moist, you can apply that same fat-to-flour ratio logic to our other baking recipes.
Is it true I should skip the ice cube to prevent splattering?
No, this is a common misconception. The ice cube is essential for cooling the brown butter instantly so you can proceed with the recipe without waiting for it to reach room temperature. The sizzle is completely normal and safe if you keep your face at a distance while dropping it in.
How to tell when the butter has reached the perfect nutty aroma?
Remove the skillet from the heat the moment you smell toasted hazelnuts. If you wait for the butter to smell dark or burnt, it has gone too far and will taste bitter. You should see distinct dark amber bits formed at the bottom of the pan at this stage.
How to achieve the signature thick, caramel like emulsion?
Whisk the brown butter and sugars vigorously for at least 2 minutes. Adding the egg and yolk during this phase helps the sugar partially dissolve, which creates that smooth, glossy texture characteristic of professional grade cookies.
Can I bake these cookies at a higher temperature to save time?
No, stick to 350°F (175°C) for the best results. Baking at higher temperatures will cause the edges to crisp up before the center has a chance to set, resulting in an uneven texture rather than the intended chewy consistency.
What is the secret to getting perfectly uniform cookies?
Use a #40 cookie scoop to portion the dough. This ensures every cookie is approximately 1.5 tablespoons, which guarantees they all bake at the same rate and reach that perfect golden brown edge at the exact same time.
Brown Butter Sugar Cookies
Ingredients:
Instructions:
Nutrition Facts:
| Calories | 167 kcal |
|---|---|
| Protein | 1.8 g |
| Fat | 8.2 g |
| Carbs | 21.8 g |
| Fiber | 0.3 g |
| Sugar | 12.8 g |
| Sodium | 104 mg |
