Cake in a Cake Recipe

- Time: Active 20 minutes, Passive 45 minutes, Total 1 hours 5 mins
- Flavor/Texture Hook: Rich chocolate cocoa notes wrapped in a silky, cloud like white crumb
- Perfect for: Birthday surprises, gender reveals, or any occasion needing a "wow" moment
- Physics of the Hidden Center
- Essential Timing and Yield Data
- Ingredients for a Velvety Texture
- Tools for Precise Hidden Shapes
- Executing the Magic Design Flawlessly
- Fixing Common Surprise Cake Mistakes
- Customizing Your Sweet Baked Creation
- Preservation Secrets for Long Freshness
- Garnish Tactics for Stunning Results
- Recipe FAQs
- 📝 Recipe Card
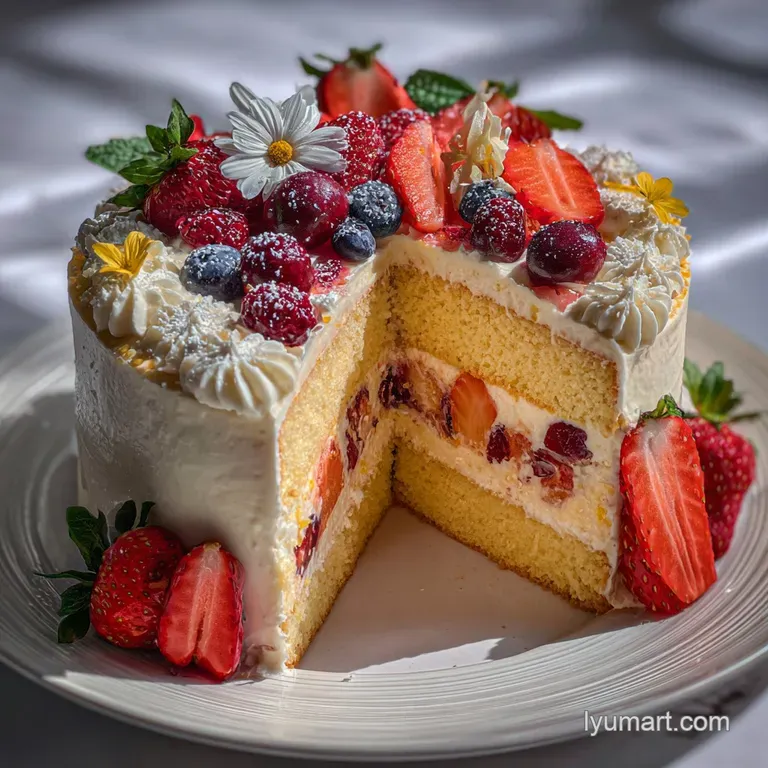
Honestly, there is nothing like the look on someone's face when they take that first slice. You serve what looks like a classic, elegant white cake, but then magic. A dark, velvet textured heart or star appears right in the middle of the slice.
It looks like you spent days in a professional pastry kitchen, but I’ll let you in on a secret: it’s mostly about simple physics and a bit of clever timing.
We've all had those moments where a dessert feels a bit "standard," right? This is the cure for that. I remember the first time I tried this; I was so worried the middle cake would turn into a dry rock because it gets baked twice.
But after some trial and error with moisture levels and freezing techniques, I found the sweet spot. You get a soft, bouncy exterior and a center that stays remarkably fudgy.
If you’ve ever felt intimidated by those "surprise inside" treats you see on social media, don't be. This method is incredibly approachable, especially since we are using a few smart shortcuts to ensure the crumb is consistent every single time.
Trust me, once you see that first perfect shape emerge, you’ll be hooked on this technique.
Physics of the Hidden Center
Starch Gelatinization: Pre baking the chocolate center sets the starch molecules into a firm matrix, allowing it to hold its shape when submerged in the second liquid batter.
Protein Denaturation: The egg whites in the outer layer create a reinforced structural web that prevents the heavier chocolate pieces from sinking to the bottom during the final rise.
| Method | Time | Texture | Best For |
|---|---|---|---|
| Fast (Box Mix) | 1 hour 5 mins | Consistent and fluffy | Busy hosts or beginners |
| Classic (Scratch) | 3 hours+ | Denser, buttery crumb | Culinary purists and pros |
Choosing the fast method allows you to focus all your energy on the precision of the shapes. While scratch cakes are lovely, the stabilizers in a high-quality mix help the "cake in a cake" maintain its structural integrity during the double bake process.
Essential Timing and Yield Data
When we talk about the cake in a cake recipe, precision is your best friend. This recipe makes 12 generous servings, and the timing is split between two distinct baking phases. You aren't just baking one cake; you are creating a structural masterpiece.
Chef's Note: I highly recommend using a "clear" vanilla extract for the white portion. It keeps the crumb looking like pure snow, which makes the chocolate interior pop even more!
If you want something lighter for another day, my No Bake Cheesecake Recipe is a winner, but today we are going for full on baked drama. The key is to ensure your oven is truly preheated; if it's too cool, the outer batter will take too long to set, and your hidden shapes might start to tilt.
| Ingredient | Science Role | Pro Secret |
|---|---|---|
| Sour Cream | Fat/Acid balance | Keeps the chocolate center fudgy after two rounds in the oven |
| Egg Whites | Structural integrity | Creates a snow white contrast without the yellow tint of yolks |
| Simple Syrup | Moisture retention | Prevents the 'twice baked' center from drying out |
The sour cream is the real MVP here. It adds a weight and moisture that standard milk just can't match. It prevents that "cardboard" texture that sometimes happens when you bake a cake for a second time.
Ingredients for a Velvety Texture
For the chocolate interior, you will need 15.25 oz Chocolate Cake Mix, which provides the base for our hidden surprise. We combine this with 1 cup Full fat sour cream Why this? The high fat content prevents the twice baked center from drying out., 3 Large eggs, and 0.5 cup Vegetable oil.
This creates a dense, sturdy cake that is easy to cut into sharp shapes.
For the outer envelope, grab 15.25 oz White or Yellow Cake Mix. You'll mix this with 1 cup Whole milk, 0.5 cup Unsalted butter, melted and cooled, and 4 Large egg whites Why this? Using whites only ensures the brightest color contrast against the chocolate..
Don't forget the 1 tsp Clear vanilla extract for that bakery scented aroma. Finally, 0.25 cup Simple syrup is essential for brushing the chocolate shapes to keep them hydrated during the final 45 minutes of baking.
The Dark Chocolate Interior
The chocolate batter needs to be thicker than your average cake. We want it to be "sturdy soft." When you mix the sour cream and eggs into the chocolate mix, it will look like a thick mousse. This is exactly what you want.
It ensures that when you use your cookie cutters, the edges stay crisp and don't crumble into a mess.
The Bright Vanilla Envelope
The outer layer is all about the "reveal." By using egg whites and melted butter, we create a texture that is reminiscent of my Homemade Vanilla Cupcakes Recipe. It needs to be pourable but thick enough to suspend the chocolate shapes in the middle of the pan without them immediately diving for the floor.
Tools for Precise Hidden Shapes
To get those stunning results, you need a few specific items. A 9x5 inch loaf pan is the traditional choice for this cake recipe because it allows you to line up the shapes in a perfect row. You will also need a small cookie cutter (about 2 inches wide) hearts, stars, or circles work best.
Avoid anything with tiny, spindly legs (like a reindeer) as those bits tend to break off.
A long offset spatula is helpful for smoothing the top of the batter, and a wire cooling rack is non negotiable. If the cake sits in the hot pan for too long, it will continue to cook, which can lead to over baking that delicate interior. I also suggest having a pastry brush handy for the simple syrup application.
| Original Ingredient | Substitute | Why It Works |
|---|---|---|
| Full fat sour cream | Greek Yogurt (full fat) | Similar acidity and fat. Note: Crumb may be slightly tangier |
| Whole milk | Buttermilk | Adds a lovely tang. Note: May cause the cake to rise a bit more |
| Vegetable oil | Melted Coconut Oil | Similar fat profile. Note: Adds a very subtle tropical scent |
Remember that substituting ingredients in baking is always a bit of a gamble with the chemistry. If you use a lower fat yogurt instead of sour cream, you might lose that "velvety" mouthfeel we're aiming for. Stick to the high fat versions for the best "magic" factor.
Executing the Magic Design Flawlessly
- Bake the chocolate base. Mix the chocolate mix, sour cream, eggs, and oil. Pour into a greased 9x13 pan and bake for 25 minutes. Note: We use a wider pan here so the cake is the right thickness for our cutters.
- Cool completely. Let the chocolate cake cool entirely on a rack. Wait until it's cold to the touch to prevent tearing.
- Cut the shapes. Use your cookie cutter to punch out as many shapes as possible from the chocolate cake.
- Hydrate and freeze. Brush each shape lightly with simple syrup and place them on a tray in the freezer for 15 minutes. Note: This "thermal armor" prevents the shape from overcooking later.
- Prepare the white batter. Whisk the white mix, milk, butter, egg whites, and vanilla until smooth and glossy.
- Create the base layer. Pour about 1 inch of the white batter into the bottom of a greased 9x5 loaf pan.
- Align the shapes. Stand the chocolate shapes upright in the center of the pan, squeezed tightly against each other in a long row.
- Cover and hide. Carefully pour the remaining white batter over and around the chocolate shapes until they are completely submerged.
- Final bake. Bake at 350°F for 45 minutes until a skewer comes out clean from the white cake.
- Cool and reveal. Let the cake cool for 20 minutes in the pan, then move to a rack. Slice crosswise to show off the hidden design.
Phase One: Initial Baking
Don't worry if the chocolate cake looks a bit flat in the 9x13 pan. We actually want it that way! It makes it easier to get uniform shapes. The smell of the cocoa at this stage should be intense and rich.
Phase Two: Precision Cutting
When cutting your shapes, try to keep them as close together as possible to minimize waste. But don't throw those scraps away! They are perfect for making quick truffles or just snacking on while the second cake bakes.
Phase Three: The Final Bake
This is where the magic happens. As the white batter rises, it hugs the chocolate shapes, locking them into place. The simple syrup we brushed on earlier creates a moisture barrier, ensuring that even though the chocolate is being heated again, it stays soft.
Fixing Common Surprise Cake Mistakes
The biggest heartbreak in a cake in a cake recipe is when the shapes fall over or sink. Usually, this happens because the bottom layer of white batter was too thin or the shapes weren't packed tightly enough. If they have room to move, they will move!
Another common issue is a "gap" between the two cakes. This is often caused by air bubbles. When you pour the white batter over the chocolate shapes, use a small knife or skewer to gently swirl around the edges (without moving the shapes!) to release any trapped air.
Correcting Sunken Internal Shapes
If your shapes keep hitting the bottom, your white batter might be too thin. Try adding an extra tablespoon of flour to the mix to increase the viscosity. This helps "hold" the shapes in place during those first critical minutes of baking before the structure sets.
| Problem | Root Cause | Solution |
|---|---|---|
| Shapes falling over | Too much space between pieces | Pack them so tightly they support each other |
| Gap between cakes | Trapped air pockets | Tap the pan hard on the counter before baking |
| Dry chocolate center | Over baking in phase one | Take the chocolate cake out 2 minutes early |
✓ Freeze the chocolate cutouts for at least 15 minutes before placing in the white batter. ✓ Tap the pan firmly on the counter to remove air bubbles around the hidden shapes. ✓ Use a toothpick to mark the orientation of the shapes so you know which way to slice.
✓ Do not over mix the white batter or the cake will become tough and rubbery. ✓ Ensure the chocolate shapes are all facing the exact same direction.
Customizing Your Sweet Baked Creation
Scaling this recipe up for a party is easy. If you want to make a double batch, just use two loaf pans. For the best results, don't try to double the batter in one giant bowl; mix them separately to ensure the leavening agents (like baking powder in the mix) stay active and don't deflate while you're working on the first loaf.
If you are scaling down to a mini loaf, reduce the final baking time by about 15 minutes. You'll also need smaller cookie cutters think the size of a quarter! It's a bit more fiddly, but the result is absolutely adorable for individual gifts.
Simple gluten-free Swaps
You can absolutely use gluten-free cake mixes for this. I've found that gluten-free batters are actually quite sturdy, which is great for holding shapes. Just be sure to add an extra egg to the chocolate portion to help with binding, as GF cakes can sometimes be more crumbly.
dairy-free Flavor Enhancements
If you need to ditch the dairy, swap the sour cream for a thick coconut cream and use a high-quality vegan butter substitute. The coconut adds a subtle, nutty depth that pairs beautifully with the chocolate. For the milk, oat milk is my top choice because of its creamy consistency.
Preservation Secrets for Long Freshness
Because of the high moisture content from the sour cream and simple syrup, this cake stays fresh longer than most. Keep it in an airtight container at room temperature for up to 3 days.
If you need to keep it longer, the fridge is fine, but let it sit at room temperature for 20 minutes before serving to let the fats soften back up.
For zero waste, take any leftover chocolate cake scraps and crumble them up. Mix them with a spoonful of frosting, roll into balls, and dip in melted chocolate for instant cake pops. It’s a great way to use every single crumb of your hard work!
Garnish Tactics for Stunning Results
For a truly professional look, we need to focus on color balance. The contrast between the dark interior and white exterior is great, but a few garnishes take it to the next level.
- Accent 1
- Raspberry Glaze. A vibrant pink drizzle over the top provides a sharp acid hit that cuts through the sugar. Add this once the cake is completely cool to prevent it from soaking in.
- Accent 2
- Gold Leaf. For a special occasion, tiny flecks of edible gold leaf placed randomly on the top add a "magic" shimmer that looks incredible under dinner party lights.
- Accent 3
- Fresh Mint. A few sprigs of deep green mint on the serving platter provide a fresh aroma and a beautiful organic contrast to the structured look of the cake.
When you finally slice into it, use a very sharp, thin knife. Wipe the blade between every single slice. This prevents the chocolate crumbs from smearing onto the white cake, keeping that "stunning" reveal crisp and clean.
It’s these little details that make the difference between a "good" home bake and a show stopping dessert!

Recipe FAQs
How to make a cake mix taste like bakery cake?
Add extra egg yolks and sour cream. Egg yolks add richness and moisture, while sour cream contributes fat and acidity for a more complex flavor and tender crumb, similar to how our Homemade Vanilla Cupcakes Recipe achieves its softness.
What is the 1234 cake rule?
It's an old ratio for scratch cakes: 1 cup butter, 2 cups sugar, 3 cups flour, 4 eggs. This rule of thumb helps create a balanced cake, though modern recipes often adjust ratios for specific textures like the dense center in our "cake in a cake" concept.
How to get a moist cake?
Use ingredients with high fat and moisture content, and don't overbake. Full fat sour cream, oil, and simple syrup are key in this "cake in a cake" recipe to ensure the center stays fudgy even after a second bake.
How do I turn a cake mix into a bakery cake for a surprise inside?
Use a high-quality mix and add specific moistening agents. For the inner shapes, combine the mix with full fat sour cream, eggs, and oil to create a sturdy yet moist batter that holds its shape when cut. The outer layer uses a white cake mix with milk, butter, and egg whites for a bright contrast.
How to prevent the inner cake shapes from drying out?
Brush the cut shapes with simple syrup before the second bake. This acts as a moisture barrier, keeping the chocolate interior soft and fudgy even though it's baked twice.
Can I use a different type of pan for this cake?
A 9x5 inch loaf pan is recommended for the main bake. This size is ideal for lining up the cut shapes in a single row, ensuring a clean reveal when sliced, much like how precise shaping is crucial for creating defined layers in a Prime Rib Roast: The 500 Rule Oven Method.
What causes the surprise shapes to fall or sink?
This usually happens if there's too much space between the shapes or the outer batter is too thin. Packing the chocolate shapes tightly together provides mutual support, and ensuring the white batter has enough viscosity (perhaps with an extra tablespoon of flour) helps suspend them during baking.
Cake In A Cake Recipe

Ingredients:
Instructions:
Nutrition Facts:
| Calories | 524 calories |
|---|---|
| Protein | 7.1 g |
| Fat | 29.2 g |
| Carbs | 59.5 g |
| Fiber | 1.8 g |
| Sugar | 36.2 g |
| Sodium | 584 mg |
