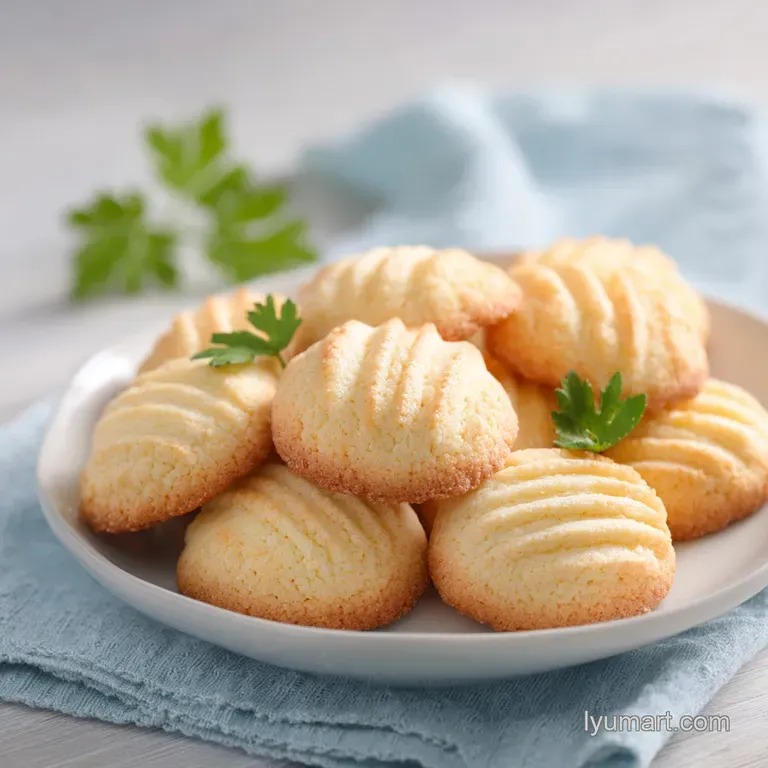
Danish Butter Cookies: Crisp and Velvety
- Time: Active 78 minutes, Passive 12 minutes, Total 90 minutes
- Flavor/Texture Hook: Shatteringly crisp edges with a velvety, melt in-the mouth center
- Perfect for: Elegant tea parties, holiday gifting, or a sophisticated afternoon snack
- Unlocking the Secret to This Butter Cookies Recipe
- Key Specifications for Baking Success
- Sourcing Quality Ingredients for Your Dough
- Professional Tools for Every Home Baker
- A Step by Step Guide to Baking
- Solving Common Issues and Baking Mistakes
- Troubleshooting Common Issues
- Creative Flavor Twists to Try Next
- Practical Storage and Waste Prevention Tips
- Elegant Ways to Serve Your Treats
- Recipe FAQs
- 📝 Recipe Card
Unlocking the Secret to This Butter Cookies Recipe
Long before the iconic blue tins became the universal home for sewing kits and stray buttons, these biscuits were the pride of Danish and French bakeries. In Denmark, they are known as "Vaniljekranse," traditionally piped into circles to represent the wreaths of the winter season.
The French have their "Sablé," named after the sandy texture that occurs when butter is rubbed into flour. This butter cookies recipe is a love letter to those traditions, focusing on the purity of the ingredients rather than complex additives.
I remember the first time I smelled the buttery aroma wafting through a small bakery in Copenhagen, it wasn't just sweet, it was rich, almost nutty, and entirely intoxicating.
The beauty of a classic biscuit lies in its restraint. We aren't hiding behind chocolate chips or swirls of caramel here. It is all about the quality of the fat and the precision of the temperature. When you bite into one of these, there should be a distinct snap, followed by a buttery richness that coats the palate.
It is a sensory experience that brings back memories of grandmothers' kitchens and festive gatherings where the simplest treats were always the first to disappear from the tray.
We are aiming for a result that feels professional but remains achievable in your own kitchen. This isn't just about mixing ingredients, it's about understanding how they interact to create that specific, sandy crumb.
Whether you are baking these for a holiday spread or just to have something sweet in the jar for your morning coffee, this method ensures they look as beautiful as they taste. Let's get into what makes this magic happen.
Key Specifications for Baking Success
Understanding the "why" behind the "how" is what separates a good baker from a great one. We aren't just following instructions, we are manipulating proteins and fats to behave exactly how we want them to. In this case, we want the butter to provide structure without making the cookie greasy.
- Aeration: The creaming phase builds a network of tiny air bubbles. This is our only "lift," as we don't use baking powder.
- Fat to Flour Ratio: We use a high proportion of butter to ensure the flour particles are thoroughly coated. This inhibits gluten development, resulting in a tender "short" texture.
- Temperature Control: Chilling the dough after piping is non negotiable. It solidifies the butter, ensuring the intricate ridges from your piping tip don't melt away into a flat puddle the second they hit the heat.
- Sugar Choice: Superfine sugar dissolves more readily into the butter, creating a more uniform crumb than standard granulated sugar, which can leave tiny pockmarks.
| Thickness | Internal Temp | Rest Time | Visual Cue |
|---|---|---|---|
| 6mm (approx) | N/A | 5 minutes | Golden mahogany edges |
| 10mm (thick) | N/A | 8 minutes | Pale center, firm base |
| 3mm (thin) | N/A | 3 minutes | Deep gold throughout |
A thicker cookie will give you a softer, more shortbread like experience, while a thinner pipe results in a crisp, wafer like snap. I personally prefer the middle ground, about 6mm, which provides the best of both worlds: a crunchy exterior and a buttery heart.
Sourcing Quality Ingredients for Your Dough
When a recipe has so few components, every single one has to be top tier. You can't hide mediocre butter here. I always look for "European style" butter because it has a higher butterfat content and less water than standard supermarket blocks. This leads to a much richer flavor and a more reliable bake.
| Component | Science Role | Pro Secret |
|---|---|---|
| European Butter | Provides fat and flavor | Use a brand with 82% fat for better snap |
| Superfine Sugar | Aeration and sweetness | Blitz regular sugar in a blender if you can't find it |
| Vanilla Bean Paste | Flavor and visual speckles | The paste adds those beautiful black seeds |
| All Purpose Flour | Structural framework | Sift twice to ensure no clumps disrupt the piping |
Wait until you see the difference that pure vanilla bean paste makes compared to the clear imitation stuff. Those tiny black specks tell everyone that you didn't take any shortcuts.
Professional Tools for Every Home Baker
You don't need a professional laboratory, but a few specific items will make your life much easier. A stand mixer is your best friend here because creaming butter and sugar for five minutes by hand is a workout nobody needs on a Sunday afternoon.
- Stand Mixer: Fitted with a paddle attachment to incorporate air without overworking the dough.
- Piping Bag: Use a sturdy, reusable silicone bag or heavy duty disposable ones. The dough is stiff, and cheap bags will burst.
- 1M or 2D Star Tip: These are the industry standard for those beautiful, ridged rosettes.
- Heavy Gauge Baking Sheets: These distribute heat evenly, preventing the bottoms of your cookies from burning before the tops are done.
Chef's Tip: If your kitchen is particularly warm, pop your metal mixing bowl and paddle in the fridge for 10 minutes before you start. Keeping the butter from getting too oily during the creaming stage is the secret to a velvety finish.
If you find yourself enjoying the precision of this bake, you might also love the delicate nature of my Shortbread Cookies recipe, which uses a similar ratio but a different mixing technique.
A step-by-step Guide to Baking
- Place the 225g of softened European style butter, 150g superfine sugar, and 3g sea salt in your mixer bowl. Cream on medium high speed for a full 3 to 5 minutes until the mixture looks pale and cloud like. Note: This aeration is what gives the cookie its light texture.
- Reduce the speed to low. Add the 1 large egg and 10ml vanilla bean paste, beating until the mixture is completely glossy and smooth.
- Turn off the mixer. Sift the 320g all purpose flour directly into the bowl. Fold it in by hand using a spatula until just combined with no white streaks.
- Fit your piping bag with the 1M or 2D tip. Fill the bag with the dough, being careful not to overfill, which makes it harder to squeeze.
- Pipe 2 inch circles or "S" shapes onto your parchment lined sheets. Leave about an inch between each cookie to allow for minimal spreading.
- Place the entire baking sheet into the refrigerator. Let them chill for 30 to 60 minutes until the dough feels firm to the touch.
- Preheat your oven to 175°C. Just before sliding them in, sprinkle the cookies with the 25g of coarse sanding sugar for a shimmering, crunchy finish.
- Bake for 10 to 12 minutes. You are looking for the edges to turn a light mahogany gold while the centers stay pale.
- Remove from the oven and let them sit on the hot tray for 5 minutes. This "carryover" heat finishes the crisping process without over browning the tops.
- Transfer to a wire rack to cool completely. The snap only develops once the butter has fully reset at room temperature.
For those who love a bit of a twist on a classic, these techniques can actually be applied to other treats. If you like the idea of a piped cookie but want something with a bit more spice, you should definitely try this Cinnamon Roll Cookies recipe.
Solving Common Issues and Baking Mistakes
Baking is a science, and sometimes the variables don't play nice. If your cookies didn't turn out quite like the photos, don't panic. Usually, it comes down to a small adjustment in temperature or timing. The most common heartbreak is seeing those beautiful piped ridges disappear in the oven.
Troubleshooting Common Issues
| Issue | Solution |
|---|---|
| Why Your Cookies Spread Into Flat Puddles | This is almost always a temperature issue. If the butter was too warm when it went into the oven, it melted before the flour had a chance to set its structure. It can also happen if you over creamed t |
| Dough Too Stiff to Pipe | If you can't squeeze the dough through the tip without turning purple in the face, the butter was likely too cold, or you added a bit too much flour. You can try warming the piping bag slightly with y |
| Why Are My Cookies Tough Instead of Snappy | Over mixing after adding the flour is the culprit here. Once the flour hits the wet ingredients, gluten starts to form. We want as little gluten as possible for a tender cookie. Fold the flour in by h |
Creative Flavor Twists to Try Next
Once you have the base dough mastered, the possibilities are endless. This butter cookies recipe is like a blank canvas. You can change the extract, add zest, or even dip them in various coatings to suit the occasion.
- Lemon Poppyseed: Add the zest of two lemons and a tablespoon of poppyseeds to the flour.
- Almond & Cardamom: Swap the vanilla for almond extract and add 2g of ground cardamom for a Scandinavian feel.
- Cocoa Variation: Replace 30g of the flour with high-quality Dutch processed cocoa powder.
- Espresso Snap: Dissolve a teaspoon of instant espresso powder into the vanilla before adding it to the butter.
| Fast Method | Classic Method | Why Choose Classic? |
|---|---|---|
| Melted butter | Creamed butter | Better lift and airier texture |
| Hand mixing | Stand mixer | Superior emulsion and fluffiness |
| No chill time | 60 minute chill | Holds the piped shape perfectly |
If you find yourself craving something a bit more rustic and hearty after all this precision, you might enjoy my Chocolate Chip Cookies from Scratch which focus more on gooey centers than crisp edges.
Practical Storage and Waste Prevention Tips
These cookies are surprisingly hardy because of their high fat and sugar content, which act as natural preservatives. To keep them at their best, store them in an airtight container at room temperature for up to two weeks.
If they start to lose their snap, you can pop them in a 150°C oven for 3 minutes to "re crisp" them.
For zero waste, don't throw away the tiny bits of dough left in the piping bag. Squeeze them into small "dots" on the corner of your baking sheet. They make excellent "taster" bits or can be crushed and used as a topping for vanilla ice cream.
You can also freeze the raw, piped cookies on a tray until solid, then move them to a freezer bag. You can bake them directly from frozen; just add 2 minutes to the total bake time.
Elegant Ways to Serve Your Treats
Presentation is where the "magic" of a sweet treat really comes to life. Depending on the setting, you can dress these up or keep them delightfully simple.
Three Levels of Plating
| Level | Style | Tweak |
|---|---|---|
| Simple | Casual | Tumble them into a vintage glass jar |
| Polished | Gift Ready | Stack 5 cookies and tie with a velvet ribbon |
| Restaurant | Gourmet | Dip half in dark chocolate and sprinkle with gold leaf |
Plating Details
- Simple: Focus on the rustic beauty of the golden edges. A simple white plate makes the mahogany highlights pop.
- Polished: Use height to your advantage. Stacking the cookies creates a sense of abundance.
- Restaurant: A smear of raspberry coulis on the plate provides a tart contrast to the rich butter.
Kitchen Myths Debunked
"You can't over cream butter." This is false. If you cream it for 10+ minutes, the friction can cause the butter to melt and the air bubbles to collapse, leading to a greasy cookie. Stick to the 3-5 minute range.
Another myth is that "unsalted butter is just salted butter without salt." In reality, many premium unsalted butters are fresher because salt is a preservative used to extend the shelf life of lower quality batches.
By following this butter cookies recipe, you aren't just making a snack; you're creating a little moment of luxury. The snap of the edge, the aroma of vanilla, and the way the sugar crystals catch the light it all adds up to something truly special. Happy baking!

Recipe FAQs
What are the ingredients for butter cookies?
This recipe requires six essential components. You will need 225g of softened unsalted European style butter, 150g of superfine sugar, 3g of fine sea salt, one room temperature large egg, 10ml of pure vanilla bean paste, and 320g of sifted all-purpose flour, plus coarse sanding sugar for the topping.
Which cookies are good for diabetics?
No, these cookies are not designed for diabetic diets. They contain traditional sugar and refined flour, which significantly impact blood glucose levels.
What are the common butter cookie mistakes?
Over creaming the butter and sugar or using warm dough are the primary errors. If the butter is too soft or the dough is not chilled for at least 30-60 minutes, the cookies will lose their structure and spread into flat puddles in the oven.
How to make butter cookies with 3 ingredients?
Follow a simplified ratio of fat, sugar, and flour, though this recipe uses six specific ingredients for the best texture. If you enjoyed mastering the emulsion technique with the egg and butter here, see how the same principle works in our Peanut Butter Mousse.
Is it true that I can skip the chilling step?
No, this is a common misconception. Chilling the piped cookies on the baking sheet for 30-60 minutes is critical to ensuring they maintain their decorative shape and crisp edges during the 10-12 minute bake at 350°F.
How to fix dough that is too stiff to pipe?
Warm the piping bag slightly with your hands to soften the butter within the dough. Ensure you did not accidentally add too much flour, as the dough should be soft enough to move through an open star tip when at the correct room temperature.
Why did my cookies turn out tough instead of snappy?
Toughness usually indicates over mixing the flour. Once you sift the 320g of flour over the butter mixture, fold it gently by hand or on the lowest mixer setting only until no streaks of flour remain to keep the cookies delicate.
Classic Danish Butter Cookies
Ingredients:
Instructions:
Nutrition Facts:
| Calories | 99 calories |
|---|---|
| Protein | 1.1 g |
| Fat | 5.2 g |
| Carbs | 12 g |
| Fiber | 0.2 g |
| Sugar | 4.9 g |
| Sodium | 33 mg |
