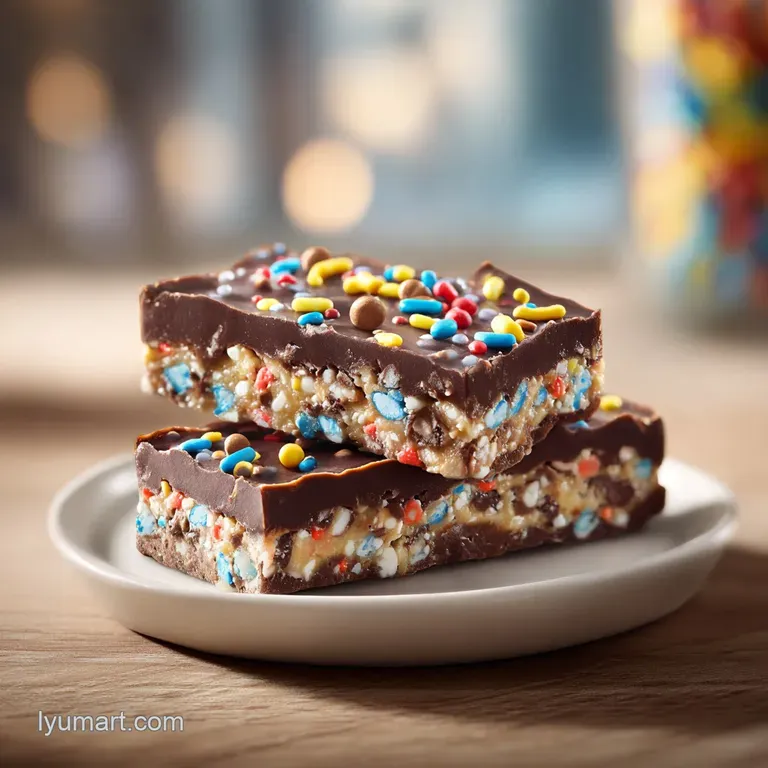
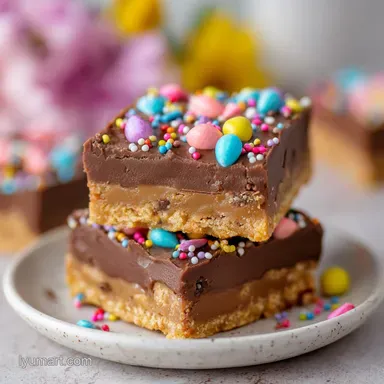
Buckeye Bars: Creamy Peanut Butter Fudge
- Time: Active 20 minutes, Passive 2 hours, Total 2 hours 20 mins
- Flavor/Texture Hook: Silky, melt in-the mouth peanut butter fudge with a snappy chocolate finish
- Perfect for: Potlucks, holiday gifting, and satisfying late night sweet cravings
- The Joy of Making Perfect Buckeye Bars
- Why This No Bake Magic Works
- The Elements of Sweet Success
- Tools for the Best Texture
- Creating the Perfect Layers
- Solving Common Texture Issues
- Creative Twists on Tradition
- Scaling for Large Groups
- Myths About No Bake Bars
- Freshness and Storage Secrets
- Elegant Ways to Serve
- Recipe FAQs
- 📝 Recipe Card
The Joy of Making Perfect Buckeye Bars
Imagine walking into a kitchen where the air is heavy with the scent of roasted peanuts and warm, melted butter. There is something truly magical about the moment you peel back the parchment paper to reveal a massive slab of Buckeye Bars, perfectly leveled and shimmering under the kitchen lights.
You get that hit of nostalgia, like the classic Ohio candy, but in a format that lets you cut a piece exactly as big (or small) as you want.
This is the ultimate quick win for anyone who wants a show stopping dessert without turning on the oven. We are skipping the fussy rolling and dipping of individual balls and going straight for high impact layers.
You get all that salty sweet satisfaction in about 20 minutes of active work, making it the perfect solution for when you need a "wow" dessert but your schedule is packed.
You are going to love how the sandy, buttery graham cracker base provides just enough grit to contrast with the silky smooth chocolate topping. It is a texture play that keeps you coming back for "just one more sliver." Plus, since there is no baking involved, you do not have to worry about the bars drying out or losing that fudgy, decadent heart we all crave.
Why This No Bake Magic Works
Getting that specific "fudge but-sturdy" texture requires a little bit of kitchen logic. It is not just about mixing things together; it is about how the fats and solids interact to stay solid at room temperature.
- Structural Reinforcement: Finely crushed graham cracker crumbs act like a skeleton for the bars, absorbing the excess oils from the peanut butter so the base does not turn into a greasy mess.
- The Stabilizing Scoop: Adding a small amount of peanut butter to the chocolate layer keeps the topping from becoming too brittle, ensuring it bends slightly before it snaps rather than shattering into shards.
- Temperature Anchoring: Using melted but slightly cooled butter allows the powdered sugar to dissolve just enough to create a smooth mouthfeel without becoming a liquid syrup.
| Servings | Ingredient Adjustments | Pan Size | Total Time |
|---|---|---|---|
| 12 people | Half recipe (use 1/2 cup butter) | 8x4 inch loaf pan | 2 hours 20 mins |
| 24 people | Full recipe (as listed) | 9x9 inch square pan | 2 hours 20 mins |
| 48 people | Double recipe (3 cups PB) | 9x13 inch pan | 2 hours 30 mins |
Choosing the right pan size is the biggest decision you will make here. A 9x9 inch pan gives you that classic, thick Buckeye profile, but if you prefer a thinner, more delicate snack, you can spread this into a larger rectangular pan for more servings.
Component Deep Dive
| Ingredient | Science Role | Pro Secret |
|---|---|---|
| Powdered Sugar | Provides structure and sweetness | Always sift it to prevent tiny "sugar pebbles" in your fudge. |
| Creamy Peanut Butter | Main fat source and flavor base | Avoid "natural" stir style brands; they are too oily for this structure. |
| Melted Butter | Binds the dry crumbs together | Use unsalted to precisely control the final salt balance. |
| Chocolate Chips | Forms the protective top seal | Semi sweet balances the high sugar content of the base perfectly. |
The Elements of Sweet Success
To get these bars exactly right, we need to stick to the measurements that keep the base firm. I have learned the hard way that "eyeballing" the peanut butter leads to bars that you have to eat with a spoon.
- 1 cup (226g) unsalted butter: Melted and slightly cooled. Why this? It acts as the glue for the entire base.
- 2 cups (180g) graham cracker crumbs: Finely crushed. Why this? Provides the "bite" and structural integrity.
- 2 cups (240g) powdered sugar: Sifted. Why this? Creates a smooth, melt in-your mouth texture.
- 1.5 cups (375g) creamy peanut butter: Standard commercial style. Why this? Ensures the bars set firmly when chilled.
- 1 tsp pure vanilla extract: For aromatic depth.
- 0.5 tsp fine sea salt: To cut through the sweetness.
- 1.5 cups (255g) semi sweet chocolate chips: high-quality for better melting.
- 2 tbsp (32g) creamy peanut butter: For the chocolate glaze.
| Original Ingredient | Substitute | Why It Works |
|---|---|---|
| Graham Cracker Crumbs | Digestive Biscuits | Similar dry, wheaty texture. Note: Slightly less sweet than grahams. |
| Semi sweet Chips | Dark Chocolate (60%) | Reduces overall sweetness. Note: Sets firmer and more matte. |
| Creamy Peanut Butter | Sunflower Seed Butter | Nut free alternative. Note: Has a slightly earthier, roasted flavor. |
Tools for the Best Texture
You do not need a lot of fancy gear for this, but a few specific items make the difference between "homemade" and "bakery style." First, a 9x9 inch square baking pan is your best friend here. It creates the perfect thickness for 24 generous bars.
You will also want some parchment paper. Do not skip this! Leaving an overhang on the sides allows you to lift the entire block of chilled Buckeye Bars out of the pan at once, which is the only way to get those clean, sharp edges.
An offset spatula is also brilliant for smoothing the chocolate into a mirror like finish without getting your knuckles in the goo.
Creating the Perfect Layers
- Line a 9x9 inch square baking pan with parchment paper, leaving an overhang on the sides for easy removal.
- In a large mixing bowl, combine the melted butter, graham cracker crumbs, and sifted powdered sugar. Stir until a thick, sandy paste forms.
- Fold 1.5 cups of creamy peanut butter and the vanilla extract into the sugar mixture. Stir vigorously until the mixture is uniform and the oil is fully incorporated. Note: If you see oil streaks, keep stirring or the bars will be greasy.
- Press the peanut butter mixture firmly and evenly into the bottom of the prepared pan using an offset spatula. Ensure the corners are packed tight.
- In a microwave safe glass bowl, combine the chocolate chips and 2 tablespoons of peanut butter.
- Heat in 30 second intervals, stirring between each, until completely smooth and glossy. Note: Stirring is what actually melts the last few chips, not just the heat.
- Pour the melted chocolate over the peanut butter layer, smoothing it to the edges.
- Refrigerate for at least 2 hours until the chocolate is firm to the touch before slicing into 24 bars.
Chef's Tip: For the cleanest slices, run a sharp chef's knife under hot water, wipe it dry, and then make one long, continuous cut. Repeat the heating and wiping for every single slice. It sounds tedious, but the results are professional grade.
Solving Common Texture Issues

Even with a simple recipe, things can go sideways if the temperature or ingredients aren't quite right. The most common heartbreak is the chocolate layer cracking like a frozen lake when you try to cut it.
Why Your Chocolate Topping Cracks
This happens because the chocolate becomes too brittle when cold. By adding that extra 2 tablespoons of peanut butter to the melting chocolate, we lower the "snap" point, making it slightly softer so the knife glides through instead of shattering the surface.
| Problem | Root Cause | Solution |
|---|---|---|
| Gritty texture | Coarse sugar or crumbs | Sift the sugar and pulse crumbs in a blender until they look like sand. |
| Oily surface | Over mixed or warm PB | Chill the base for 15 minutes before adding the chocolate layer. |
| Bars are soft | Not enough crumbs | Add an extra 1/4 cup of crumbs if the mixture feels like batter instead of dough. |
Common Mistakes Checklist
- ✓ Never use "natural" peanut butter where the oil separates; the bars won't set.
- ✓ Don't skip sifting the powdered sugar; those little white lumps never fully disappear.
- ✓ Pat the peanut butter layer down hard use the bottom of a flat measuring cup to pack it.
- ✓ Let the bars sit at room temp for 5-10 minutes before slicing if they've been in the fridge overnight.
- ✓ Use a glass bowl for the chocolate; plastic can retain odors or overheat too quickly.
Creative Twists on Tradition
If you want to branch out from the classic Ohio style, there are plenty of ways to play with the flavor profile. I often get asked about making these for friends with different dietary needs. For a lower carb version, you might want to look into a Keto Peanut Butter Cookies recipe for inspiration on sugar-free binders.
The Crunch Factor
If you love a bit of noise when you eat, try making Buckeye Bars with Rice Krispies. Simply fold in 1 cup of toasted rice cereal after you have mixed the peanut butter and sugar. It adds a light, airy crunch that breaks up the dense fudge of the base.
It is a fantastic variation for those who find the original version a bit too "heavy."
The Sea Salt Dark Chocolate Twist
For a more sophisticated palate, swap the semi sweet chips for a 70% dark chocolate. Right after you pour the chocolate and smooth it out, sprinkle a generous pinch of flaky sea salt (like Maldon) over the top.
The salt heightens the roasted peanut flavor and tames the sugar, making these taste like something from a high end chocolatier.
Scaling for Large Groups
These bars are incredibly easy to scale up for bake sales or large parties. Since they are no bake, you aren't limited by oven space, only by your fridge real estate!
- Scaling Down (Half Batch): Use an 8x4 inch loaf pan. You will still get about 12 thick bars. Use 1/2 cup of butter and adjust the rest accordingly. Since you can't easily use half an egg (which isn't in this recipe anyway!), scaling is perfectly linear.
- Scaling Up (Double Batch): Use a 9x13 inch pan. You will need to increase your chilling time by about 30 minutes to ensure the center of the larger mass sets properly.
- Baking Note: If you ever decide to try a version that requires a baked crust (some people like to toast the graham crumbs first), remember to lower the oven temp to 325°F (160°C) and bake for only 8-10 minutes.
| Method | Time | Texture | Best For |
|---|---|---|---|
| Microwave | 2 mins | Silky & Fast | Every day prep |
| Stovetop (Bain Marie) | 10 mins | Ultra Glossy | Special occasions |
Myths About No Bake Bars
There is a lot of "kitchen folklore" surrounding no bake treats that can actually lead you astray. Let's clear the air on a few things I see people arguing about in cooking forums.
One common myth is that you must use "natural" peanut butter for the best flavor. While natural PB tastes great on toast, it is the enemy of a sturdy Buckeye Bar. The lack of stabilizers means the oil will seep out, leaving you with a puddle in the pan.
Stick to the classic, creamy commercial brands for this specific dessert.
Another misconception is that the graham crackers are just for filler. In reality, they are a functional ingredient. Without the starch and dry matter from the crumbs, the sugar and butter would never form a stable solid.
They are effectively the flour of this "dough," just without the need for heat to set the proteins.
Freshness and Storage Secrets
Buckeye Bars are the ultimate "make-ahead" treat because they actually improve after a day in the fridge. The flavors meld, and the texture becomes more uniform.
- Storage: Keep the bars in an airtight container in the fridge for up to 1 week. If you leave them on the counter, the chocolate may soften too much, and the base can become slightly greasy.
- Freezing: These freeze beautifully! Wrap individual bars in plastic wrap and store them in a freezer bag for up to 3 months. You can even eat them straight from the freezer for a "frozen fudge" experience.
- Zero Waste: If you have crumbs left over from the bottom of the pan, don't toss them! Stir them into vanilla ice cream or use them as a topping for a Chocolate Dump Cake for an extra hit of peanut butter magic.
Elegant Ways to Serve
Plating can take these from a casual snack to a "restaurant style" dessert. It is all about the precision of the cut and what you put next to them.
| Level | Plating Tweak | Visual Impact |
|---|---|---|
| Simple | Piled high on a wooden board | Rustic, cozy, "help yourself" vibes. |
| Polished | Perfectly spaced on a white platter | Clean, professional, and modern. |
| Restaurant | Single bar with a peanut butter drizzle | High end, intentional, and decadent. |
For a "restaurant" look, place one chilled bar in the center of a dark plate. Take a small spoonful of melted peanut butter and "feather" it across the plate in a swift motion. Add three tiny dots of chocolate ganache and a single roasted peanut on top of the bar.
It looks like you spent hours on it, but it only takes 30 seconds!
Precision Checkpoints
- 9x9 inches: The exact pan size for the correct layer ratio.
- 2 hours: The minimum chill time before you even think about touching a knife to the chocolate.
- 155°F (68°C): The ideal temperature for the melted chocolate any hotter and you risk scorching the cocoa solids.
If you are looking for a quick decision on how to finish these, here is my shortcut: If you want a classic treat, keep them plain. If you want a crowd pleaser, add the Rice Krispies. If you want to impress a foodie, go with the dark chocolate and sea salt.
No matter which path you take, these bars are guaranteed to disappear faster than you can say "Ohio State!" Enjoy the sweet magic of this no bake wonder.

Recipe FAQs
What makes Buckeye bars so good?
The perfect balance of textures creates a decadent experience. Combining the dense, salty sweet peanut butter base with a smooth, glossy chocolate topping replicates the classic candy flavor in a satisfying, dense bar form.
Are Buckeye bars actually made with nuts?
No, this is a common misconception. While named after the poisonous Ohio state nut, these bars contain no actual nuts, relying entirely on creamy peanut butter for their signature flavor.
Who invented the original Buckeye candy?
The origin is attributed to Gail Tabor, a home cook from Ohio. She created the iconic peanut butter and chocolate confection in the mid-1960s to resemble the appearance of the buckeye tree's nut.
What are common Buckeye recipe mistakes?
Using natural peanut butter is the most frequent error. The oil separation in natural varieties prevents the bars from setting properly, so always stick to standard creamy peanut butter.
How to ensure a smooth texture in the base?
Sift the powdered sugar before mixing. Skipping this step leaves white lumps in your peanut butter layer that will never disappear, no matter how much you stir.
How to get clean slices without cracking the chocolate?
Let the bars sit at room temperature for 5 to 10 minutes before cutting. This softens the chocolate layer just enough to prevent it from shattering or cracking when you press your knife through.
How to achieve a dense, professional looking base?
Pack the mixture firmly using the bottom of a flat measuring cup. Pressing the peanut butter layer down hard into the parchment lined 9x9 inch pan ensures the bars hold their shape and don't crumble during service.
Easy No Bake Buckeye Bars
Ingredients:
Instructions:
Nutrition Facts:
| Calories | 289 kcal |
|---|---|
| Protein | 5.2 g |
| Fat | 20.3 g |
| Carbs | 25.8 g |
| Fiber | 1.4 g |
| Sugar | 19.5 g |
| Sodium | 148 mg |
