Rice Pilaf: Fluffy and Buttery

- Time:10 minutes prep + 30 minutes cooking/resting = 40 minutes total
- Flavor/Texture Hook: Nutty, buttery, and distinctively fluffy
- Perfect for: Sunday roasts, meal prepping, or impressive weeknight sides
- Master the Golden Secrets of Classic Rice Pilaf
- Perfecting the Texture and Flavor Profile
- Essential Preparation and Timing Metrics
- Primary Components and Functional Roles
- Necessary Tools for Fluffy Results
- Executing the Multi Stage Cooking Process
- Resolving Common Texture and Heat Issues
- Adjusting Portions and Ingredient Swaps
- Preservation Secrets and Reheating Techniques
- Enhancing Your Final Presentation
- Recipe FAQs
- 📝 Recipe Card
Master the Golden Secrets of Classic Rice Pilaf
I remember the first time I tried to make a "fancy" side dish for a big family dinner. I thought rice was just... rice. I dumped it in a pot with some water, boiled it within an inch of its life, and ended up with a gummy, grey mound of sadness that looked more like wallpaper paste than a professional side.
It was embarrassing, especially when I had to scoop it onto plates like a cafeteria worker. That was my wake up call that the humble grain deserves more respect.
The smell of butter melting into finely diced onions is the real starting gun for any great meal. But when you add dry orzo pasta to that sizzling fat, something magical happens. The kitchen fills with a scent that is almost like toasted popcorn or freshly baked bread.
This isn't just about cooking; it's about building layers of flavor that a simple rice cooker can never replicate. When you hear that gentle shish shish of the grains hitting the pan, you know you're on the right track to a texture that actually shatters slightly between your teeth before melting away.
We've all been there with the "blue box" versions of this dish, but making a homemade rice pilaf is a completely different experience. It’s about the contrast between the tender, long grain rice and the deeply bronzed bits of pasta.
This recipe is my targeted fix for anyone who has ever struggled with a pot of rice that felt heavy or uninspired. We're going for grains that are coated in garlic butter and stand proudly on their own, never clumping together into a soggy mess.
Perfecting the Texture and Flavor Profile
Getting that restaurant quality finish isn't magic; it's just a bit of simple kitchen logic. Most people treat rice like a passive ingredient that just soaks up water, but in a pilaf, we treat it like a protein that needs a good sear.
By understanding how the starch behaves, we can manipulate the final result to be as light as a cloud.
- Surface Starch Removal: Rinsing the rice under cold water for 1-2 minutes strips away the dusty starch that causes grains to stick together and turn gummy.
- Lipid Encapsulation: Coating the rice and orzo in melted butter before adding liquid creates a fat barrier that prevents the grains from over hydrating and bursting.
- The Maillard Effect: Toasting the dry orzo for 3-4 minutes until it hits a mahogany gold color creates complex savory notes that raw pasta lacks.
- Internal Steam Management: Allowing the pot to rest for 10 minutes off the heat lets the remaining moisture redistribute evenly, ensuring the top layer is just as tender as the bottom.
| Method | Total Time | Resulting Texture | Best For |
|---|---|---|---|
| Traditional Stovetop | 40 minutes | Distinct, fluffy grains | Classic dinner parties |
| Instant Pot | 25 minutes | Softer, more cohesive | Quick weeknight fuel |
| Oven Baked | 50 minutes | Extremely even, no crust | Large holiday crowds |
Choosing the right path depends entirely on your schedule, but the stovetop method remains the gold standard for controlling the toast on your orzo. While the Instant Pot is fast, it often misses that "shatter" factor that makes the stovetop version so satisfying to eat alongside a Broccoli Casserole recipe.
Essential Preparation and Timing Metrics
Before we even turn on the stove, we need to talk about the "Component Analysis." Every part of this dish has a functional job. The rice provides the bulk, the orzo adds the visual and textural contrast, and the aromatics provide the "soul" of the flavor.
If you skip the rinsing or the toasting, you aren't making a pilaf; you're just making buttery rice.
| Ingredient | Science Role | Pro Secret |
|---|---|---|
| Long Grain Rice | Structural Base | Use Basmati for extra floral aroma and length |
| Dry Orzo | Textural Contrast | Toast until it looks darker than you think is safe |
| Chicken Broth | Hydration & Umami | Use low sodium to control the seasoning precisely |
| Unsalted Butter | Fat & Emulsion | Browning the butter slightly adds an extra layer of nuttiness |
The timing of this dish is non negotiable. You can't rush the 10 minute rest at the end. I’ve tried, and I’ve regretted it every single time. When you pull the lid off too early, the steam escapes, and the rice at the top becomes crunchy while the bottom stays wet.
That silence when the pot is sitting off the burner is where the real work happens.
Primary Components and Functional Roles
Selecting your elements is the first step toward a successful bake. I always recommend using a high-quality chicken broth because the rice is going to absorb every single drop of that liquid. If your broth tastes like salt water, your pilaf will too.
- 2 tbsp unsalted butter: Provides the fat needed for toasting and a velvety mouthfeel.
- 0.5 cup yellow onion, finely diced: The aromatic backbone that sweetens as it cooks.
- 3 cloves garlic, minced: Adds a sharp, savory kick that balances the butter. Why this? Garlic burns easily, so we add it late to keep it sweet.
- 0.5 tsp fine sea salt: Enhances the natural flavors of the grain.
- 0.25 tsp freshly cracked black pepper: Provides a subtle heat.
- 1 cup long grain white rice: The main event. Why this? Long grain stays separate better than short grain varieties.
- 0.33 cup dry orzo pasta: Adds that classic Mediterranean look and bite.
- 2 cups chicken broth: The flavorful cooking medium.
- 1 small bay leaf: Infuses a subtle herbal depth.
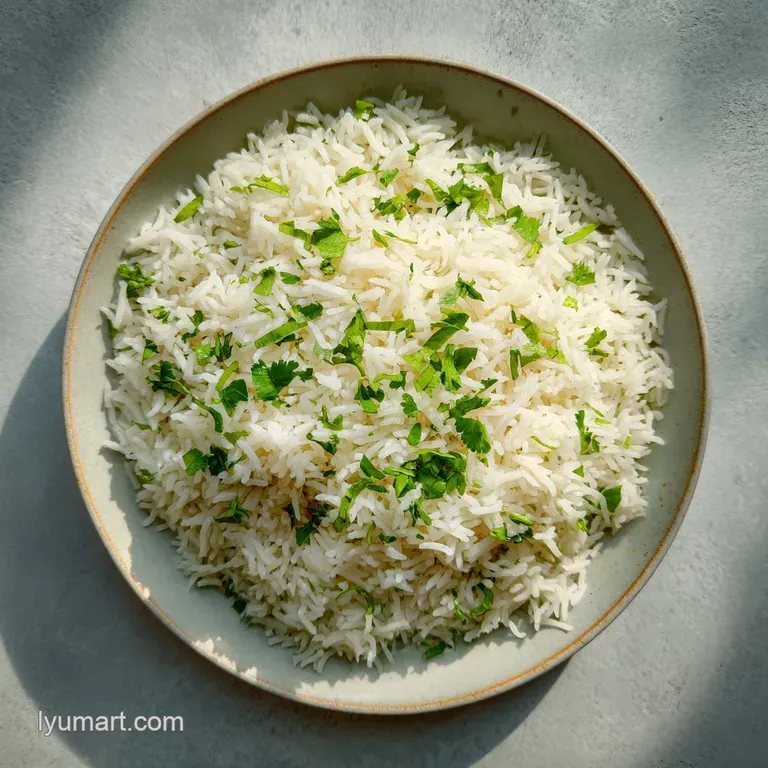
- 2 tbsp fresh parsley, finely chopped: For a burst of color and freshness at the finish.
| Original Ingredient | Substitute | Why It Works |
|---|---|---|
| Chicken Broth | Vegetable Broth | Same hydration levels. Note: Flavor is lighter and more herbal |
| Dry Orzo | Broken Vermicelli | Traditional in Middle Eastern versions; toasts very quickly |
| Unsalted Butter | Olive Oil | Creates a cleaner, more Mediterranean flavor profile |
If you are looking for a more hearty meal, you can easily serve this as a base for something like Shrimp Fried Rice the next day if you have leftovers, though the textures are quite different. The pilaf is designed to be the elegant partner to a main protein.
Necessary Tools for Fluffy Results
You don't need a professional kitchen, but a few specific tools make this process foolproof. First, a medium saucepan with a tight fitting lid is essential. If the lid is loose, steam escapes, and your rice will be undercooked.
I often place a clean kitchen towel between the pot and the lid during the resting phase to trap every bit of moisture.
A fine mesh strainer is your best friend here. Trying to rinse rice in a bowl and pour the water out is a recipe for losing half your grains down the sink. You want a strainer that allows the water to flow through freely while catching those tiny grains. Finally, use a fork, not a spoon, for the final fluffing.
A spoon mashes the grains together, while a fork tines separate them gently without breaking the delicate structure you've worked so hard to build.
Executing the Multi Stage Cooking Process
- Rinse the rice. Place the rice in a fine mesh strainer and rinse under cold water for 1–2 minutes, or until the water runs clear. Note: This removes the surface starch that causes stickiness.
- Toast the orzo. Melt the butter in a medium saucepan over medium heat. Add the dry orzo and stir constantly for 3–4 minutes until it turns a deep mahogany gold.
- Sauté the onions. Add the diced onion to the saucepan and cook for 2 minutes until translucent and soft.
- Toast the rice. Stir in the minced garlic and the rinsed rice. Cook for about 60 seconds until every grain is coated in garlic butter.
- Add liquid. Pour in the chicken broth, salt, pepper, and bay leaf. Increase heat to bring the liquid to a rolling boil.
- Simmer covered. Once boiling, reduce the heat to low, cover with a tight fitting lid, and simmer for 15-18 minutes until the liquid is fully absorbed.
- The resting phase. Remove the pot from the heat and let it rest undisturbed for 10 minutes. Note: Do not lift the lid during this time.
- Final fluffing. Remove the bay leaf, fluff the rice with a fork, and garnish with fresh parsley until the color is vibrant.
Resolving Common Texture and Heat Issues
Even with the best intentions, stovetops can be fickle. If you find your rice is still crunchy after the simmer time, it usually means your lid wasn't tight enough or your heat was a hair too low. On the flip side, a burnt bottom usually means the "low" setting on your burner is still a bit too aggressive.
The Solution for Mushy Rice
This usually happens if the rice wasn't rinsed well enough or if too much liquid was added. If it’s just slightly overdone, you can spread it out on a baking sheet and pop it in a warm oven for 5 minutes to dry it out.
The Fix for Burnt Bottoms
If you smell burning before the timer is up, don't stir it! You’ll just mix the burnt flavor into the good rice. Immediately set the bottom of the pot in a sink of cold water for 30 seconds to stop the cooking, then scoop out the top, unburnt portion.
| Problem | Root Cause | Solution |
|---|---|---|
| Crunchy rice | Steam escaped | Add 2 tbsp boiling water, cover, and rest 5 more mins |
| Greasy finish | Butter didn't emulsify | Stir in a squeeze of lemon juice to cut the fat |
| Lack of flavor | Under seasoned liquid | Use a bouillon base or increase salt in the next batch |
Common Mistakes Checklist
- ✓ Always rinse the rice until the water is perfectly clear.
- ✓ Use a heavy bottomed pot to ensure even heat distribution.
- ✓ Never peek! Lifting the lid kills the steam pressure.
- ✓ Toast the orzo longer than you think; it should look like dark wood.
- ✓ Let the rice rest off the heat it's the most important step.
Adjusting Portions and Ingredient Swaps
When you're cooking for a crowd or just for two, scaling this recipe requires a bit of finesse. For a half batch, use a smaller saucepan so the liquid still covers the rice properly. If you're doubling it, be careful with the spices.
Salt and pepper shouldn't be strictly doubled; start with 1.5x the amount and taste the broth before it boils.
Vegetarian Rice Pilaf Swap
To make this vegetarian or vegan, simply swap the chicken broth for a high-quality vegetable stock and use a neutral oil or vegan butter substitute. The flavor will be lighter, so I often add a pinch of dried thyme or a sliver of lemon zest during the sautéing phase to compensate for the missing chicken umami.
gluten-free Adaptation
Since orzo is a pasta made from wheat, it's not gluten-free. To keep the pilaf spirit without the gluten, you can use certified gluten-free orzo or replace the pasta entirely with toasted slivered almonds or pine nuts. The nuts provide that same "toasty" crunch and brown beautifully in the butter.
| Servings | Rice Amount | Broth Amount | Pan Size |
|---|---|---|---|
| 2 people | 0.5 cup | 1 cup | 1 quart |
| 4 people | 1 cup | 2 cups | 2 quart |
| 8 people | 2 cups | 3.75 cups | 4 quart |
Preservation Secrets and Reheating Techniques
There’s a big myth that you can't reheat rice safely. That’s simply not true, provided you cool it down quickly and store it right. Another myth is that the "crunchy bits" at the bottom of the pot are a failure.
In many cultures, that's called tahdig or socarrat, and it's considered the best part of the meal!
Storage: Store leftovers in an airtight container in the fridge for up to 4 days. For long term storage, you can freeze the pilaf in freezer bags for up to 3 months. When freezing, make sure to press all the air out to prevent freezer burn.
Zero Waste: Don't throw away those parsley stems! Chop them finely and sauté them with the onions for extra flavor. If you have leftover pilaf that's gotten a bit dry, it makes an incredible base for a quick soup just toss it into some simmering broth with leftover chicken and vegetables.
Enhancing Your Final Presentation
To really make this dish pop, think about the garnish. While parsley is the classic choice, a sprinkle of pomegranate seeds or toasted pistachios can turn this humble side into something truly "classic" and comforting.
If you're serving it with a Mediterranean dish, a little lemon zest stirred in at the end adds a brightness that cuts through the buttery richness.
Remember, this is a versatile foundation. Once you’ve mastered the basic technique, you can start experimenting with different liquids like coconut milk for a tropical twist or adding dried cranberries and saffron for a Persian inspired feast.
The "mistake I once made" was being too afraid to let things brown, but trust me on this: the color is where the flavor lives. Let that orzo get dark, let the rice smell like popcorn, and you’ll never go back to plain boiled rice again. Right then, let's crack on and get cooking!

Recipe FAQs
What gives rice pilaf its flavor?
Toasting the orzo in butter and using a chicken broth base provides the primary depth of flavor. Sautéing the onion and garlic in the same butter before adding the rice builds a savory foundation that infuses every grain.
How to cook rice for diabetic patients?
Rinse the rice thoroughly under cold water for 1 2 minutes until the water runs clear. This removes excess surface starch, which can help achieve a better texture, though portion control remains the most critical factor for blood sugar management.
What is the 5 5 5 rule for rice?
No, this is a common misconception for this specific recipe. Our method relies on a 15 18 minute simmer followed by a 10-minute rest period to redistribute moisture, which is the secret to perfectly fluffy grains without any gummy texture.
What are common mistakes making rice pilaf?
Lifting the lid during the simmer is the most frequent error. Peeking releases the steam pressure necessary for even cooking; keep the lid on until the 10-minute resting phase is complete to ensure consistent results.
How to ensure the orzo is perfectly toasted?
Stir the orzo constantly for 3 4 minutes over medium heat until it reaches a deep mahogany gold color. If you enjoyed mastering this browning technique, see how we apply similar color building principles to our Keto Korean Beef for a richer crust.
Is it necessary to use a heavy bottomed pot?
Yes, a heavy bottomed pot is essential for even heat distribution. It prevents hot spots that can scorch the butter or garlic while the rice is simmering.
Why is the resting step important?
Resting for 10 minutes off the heat allows the moisture to redistribute evenly throughout the grains. If you try to fluff the rice immediately after the timer goes off, the grains may be too wet or unevenly cooked.
Homemade Rice Pilaf

Ingredients:
Instructions:
Nutrition Facts:
| Calories | 290 kcal |
|---|---|
| Protein | 6 g |
| Fat | 7 g |
| Carbs | 51 g |
| Fiber | 1 g |
| Sugar | 1 g |
| Sodium | 358 mg |
