How Long to Cook Lasagna
- Time: Active 45 minutes, Passive 60 minutes, Total 1 hour 45 mins
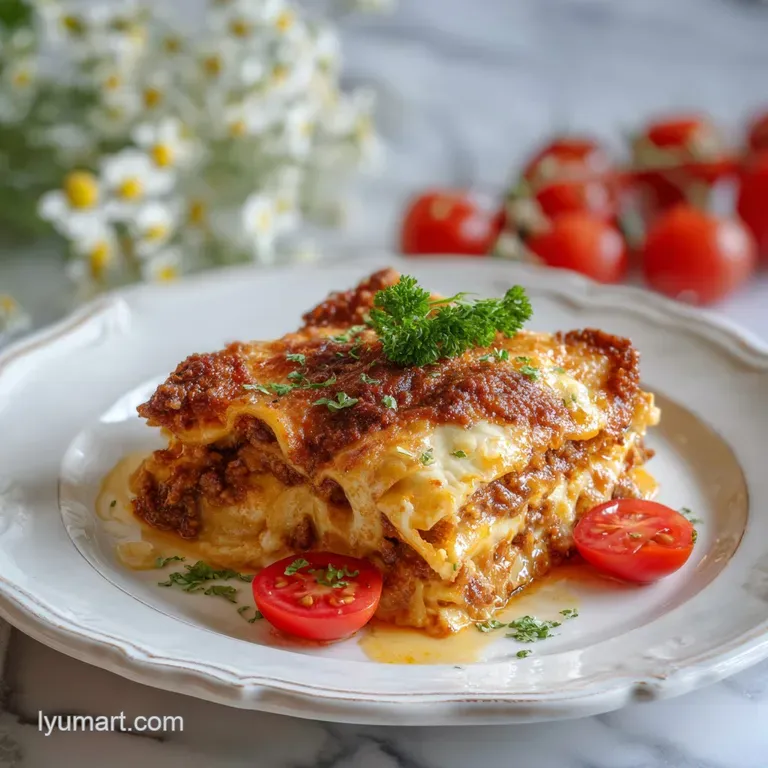
- Flavor/Texture Hook: Savory, velvety layers with a bubbly cheese crust
- Perfect for: Sunday family dinner or meal prep for the week
- Master Exactly How Long to Cook Lasagna
- Timing and Core Recipe Specs
- Essential Ingredients and Smart Swaps
- Necessary Tools for High Performance
- The Reliable Assembly Process
- Solving Common Baking Hurdles
- Practical Scaling and Adaptations
- Myths Regarding the Baking Process
- Storage and Zero Waste Methods
- Complementary Sides and Pairing Ideas
- Recipe FAQs
- 📝 Recipe Card
Master Exactly How Long to Cook Lasagna
There is nothing quite like the sizzle of a heavy casserole dish as it comes out of the oven, the edges of the cheese already turning that deep, golden brown. We have all been there, though, hovering by the oven door wondering if the middle is still cold or if the noodles have turned to mush.
It is the ultimate kitchen test, but once you understand the timing, it becomes second nature.
I remember my first attempt at a family dinner years ago. I pulled the tray out too early because I was hungry, and we ended up with what I call lasagna soup. It tasted fine, but it looked like a mess on the plate.
I learned the hard way that the oven time is not just about heat, it is about allowing the structural proteins to set.
This recipe is my tried and true method. We are talking about a full hour of baking to ensure the 1 lb of Italian sausage and 1 lb of beef chuck meld into those 56 oz of crushed tomatoes.
This is not a rushed meal, it is a labor of love that rewards your patience with a velvety finish and layers that actually stay together.
Timing and Core Recipe Specs
When we talk about how long to cook lasagna, we have to look at the stages. It is not just one block of time. You have the covered bake, which focuses on cooking the noodles through steam, and the uncovered bake, which focuses on the Maillard reaction for that cheese crust.
If you miss either stage, the texture just will not be right.
I usually aim for a 350°F environment. Some people like 375°F, but I find the lower temp gives the 1 lb of lasagna noodles time to hydrate without the sauce evaporating too quickly.
If you have ever had a dry, sticky lasagna, it is usually because the oven was too hot or the pan was not sealed properly.
| Feature | Classic Method | Fast Method |
|---|---|---|
| Total Bake Time | 60 minutes | 40 minutes |
| Noodle Texture | Silky and integrated | Al dente and distinct |
| Structural Integrity | High (slices cleanly) | Moderate (may slide) |
The classic method is my go to for guests because it allows the 30 oz of ricotta cheese to fully set with that large egg. It creates a custard like layer that is far superior to just dumping cheese in a pan. If you are looking for other comforting options for a busy Tuesday, you might enjoy my One Pan Chicken recipe which is much faster but still brings that home cooked feeling.
The Science of Why it Works
Starch Gelatinization: The noodles absorb the liquid from the 56 oz of crushed tomatoes, swelling and softening into a velvety texture as the heat breaks down the starch molecules.
Protein Denaturation: The large egg mixed into the ricotta cheese coagulates during the bake, creating a firm matrix that binds the cheese layers so the lasagna holds its shape when sliced.
Essential Ingredients and Smart Swaps
Getting the ingredients right is half the battle. We are using 1 lb of ground beef chuck for richness and 1 lb of Italian sausage for that punch of fennel and spice. The fat content in the beef chuck is important because it prevents the meat from becoming dry during the long 60 minute bake.
I always tell people to use low moisture mozzarella. Fresh mozzarella is beautiful on pizza, but in a lasagna, it releases too much water. You will end up with a puddle in the bottom of your pan. If you want that velvety pull, stick to the 1 lb of low moisture shredded mozzarella.
| Component | Science Role | Pro Secret |
|---|---|---|
| 30 oz Ricotta | Moisture & Protein | Mix with parsley and egg for a "set" layer |
| 56 oz Crushed Tomatoes | Acid & Hydration | Provides the steam needed to cook noodles |
| 1 lb Italian Sausage | Fat & Aromatics | Caramelize deeply before adding the sauce |
| 1 lb Lasagna Noodles | Starch Structure | Don't over boil if pre cooking; keep them firm |
For the 1 lb of ground beef chuck, you can use ground turkey, but I find the flavor is a bit thin. If you go that route, add an extra splash of olive oil to compensate for the missing fat. Similar to how we handle sauces in my Pasta Penne Pasta recipe, the balance of fat and acid is what makes the sauce stand out.
| Original Ingredient | Substitute | Why It Works |
|---|---|---|
| 1 lb Italian Sausage | Ground Pork + Fennel | Mimics the spice profile. Note: Needs more salt/pepper |
| 30 oz Ricotta Cheese | Small Curd Cottage Cheese | Similar moisture. Note: Result is slightly more acidic |
| 1 lb Mozzarella | Provolone (mild) | Same melting point. Note: Adds a sharper, smokier edge |
Necessary Tools for High Performance
You really need a deep dish for this. A standard 9x13 inch pan is the baseline, but if it is shallow, you are going to have sauce bubbling over onto the bottom of your oven. I have spent too many nights scrubbing burnt tomato sauce off oven racks to make that mistake again.
Always place a baking sheet on the rack below your lasagna just in case.
A heavy bottomed pot, such as a Lodge Dutch oven, is best for the sauce. You want even heat so the 2 tbsp of tomato paste does not scorch while you are blooming the 4 cloves of minced garlic. If the garlic burns, the whole 56 oz of sauce will taste bitter, and there is no fixing that.
Chef's Note: Freeze your mozzarella for 10 minutes before shredding. It makes the block firmer and prevents it from clumping in the grater, giving you those long, beautiful strands that melt evenly.
The Reliable Assembly Process

- Brown the meats. Cook the 1 lb beef chuck and 1 lb Italian sausage in a large pot until no longer pink and sizzle crisp.
- Aromatize the base. Add the 1 large diced yellow onion and 4 cloves of minced garlic until translucent and fragrant.
- Simmer the sauce. Stir in 56 oz crushed tomatoes, 2 tbsp tomato paste, 1 tsp oregano, 0.5 tsp salt, and 0.5 tsp pepper. Note: This develops the deep umami flavor.
- Prepare cheese filling. Mix 30 oz ricotta, 1 large egg, 0.5 cup parmesan, and 0.25 cup chopped parsley in a bowl until creamy and uniform.
- Start the layers. Spread 1 cup of sauce in the bottom of a 9x13 pan to prevent the 1 lb of lasagna noodles from sticking.
- Build the tiers. Layer noodles, then ricotta mixture, then meat sauce, then 1 lb shredded mozzarella. Repeat until the pan is full.
- Finish with cheese. Top the final layer with the remaining mozzarella and 0.5 cup parmesan until the surface is completely white.
- Cover and bake. Tent with foil and bake at 350°F for 45 minutes until the sauce is bubbling at the edges.
- Brown the top. Remove the foil and bake for another 15 minutes until the cheese is golden and begins to shatter.
- The rest period. Let the lasagna sit for 15 minutes until the layers set firmly. Note: This prevents the filling from running out.
Solving Common Baking Hurdles
The most common issue I hear about is the "watery lasagna" syndrome. This usually happens because the vegetables (like the onion) were not cooked down enough, or the ricotta was too wet. If you see a pool of liquid, do not panic. The rest period is designed to help the noodles soak up that extra moisture.
Another frustration is the crunchy noodle. This happens if the noodles were not completely covered in sauce. Any bit of pasta exposed to the air in the oven will turn into a cracker. I always make sure to spread the sauce right to the very edge of the pan.
Fixing Watery Layers
If your lasagna looks like a swimming pool, it is often due to the ricotta. Some brands are very high in whey. You can strain your ricotta through cheesecloth for an hour before mixing to ensure a thicker, more velvety result.
Preventing Crunchy Edges
The corners of the noodles are the first to dry out. I like to dip each noodle in the sauce pot before laying it down. This ensures total coverage and hydration during that 60 minute bake.
| Problem | Root Cause | Solution |
|---|---|---|
| Layers sliding apart | No egg in ricotta | Add 1 large egg to bind the proteins |
| Hard noodles | Not enough sauce | Ensure noodles are fully submerged in liquid |
| Burnt cheese top | Baked uncovered too long | Keep foil on for the first 45 minutes |
Practical Scaling and Adaptations
If you are cooking for a smaller crowd, you can easily cut this in half. Use an 8x8 inch square pan and reduce the bake time by about 10 to 15 minutes. For the 1 large egg, just beat it in a small bowl and use about half. It is better to have a slightly firmer ricotta than one that is too loose.
Scaling up for a party is where things get fun. If you are doing two pans at once, remember that your oven will work harder to maintain the temp. You might need to add 10 minutes to the total bake time. I always rotate the pans halfway through to account for hot spots in the oven.
- For a crispier crust: Switch the oven to broiler mode for the last 2 minutes, but watch it like a hawk.
- For a softer texture: Increase the crushed tomatoes by 8 oz to provide more hydration for the noodles.
- For faster cleanup: Line your baking sheet with parchment paper to catch any drips from the lasagna pan.
Myths Regarding the Baking Process
Myth: You have to boil "no boil" noodles first. Truth: No boil noodles are actually thinner and precooked, designed to hydrate entirely in the oven. If you boil them, they turn into mush. Just make sure your sauce is slightly thinner than usual to give them enough liquid to absorb.
Myth: Lasagna is better the same day. Truth: While it is great fresh, the flavor of the 1 tsp oregano and garlic actually deepens overnight. The structure also firms up, making it the king of leftovers.
Myth: You should rinse the noodles after boiling. Truth: Never do this. The starch on the surface of the noodles helps the sauce and cheese cling to them. Rinsing makes the noodles slippery and causes the layers to slide.
Storage and Zero Waste Methods
You can keep this lasagna in the fridge for up to 4 days. I actually think it tastes better on day two because the 1 lb of Italian sausage has time to really infuse the sauce. To reheat, I suggest a low heat in the oven (325°F) covered with foil so it doesn't dry out.
The microwave works too, but you lose that crispy cheese texture.
For zero waste, if you have leftover meat sauce, do not toss it. It makes an incredible base for a quick shakshuka the next morning or a topping for a baked potato. If you have leftover noodle scraps, chop them up and throw them into a minestrone soup.
Even the parmesan rinds can be tossed into your next batch of sauce to add a deep, salty umami.
Complementary Sides and Pairing Ideas
Since this lasagna is quite heavy with 1 lb of beef and 1 lb of sausage, I usually pair it with something bright and acidic. A simple arugula salad with a lemon vinaigrette cuts right through the richness of the 30 oz of ricotta. It refreshes the palate between those cheesy bites.
If you are feeling extra indulgent, garlic bread is the classic choice. I like to rub a raw garlic clove on toasted sourdough and top it with a little more of that 1 cup of parmesan cheese. It is simple, but it works every single time. This meal is about comfort, after all.
Precision Checkpoints
- Internal Temperature: The center should reach 165°F (74°C) to ensure the egg in the ricotta is fully cooked and set.
- The 15 Minute Rest: Do not skip this. The noodles need time to re absorb the carryover moisture, or the lasagna will collapse.
- The Foil Tent: Ensure the foil is not touching the cheese. If it does, the cheese will stick to the foil and pull right off when you uncover it. Use toothpicks to hold the foil up if your pan is very full.

High in Sodium
875 mg mg of sodium per serving (38% % of daily value)
The American Heart Association recommends limiting sodium intake to about 2,300mg per day.
Tips to Reduce Sodium in Your Lasagna
-
Swap Sausage-25%
Replace the Italian sausage with low-sodium ground turkey or chicken sausage. This can significantly reduce the sodium content from processed meats.
-
Reduce Parmesan-15%
Parmesan cheese is high in sodium. Reduce the amount used, or substitute with a lower sodium cheese like part skim mozzarella.
-
No-Salt Added Tomatoes-20%
Use no-salt added crushed tomatoes and tomato paste. This can drastically lower the sodium without sacrificing flavor.
-
Omit Added Salt-25%
Eliminate the added salt entirely. With the other flavorful ingredients, you likely won't miss it. Taste and adjust seasoning at the end if needed.
-
Fresh Herbs & Spices
Enhance the flavor with plenty of fresh herbs like basil and oregano, and spices like garlic powder, onion powder, and red pepper flakes. These boost flavor without adding sodium.
Recipe FAQs
Do you bake lasagna at 350 or 375?
350°F is generally recommended. While some recipes suggest 375°F, a slightly lower temperature allows the lasagna noodles more time to hydrate and cook through with the sauce without the sauce evaporating too quickly.
This also helps prevent the cheese from burning before the inside is fully heated.
How long should you leave lasagna in the oven?
A total of 60 minutes is ideal for a classic bake. This typically involves covering it for the first 45 minutes to allow steam to cook the noodles, and then uncovering for the final 15 minutes to achieve a golden, bubbly cheese crust. Make sure to let it rest for 15 minutes after baking.
How long does a lasagne take to cook?
Expect about 60 minutes of active baking time for a traditional lasagna. This includes covered and uncovered periods, ensuring the noodles are tender and the cheese is perfectly melted and browned. Allowing it to rest after baking is crucial for the layers to set properly.
Do you bake lasagna covered or uncovered?
You should bake it covered for most of the time, then uncovered. Tenting the lasagna with foil for the initial 45 minutes traps steam, which is essential for cooking the noodles thoroughly. Removing the foil for the last 15 minutes allows the cheese to melt and brown beautifully.
Why are my lasagna noodles still hard?
Hard noodles usually mean they weren't fully submerged in sauce. Lasagna noodles need ample liquid to absorb and soften during baking. Ensure every part of the noodle is covered in sauce and cheese layers to prevent dry, crunchy edges.
How do I prevent my lasagna from being watery?
Drain excess liquid from ingredients like ricotta and vegetables. Using low-moisture mozzarella instead of fresh, and ensuring your sauce isn't too thin, also helps. Some chefs strain their ricotta for an hour beforehand to achieve a thicker, more velvety result, similar to how we ensure a smooth texture in our Creamy Garlic Pasta Recipe: Velvety Finish.
Can I make lasagna ahead of time?
Yes, assembling lasagna up to 24 hours ahead is perfectly fine. Cover it tightly with plastic wrap and then foil, and refrigerate. When ready to bake, allow it to sit at room temperature for about 30 minutes before placing it in a slightly preheated oven, or add an extra 10-15 minutes to the bake time if going straight from the fridge.
How Long To Cook Lasagna
Ingredients:
Instructions:
Nutrition Facts:
| Calories | 642 kcal |
|---|---|
| Protein | 40g |
| Fat | 34g |
| Carbs | 40g |
| Fiber | 3.3g |
| Sugar | 5.4g |
| Sodium | 875mg |
