How Long to Bake a Potato: Crispy and Fluffy
- Time: Active 5 minutes, Passive 60 minutes, Total 65 minutes
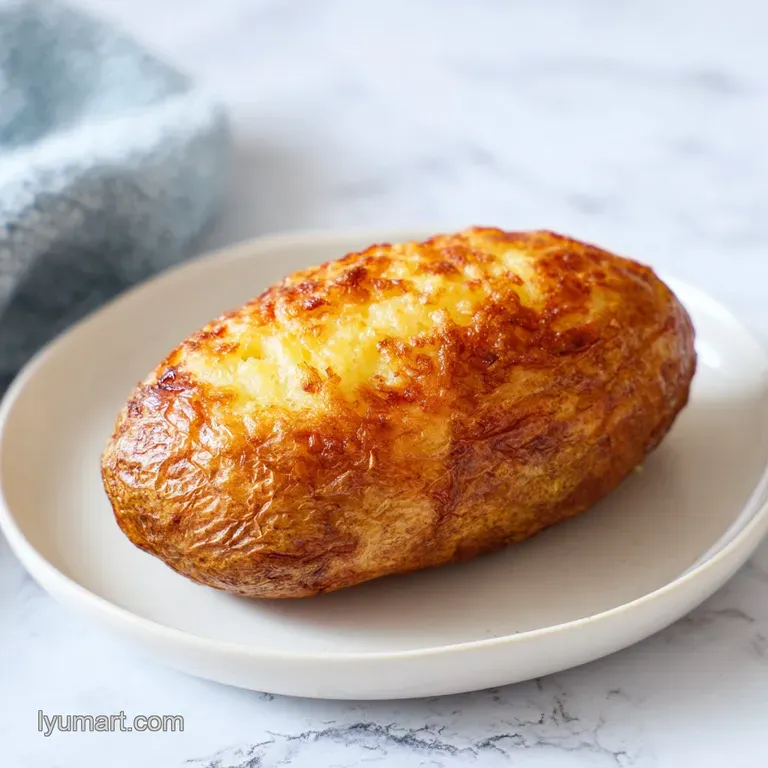
- Flavor/Texture Hook: Shatter crisp salty skin with a velvety, cloud like interior
- Perfect for: A humble weeknight side or a satisfying foundation for leftovers
- Finding Out How Long To Bake A Potato
- Essential Potato Recipe Specs
- Sourcing Humble Spud Ingredients
- Necessary Tools For Fluffy Spuds
- Step By Step Potato Guide
- Solving Common Baking Problems
- Creative Potato Filling Ideas
- Solving Potato Prep Myths
- Storing Your Leftover Potatoes
- Sides To Serve Potatoes With
- CRITICAL: Very High in Sodium
- Recipe FAQs
- 📝 Recipe Card
Finding Out How Long To Bake A Potato
There is a specific sound that happens when you tap a truly well baked potato with the back of a spoon. It’s a hollow, woody "clack" that tells you the skin has completely separated from the flesh, creating a protective, crispy shell.
I remember years ago, I used to wrap mine in foil because I thought it kept them moist. All I ended up with were sad, steamed, leathery potatoes that tasted like they’d been sitting in a school cafeteria. The day I stopped using foil was the day my kitchen life changed forever.
When you walk into the kitchen and see those four Russets sitting on the counter, you aren't just looking at a side dish. You’re looking at a blank canvas of comfort. The aroma that fills the house as they roast is earthy and grounded, like a warm hug on a rainy Tuesday.
It’s a classic American staple for a reason, but getting that velvety texture inside requires more than just "tossing it in." It requires respect for the starch.
We’ve all been there stabbing a potato with a knife only to find a hard, waxy center. Or worse, the skin is burnt but the middle is still grainy. This method solves that. We are going for that satisfying, humble result that makes everyone at the table sigh with relief.
It's about taking the most basic ingredient in your pantry and treating it like a king.
Essential Potato Recipe Specs
Success in the kitchen usually comes down to understanding the physics of your ingredients before the heat even hits them. For a baked potato, the goal is to manage the moisture levels so the skin dries out while the inside stays fluffy.
Starch Gelatinization: As the internal temperature climbs, the starch granules inside the Russet absorb moisture and swell. This is what creates that airy, light texture we crave.
The Vapor Escape: Pricking the skin isn't just a myth; it creates tiny chimneys for steam. If that steam stays trapped, the pressure can make the potato explode, or worse, turn the inside into a gummy mess.
Surface Tension: Brushing oil on at the very end, rather than the beginning, allows the skin to dehydrate first. This ensures the "shatter" effect rather than a greasy, chewy exterior.
| Thickness | Internal Temp | Rest Time | Visual Cue |
|---|---|---|---|
| 5 cm (Small) | 96°C (205°F) | 2 mins | Skin pulls away easily |
| 8 cm (Medium) | 96°C (205°F) | 4 mins | Tapping sounds hollow |
| 11 cm (Large) | 97°C (208°F) | 5 mins | Skin looks dusty and dry |
The time it takes to reach these internal goals depends heavily on the density of your specific spud. Russets are the gold standard here because their high starch and low moisture content make them behave like sponges for butter once they are opened.
| Ingredient | Science Role | Pro Secret |
|---|---|---|
| Russet Potato | High starch content | Choose ones that feel heavy for their size |
| Sea Salt | Draws out moisture | Use flaky salt for better surface area contact |
| Olive Oil | Heat conductor | Apply only in the last 15 minutes for maximum crunch |
If you find yourself out of Russets but still craving a side, you might consider a different path. While you can bake a Yukon Gold, the texture will be more creamy than fluffy. For a completely different vibe, my crispy sweet potato bites offer a faster, caramelized alternative that hits those same savory notes.
Sourcing Humble Spud Ingredients
For this recipe, we are sticking to the basics. You don't need fancy artisanal tubers; you just need the right type. The Russet is the undisputed heavyweight champion of the baking world. Its skin is thick enough to handle high heat, and its flesh is designed to shatter into beautiful, snowy flakes.
- 4 large Russet potatoes (10 12 oz each): Look for skins that are clear of "eyes" or green tinges. Why this? Russets have the perfect starch to water ratio for fluffiness.
- 2 tbsp extra virgin olive oil: A good quality oil helps the salt stick and crisps the skin. Why this? It has a high enough smoke point for the final 450°F blast.
- 1 tbsp flaky sea salt: This provides texture and draws out the last bit of surface moisture. Why this? Flakes stick better to the round surface of the skin.
- 1 tsp garlic powder: An optional but highly recommended savory boost. Why this? It toasts slightly in the oil, adding a nutty aroma.
| Original Ingredient | Substitute | Why It Works |
|---|---|---|
| Extra Virgin Olive Oil | Ghee (clarified butter) | Higher smoke point and adds a rich, toasted flavor. |
| Flaky Sea Salt | Kosher Salt | Good grain size for sticking, though less "crunch" than flakes. |
| Russet Potato | Yukon Gold | Note: The texture will be waxy and dense rather than fluffy. |
Necessary Tools For Fluffy Spuds
You don't need a lot of gear for this, but the gear you choose matters. The biggest mistake people make is placing the potato directly on a flat baking sheet. This creates a "hot spot" where the potato touches the metal, leading to a flat, hard, or even burnt bottom.
A wire rack is your best friend here. By lifting the potato up, you allow the 218°C air to circulate 360 degrees around the spud. It’s essentially a low tech version of an air fryer.
If you don't have a rack, you can crumple up some aluminum foil into small rings and rest the potatoes on top of those to keep them elevated.
You'll also want a sturdy vegetable brush. Potatoes grow in the dirt, and even "pre washed" ones often have grit hiding in the nooks. A clean potato is a potato you can eat skin and all, which is where all the minerals and half the flavor live.
Finally, an instant read thermometer is the only way to be 100% sure you've hit that 96°C sweet spot.
step-by-step Potato Guide
- Preheat your oven to 425°F (218°C). Scrub the potatoes under cold water with a vegetable brush to remove all dirt.
- Dry the potatoes thoroughly with a lint free towel. Note: Any leftover water will turn to steam and prevent the skin from getting crispy.
- Use a fork to prick each potato 6 to 8 times, approximately half an inch deep. Note: This allows steam to escape and prevents the potato from bursting.
- Place the potatoes directly on a wire rack set over a baking sheet. Bake "naked" without oil or foil for 45 minutes until the skins feel dry and slightly papery.
- Remove the tray from the oven and increase the temperature to 450°F (232°C).
- Brush the potatoes generously with the 2 tablespoons of olive oil, ensuring the entire surface is coated.
- Sprinkle the flaky sea salt and garlic powder evenly over the oiled skins.
- Return the potatoes to the oven for 10 to 20 minutes until the internal temperature reaches 205°F–210°F.
- Slice the potatoes open immediately with a sharp knife to release the final burst of steam.
- Use a fork to fluff the white interior until it looks like light, powdery snow.
Solving Common Baking Problems

Even with a simple recipe, things can go sideways. The most common issue is a potato that feels "done" on the outside but is still firm in the middle. This usually happens if the oven wasn't properly calibrated or if the potato was particularly cold when it went in.
The Problem Of Soggy Skin
If you pull your potato out and the skin feels soft or wet, it's likely a moisture issue. This often happens if the potatoes weren't dried properly after washing or if you wrapped them in foil.
Foil is the enemy of the crispy potato; it traps the steam against the skin, essentially boiling the exterior rather than roasting it.
Dealing With Dense Centers
A dense, heavy center means the starch hasn't fully "exploded." To fix this, you need heat. If your potato is hitting the time limit but still feels heavy, check your oven temp. You really need that internal 96°C (205°F) for the cells to separate and create that velvety finish.
| Problem | Root Cause | Solution |
|---|---|---|
| Hard center | Undercooked | Use a thermometer to hit 96°C (205°F) minimum. |
| Leathery skin | Oiled too early | Bake dry for 45 mins before adding oil. |
| Exploding potato | No steam vents | Prick with a fork at least 6 times. |
Common Mistakes Checklist
- ✓ Never wrap in foil if you want crispy skin (foil is for keeping things soft).
- ✓ Always dry the skin completely after washing (moisture is the enemy of crunch).
- ✓ Don't skip the wire rack (airflow is required for an even bake).
- ✓ Cut the potato open the second it leaves the oven (prevents steam from being reabsorbed).
- ✓ Use Russets specifically (waxier potatoes like Reds won't fluff).
Creative Potato Filling Ideas
The beauty of a baked potato is that it’s a vessel. Once you’ve mastered the base, you can scale this up for a crowd. If you’re cooking for a large family, I usually recommend 1.5x the salt and spices, but keep the oil ratio the same.
When scaling up, make sure your potatoes aren't touching on the rack; they need that "personal space" for the air to circulate.
If you’re looking for a variation that feels a bit more indulgent, you can turn these into "twice baked" beauties. Scoop out the fluff, mix it with sour cream and chives, and stuff it back in. It’s a similar vibe to my aromatic garlic mashed potatoes, but with the added bonus of that salty, roasted skin.
- The Classic: Butter, sour cream, sharp cheddar, and a mountain of fresh chives.
- The Tex Mex: Leftover chili, pickled jalapeños, and a dollop of Greek yogurt.
- The Breakfast: A soft poached egg, crispy bacon bits, and a drizzle of hot sauce.
- The Veggie: Sautéed spinach, feta cheese, and a squeeze of lemon.
| Method | Time | Texture | Best For |
|---|---|---|---|
| Standard Oven | 60-65 mins | Shatter crisp skin | The ultimate classic result |
| Air Fryer | 40-45 mins | Very crunchy | Speed and energy efficiency |
| Microwave + Oven | 25 mins | Soft skin | When you are in a massive rush |
Solving Potato Prep Myths
There are a lot of old school tips floating around that actually hurt your results. For instance, some people suggest soaking potatoes in salt water before baking. While this works for French fries to remove excess starch, for a baked potato, it just adds unnecessary moisture that makes it harder to get the skin crispy.
Another myth is that you should "slow bake" at 325°F for a longer time. While you can do this, you lose the Maillard reaction on the skin that gives you that deep, toasted flavor.
High heat (425°F and up) is the key to that satisfying "sizzle" when the oil hits the skin.
Finally, don't believe the "any potato works" line. Red potatoes and New potatoes have too much moisture and too little starch. They will never be fluffy; they will just be hot and firm. Stick to the Russet for the win.
Storing Your Leftover Potatoes
If you happen to have leftovers (a rare occurrence in my house), they keep surprisingly well. Store them in an airtight container in the fridge for up to 4 days. Whatever you do, don't microwave them to reheat if you want to keep the skin crispy.
Instead, pop them back in a 400°F (200°C) oven or air fryer for 10 minutes. This wakes up the oils and recrisps the exterior.
For zero waste, don't throw away the skins if you only eat the inside! You can toss the leftover skins with a little extra oil and salt and bake them at 450°F for 5 minutes to make "potato skin chips." They are an incredible snack on their own.
You can also dice up leftover baked potatoes for a head start on a breakfast hash the next morning.
Sides To Serve Potatoes With
A baked potato is the ultimate companion to a protein heavy meal. It balances the richness of a steak or the lightness of a roasted bird. I personally love serving these alongside a bright green vegetable to cut through the starch. For example, knowing how long to bake asparagus is a great skill to have, as it usually takes about 20 minutes the perfect amount of time to toss it in the oven during the final stage of your potato's crisping process.
The earthy, humble flavor of the potato also pairs beautifully with roasted chicken or a simple pot roast. It acts as a sponge for any pan juices or gravies. If you’re keeping it vegetarian, a big, crunchy Caesar salad provides the perfect temperature and texture contrast to the hot, soft potato.
It’s all about creating a balance on the plate that feels both satisfying and familiar.

CRITICAL: Very High in Sodium
1460 mg 1460 mg (63% 63%)
The American Heart Association recommends limiting sodium intake to less than 2,300 mg per day, with an ideal limit of less than 1,500 mg per day for most adults.
Tips to Reduce Sodium in Your Potato Recipe
-
Eliminate Flaky Sea Salt-25%
The 1 tablespoon of flaky sea salt is the primary source of sodium. Removing it entirely will significantly reduce the sodium content. Taste and adjust seasoning after other steps.
-
Control Garlic Powder
While garlic powder itself is low in sodium, be sure you are using pure garlic powder and not a seasoned salt blend. If you can find unsalted garlic powder, opt for that.
-
Boost Flavor with Herbs and Spices
Incorporate fresh or dried herbs like rosemary, thyme, chives, or dill. Use other spices such as black pepper, paprika, or onion powder to add depth of flavor without sodium.
Recipe FAQs
How long will it take to bake a potato in the oven at 400 degrees?
Bake for 60 to 70 minutes. While our optimal method requires starting at 425°F and finishing at 450°F for maximum crispness, a constant 400°F oven will typically require this extended time to reach an internal temperature of 205°F 210°F.
Do you bake potatoes in foil or not?
No, avoid foil entirely. Wrapping potatoes in foil traps steam, which softens the skin and results in a boiled texture rather than the desired crispy exterior.
Are baked potatoes good for diabetics?
Moderation is key. Baked potatoes have a high glycemic index, which can cause blood sugar spikes; however, eating them alongside protein or healthy fats can help mitigate this effect.
How long should I cook a baked potato at 350 degrees?
Expect 75 to 90 minutes. Lower temperatures significantly delay the dehydration needed to achieve a crispy skin, so ensure you check for an internal temperature of 205°F 210°F before serving.
Why is it necessary to prick the potato with a fork before baking?
Pricking allows internal steam to escape. Without these 6 to 8 ventilation holes, the pressure buildup from the evaporating water can cause the potato to burst inside your oven. If you enjoyed learning how to control moisture and texture here, you can apply similar logic to achieve perfectly crispy skin in other roasted dishes.
How to reheat leftover potatoes while keeping the skin crispy?
Place potatoes in a 400°F oven for 10 minutes. Avoid the microwave, which turns the skin soggy; the dry heat of an oven or air fryer effectively wakes up the oils and restores the original crunch.
How to determine if a baked potato is finished cooking?
Measure the internal temperature with an instant read thermometer. The potato is perfectly cooked once the center reaches 205°F to 210°F, ensuring a light and fluffy interior texture.
How To Bake Potatoes

Ingredients:
Instructions:
Nutrition Facts:
| Calories | 308 kcal |
|---|---|
| Protein | 6.2 g |
| Fat | 7.1 g |
| Carbs | 56.2 g |
| Fiber | 4.1 g |
| Sugar | 1.8 g |
| Sodium | 1460 mg |
