Magnolia Bakery Banana Pudding: the Ultimate Copycat
- Time: Active 20 minutes, Passive 8 hours, Total 8 hours 20 minutes
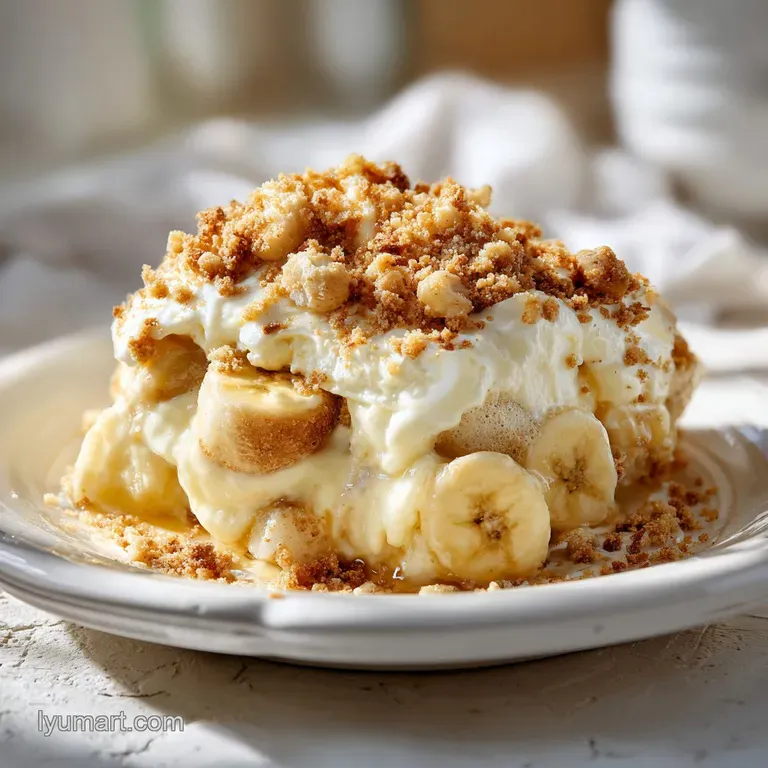
- Flavor/Texture Hook: Velvety vanilla clouds paired with soft, pillowy wafers
- Perfect for: Potlucks, family gatherings, or anyone craving a classic NYC bakery vibe
- Creating the Legendary magnolia bakery banana pudding recipe
- Core Specifications for Your Sweet Success
- Selecting the Finest Elements for Texture
- Tools Required for a Silky Finish
- Step by Step Assembly of the Masterpiece
- Solving Common Texture and Appearance Issues
- Adjusting the Recipe for Different Needs
- Preservation and Repurposing Your Sweet Treat
- Elevating the Visual Appeal of Your Dessert
- Understanding the Pudding Perfection Myths
- Recipe FAQs
- 📝 Recipe Card
Creating the Legendary magnolia bakery banana pudding recipe
Imagine walking through the West Village, the air thick with the scent of toasted sugar and fresh cream, as you finally pull open that heavy glass door. There is a specific aroma that hits you - it is not just sweet, it is creamy, comforting, and nostalgic all at once.
That is the magic we are bringing into your kitchen today with this magnolia bakery banana pudding recipe. It is a dish that proves you do not need a blowtorch or fancy molecular gastronomy to create something that people will talk about for weeks.
The real hero of this story is the sweetened condensed milk. While some might reach for granulated sugar, this thick, syrupy nectar provides a specific kind of "weight" to the flavor that sugar simply cannot replicate. It creates a silky foundation that allows the vanilla notes to bloom without being grainy.
When I first tried making this, I underestimated how much this one ingredient dictates the final mouthfeel. It is the glue that binds the airy whipped cream to the structure of the pudding, ensuring every spoonful feels like a luxury.
We are going for a texture that sits somewhere between a soft cloud and a structured trifle. This recipe is all about patience and the beauty of the "set." You are not just making a pudding, you are orchestrating a transformation where crisp wafers absorb just enough moisture to become tender, but not mushy.
It is a delicate balance, and honestly, it is the most rewarding thing to watch come together as you peel back the plastic wrap after a long chill.
Core Specifications for Your Sweet Success
The beauty of this dessert lies in its simplicity, but that doesn't mean we should ignore the technical side of things. To get that signature Magnolia lift, we have to be precise about our ratios.
This isn't a recipe where you want to "eyeball" the water or the cream, as the water to pudding mix ratio is what prevents the whole thing from turning into a soup. We want a sturdy base that can support the weight of fresh fruit and layers of cookies.
Hydration Ratio: The 1.5 cups of ice cold water is calculated to fully bloom the 3.4 oz of instant pudding mix without over saturating it. This creates a concentrated vanilla base that can stand up to being folded into the heavy cream.
If you use too much water, the structural integrity collapses, and you'll end up with a bowl of liquid rather than a fluffy masterpiece.
Aeration Control: When we whip the 3 cups of heavy whipping cream, we are aiming for stiff peaks. These tiny air bubbles are what give the pudding its "lift." Without proper aeration, the dessert feels heavy and oily. With it, the pudding becomes a mousse like dream.
I've found that using a chilled metal bowl actually makes a noticeable difference in how quickly those peaks form and how long they stay stable.
| Measurement Category | Value | Purpose |
|---|---|---|
| Total Preparation | 20 minutes | Active whisking and layering time |
| Initial Setting | 4 hours | Necessary for the pudding to fully hydrate |
| Final Softening | 4 to 8 hours | Allows wafers to reach "cake" consistency |
This timeline is non negotiable if you want the authentic experience. You can't rush the way the wafers interact with the cream. If you eat it too early, the cookies are still crunchy and the flavors haven't melded.
If you wait the full 8 hours 20 minutes, the cookies transform into something resembling a soft sponge cake, which is exactly what we want.
Selecting the Finest Elements for Texture
The "why" behind these ingredients is just as important as the "what." We are looking for a specific chemical harmony between the fats, sugars, and starches. For instance, using "instant" pudding mix instead of the cook and-serve variety is essential because the starches in instant mix are pre gelatinized.
They thicken immediately upon contact with cold liquid, which is vital for maintaining the cold chain of the dessert.
Stabilized Fat: Heavy whipping cream is the backbone here. By choosing a high fat cream (at least 36%), you ensure the pudding stays airy even after 8 hours in the fridge. Lower fat "light" creams will weep moisture, leading to a soggy bottom that no one wants.
Trust me, go for the full fat stuff; it is where the magic happens.
Starch Interaction: Nilla Wafers are the traditional choice for a reason. They have a specific density and sugar content that allows them to absorb moisture from the pudding without disintegrating. They act like a sponge, drawing in the vanilla scented cream while maintaining their shape.
| Component | Role | Pro Secret |
|---|---|---|
| Sweetened Condensed Milk | Provides "body" and smooth sweetness | Chill it before mixing to keep the water temperature low |
| Instant Vanilla Pudding | Acts as the structural stabilizer | Whisk for exactly 2 minutes to ensure no starch clumps remain |
| Heavy Whipping Cream | Introduces air and a velvety mouthfeel | Stop whipping the moment peaks stand straight up to avoid over mixing |
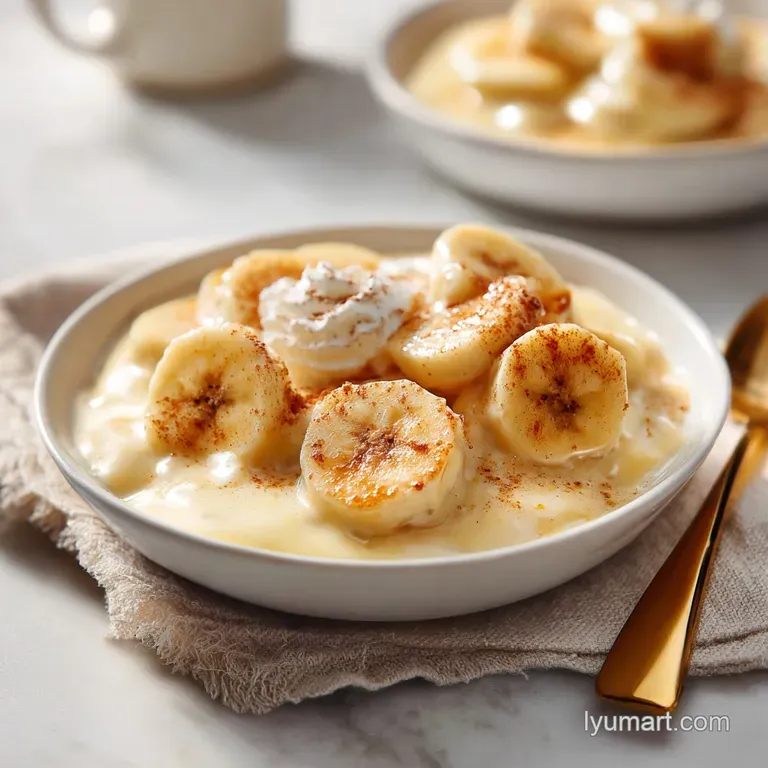
When selecting your bananas, look for fruit that is yellow with just a few brown freckles. If they are too green, they lack the sweetness and soft texture needed. If they are too dark, they become slippery and can make the layers slide around.
You want that "just right" ripeness where the aroma is strong but the fruit still holds a clean slice.
Tools Required for a Silky Finish
You don't need a professional pastry kitchen to pull this off, but a few specific tools will make your life much easier. First and foremost, a stand mixer or a high-quality hand mixer is a necessity. Whipping 3 cups of heavy cream by hand is a workout that most of us aren't looking for on a Saturday afternoon.
The consistent speed of a mixer ensures even aeration, which is the secret to that "bakery perfect" fluffiness.
I always recommend using a large glass trifle bowl if you have one. Part of the joy of a magnolia bakery banana pudding recipe is seeing those beautiful layers of yellow pudding, white cream, and golden wafers through the side of the dish.
If you don't have a trifle bowl, a deep 9x13-inch glass dish works beautifully too. Just make sure it is deep enough to hold at least three full layers of everything.
Chef's Note: Before you start, put your metal mixing bowl and whisk attachment in the freezer for 10 minutes. Cold tools keep the fat globules in the cream from melting, resulting in a much more stable foam and a lighter final texture.
A flexible rubber spatula is also your best friend here. When it comes time to combine the heavy pudding base with the delicate whipped cream, you cannot use a whisk. A whisk will knock the air right out of your cream, leaving you with a dense, flat dessert.
The spatula allows you to "fold" a gentle turning motion that incorporates the two mixtures while keeping those precious air bubbles intact.
step-by-step Assembly of the Masterpiece
Now we get to the part where it all comes together. Follow these steps exactly, especially the chilling times, to ensure your pudding has the structural integrity of the NYC original.
- Whisk the base. In a large mixing bowl, beat together the 14 oz of chilled sweetened condensed milk and 1.5 cups of ice cold water until the mixture is completely smooth. Note: Using ice cold water is crucial for the instant pudding to set correctly.
- Bloom the pudding. Gradually whisk in the 3.4 oz of instant vanilla pudding mix. Continue whisking for approximately 2 minutes until the mixture is thick and no lumps remain. Cover the bowl tightly and refrigerate for at least 4 hours (or overnight) until it is completely firm.
- Whip the cream. In your chilled metal bowl, pour in the 3 cups of heavy whipping cream. Whip on medium high speed until stiff peaks form and the whisk leaves clear tracks. Be careful not to over whip into butter.
- Combine the layers. Gently fold the cold, set pudding mixture into the whipped cream using a rubber spatula. Use a "cut and fold" motion until no yellow streaks remain and the mixture is uniform.
- Prep the fruit. Peel and slice your 5 large bananas into uniform rounds. Note: Don't slice them too thin, or they will disappear into the pudding; about 1/2 cm is ideal.
- Start layering. In your chosen dish, place a single layer of 11 oz of Nilla Wafers across the bottom. Follow this with a layer of sliced bananas, then spread about one third of the pudding mixture over the top.
- Repeat the process. Continue layering wafers, then bananas, then pudding until you have used all the ingredients. I usually aim for three full layers.
- The final chill. Cover the dish tightly with plastic wrap, pressing it slightly against the top layer of pudding to prevent a skin from forming. Refrigerate for an additional 4 to 8 hours until the wafers have softened into a cake like texture.
The waiting is the hardest part, but it is also the most important "ingredient." If you try to eat this right after assembly, you'll find the wafers are still crunchy and the bananas haven't had time to perfume the cream.
This is a great recipe to make a day before a party, as it only gets better with a little time in the cold.
Solving Common Texture and Appearance Issues
Even with the best intentions, things can sometimes go slightly sideways in the kitchen. The most frequent complaint I hear is about the pudding being too runny. Usually, this happens because the initial pudding/milk/water mixture didn't get enough time to fully hydrate in the fridge.
That 4 hour window isn't a suggestion; it is a chemical requirement for the starches to bond.
Preventing Banana Oxidation
Nothing ruins the look of this beautiful dessert faster than grey or brown bananas. This happens because of an enzyme called polyphenol oxidase reacting with oxygen. To prevent this, make sure your bananas are fully submerged or "sealed" by the pudding layers. The pudding acts as a physical barrier against the air.
You can also lightly toss the slices in a tiny bit of lemon juice, but be careful too much will add an unwanted tang to your sweet vanilla dream.
Fixing a Runny Pudding
If you've folded everything together and it feels more like a thick drink than a fluffy cloud, don't panic. You can sometimes save it by whipping an extra half cup of heavy cream to very stiff peaks and gently folding it in. However, the best "fix" is prevention.
Ensure your water was truly ice cold and your sweetened condensed milk was chilled. Temperature is the primary driver of stability in no bake desserts.
| Problem | Root Cause | Solution |
|---|---|---|
| Soggy/Mushy Wafers | Chilled for longer than 12 hours | Serve within the 4 to 8 hour window for the best "cake" texture |
| Lumpy Pudding Base | Pudding mix added too quickly | Sift the mix in slowly while whisking constantly for 2 mins |
| Weeping/Watery Bottom | Using low-fat cream or milk | Always use heavy whipping cream with at least 36% fat content |
If you are worried about the dessert holding up during a warm outdoor event, you might want to consider the "stabilized" route. For another incredibly reliable no bake option that handles room temperature well, my No Bake Peanut Butter Pie uses a similar cream cheese base for extra structure.
Common Mistakes Checklist:
- ✓ Skipping the 4 hour initial chill (leads to a soup like consistency).
- ✓ Using room temperature water (prevents the pudding starches from setting firmly).
- ✓ Over whipping the cream until it becomes grainy (destroys the silky mouthfeel).
- ✓ Slicing bananas too far in advance (causes browning before they even hit the bowl).
- ✓ Forgetting to cover the dish tightly (allows the pudding to pick up "fridge smells").
Adjusting the Recipe for Different Needs
One of the questions I get most often is how to scale this up for a massive party or down for a quiet night in. Because this recipe relies on the specific volume of the instant pudding box, scaling can be a little tricky if you aren't careful with the ratios. If you're looking for a similar creamy comfort but want a classic baked custard vibe, you might also enjoy my Buttermilk Pie recipe, which scales beautifully for large groups.
Scaling for Crowds
If you want to double this recipe, do not just double the salt or spices (if you were adding any). For this specific pudding, you can double the ingredients exactly, but you will need a massive container think a 5 quart punch bowl. When doubling, work in two batches for the whipped cream.
Most standard home mixers struggle to properly aerate 6 cups of cream at once, and you'll end up with uneven peaks.
| Servings | Pudding Mix | Heavy Cream | Dish Size |
|---|---|---|---|
| 7 Servings | 1.7 oz (half box) | 1.5 cups | 8x8 square pan |
| 15 Servings | 3.4 oz (1 box) | 3 cups | 9x13 or Trifle bowl |
| 30 Servings | 6.8 oz (2 boxes) | 6 cups | 2 large Trifle bowls |
When scaling down, the hardest part is the half box of pudding mix. I recommend using a kitchen scale to measure out exactly 48 grams (which is half of the 3.4 oz box). This ensures your ratios stay perfect. For the sweetened condensed milk, half a can is exactly 7 oz.
You can store the remaining half in a sealed jar in the fridge for your morning coffee!
Preservation and Repurposing Your Sweet Treat
Storing this pudding is a bit of a race against time. Because fresh bananas are involved, the clock starts ticking the moment you slice them. In the fridge, the pudding is at its absolute peak between 4 and 12 hours after assembly.
Beyond that, the bananas will start to release moisture (syneresis), which can make the pudding a bit watery, and the wafers will lose their "cake" structure and become quite soft.
Fridge Life: Keep it tightly covered with plastic wrap. It will stay safe and tasty for up to 3 days, but be prepared for the bananas to brown slightly and the texture to soften further each day. It is still delicious, just less "pretty."
Freezer Rules: Honestly, I don't recommend freezing this specific magnolia bakery banana pudding recipe. The cellular structure of the bananas breaks down when frozen and thawed, turning them into mush. Plus,, the whipped cream and pudding mixture can separate and become grainy upon thawing.
If you must freeze it, eat it while it is still partially frozen it tastes a bit like a banana cream pie ice cream!
Zero Waste Ideas: If you have leftover pudding that is looking a little "tired," don't toss it! You can blend it into a milkshake with a splash of milk and a scoop of vanilla ice cream. The softened wafers blend right in, creating a "cake batter" flavor that is out of this world.
You can also use the extra banana peels to make a simple fertilizer for your houseplants just soak them in water for 24 hours!
Elevating the Visual Appeal of Your Dessert
While a big bowl of pudding is always welcome, sometimes you want that "wow" factor. The way you present this can take it from a casual family snack to the centerpiece of a celebration. Since we are using such simple ingredients, the visual texture is where we can really show off our skills.
Three Levels of Plating
- Simple Style: Scoop the pudding into a large glass bowl, ensuring you can see the wafers and bananas pressed against the sides. Top with a few extra crushed wafers right before serving for a bit of crunch.
- Polished Style: Create individual portions in small Mason jars or wine glasses. This looks incredibly intentional and prevents the "messy scoop" look when serving. Top with a single perfect banana slice and a whole wafer tucked in at a 45 degree angle.
- Restaurant Style: Using a wide, shallow bowl, place a large "quenelle" (an elegant oval scoop) of the pudding in the center. Surround it with a few "deconstructed" elements: a drizzle of salted caramel, some toasted macadamia nuts for crunch, and a sprig of fresh mint.
| Plating Level | Key Feature | Best For |
|---|---|---|
| Simple | Bulk layers in a clear dish | Casual backyard BBQs |
| Polished | Individual glass jars | Bridal showers or brunches |
| Restaurant | Wide bowl with garnishes | Dinner parties |
The "Decision Shortcut" for presentation is easy: If you want it to look professional, always save a handful of wafers to crush and sprinkle on top at the very last second. This adds a textural contrast (crunchy vs. soft) that makes the dessert feel much more sophisticated.
Understanding the Pudding Perfection Myths
There are a few "old wives' tales" floating around the baking world regarding this recipe that we should clear up. One common myth is that you must use "cooked" custard for an authentic taste. While a cooked custard is delicious, the Magnolia Bakery version famously uses the instant method. Why?
Because the instant mix provides a specific stability and "clean" vanilla flavor that doesn't compete with the fresh bananas.
Another myth is that you can't use frozen bananas. While you can technically use them if you're blending them into a smoothie, in this layered pudding, they are a disaster.
Frozen bananas lose their structural integrity and release too much water as they thaw, which will turn your beautiful pudding into a soggy mess. Stick to fresh, firm ripe fruit for the best results.
Finally,, some people believe you can substitute Cool Whip for the heavy whipped cream. While it might save time, it completely changes the soul of the dish. Cool Whip is an oil based product and has a very different melting point and "mouth coating" feel than dairy based heavy cream.
For that true, high end bakery experience, the 3 cups of heavy whipping cream are non negotiable. The way the dairy fat carries the banana flavor is something a substitute just can't replicate.

Recipe FAQs
What's in Magnolia Bakery banana pudding?
This dessert features a blend of sweetened condensed milk, ice-cold water, instant vanilla pudding mix, heavy whipping cream, Nilla wafers, and fresh bananas. These simple ingredients create the iconic flavor profile and signature texture when layered correctly.
How to recreate Magnolia Bakery banana pudding?
Whisk the condensed milk, ice-cold water, and pudding mix together before refrigerating for at least 4 hours. Afterward, fold this mixture into stiffly whipped heavy cream and layer it in a dish with Nilla wafers and sliced bananas.
How good is Magnolia Bakery banana pudding?
It is widely considered the gold standard for banana pudding due to its unique cake like wafer texture. By allowing the assembled dessert to sit for 4 to 8 hours, the wafers absorb moisture from the pudding, creating a sophisticated consistency that is much better than freshly assembled versions.
What makes Magnolia Bakery's pudding special?
The secret lies in the strict chilling protocol and the specific reaction between the pudding base and the wafers. If you enjoy the precision of ingredient ratios here, you will find that same logic applied to our silky smooth cream of coconut preparation.
Is it necessary to use ice-cold water instead of milk for the pudding base?
Yes, using ice-cold water is essential for the pudding to set properly. Replacing it with milk can alter the chemical set of the instant mix and prevent the pudding from achieving the necessary structural integrity.
How to prevent the banana slices from turning brown?
Slice the bananas immediately before assembly and ensure they are fully submerged or covered by the pudding mixture. When the fruit is shielded from air by the cream and pudding layers, the oxidation process is significantly slowed during the required 4 to 8-hour refrigeration period.
Can I speed up the chilling time for the pudding?
No, the chilling times are non-negotiable for the correct texture. You must allow the initial base to firm up for at least 4 hours and the final assembled dish to set for another 4 to 8 hours to ensure the wafers soften into that signature cake like state.
Magnolia Banana Pudding

Ingredients:
Instructions:
Nutrition Facts:
| Calories | 398 kcal |
|---|---|
| Protein | 4.5 g |
| Fat | 22.9 g |
| Carbs | 44.5 g |
| Fiber | 1.3 g |
| Sugar | 34.8 g |
| Sodium | 212 mg |
