Peanut Butter Balls with Crisp Chocolate
- Time: Active 20 minutes, Passive 1 hour, Total 1 hour 20 mins
- Flavor/Texture Hook: Shatter crisp dark chocolate with a silky, salted nut butter core
- Perfect for: Elegant gifting, mindful snacking, or a stunning holiday dessert spread
- The Science Behind Perfect Results
- Core Specs for Success
- Sourcing Your Premium Components
- Essential Tools for Precision
- The Path to Plated Magic
- Solving Common Texture Issues
- Creative Flavor Adaptations
- Preserving That Fresh Snap
- Presenting Your Stunning Creation
- Kitchen Truths Debunked
- Recipe FAQs
- 📝 Recipe Card
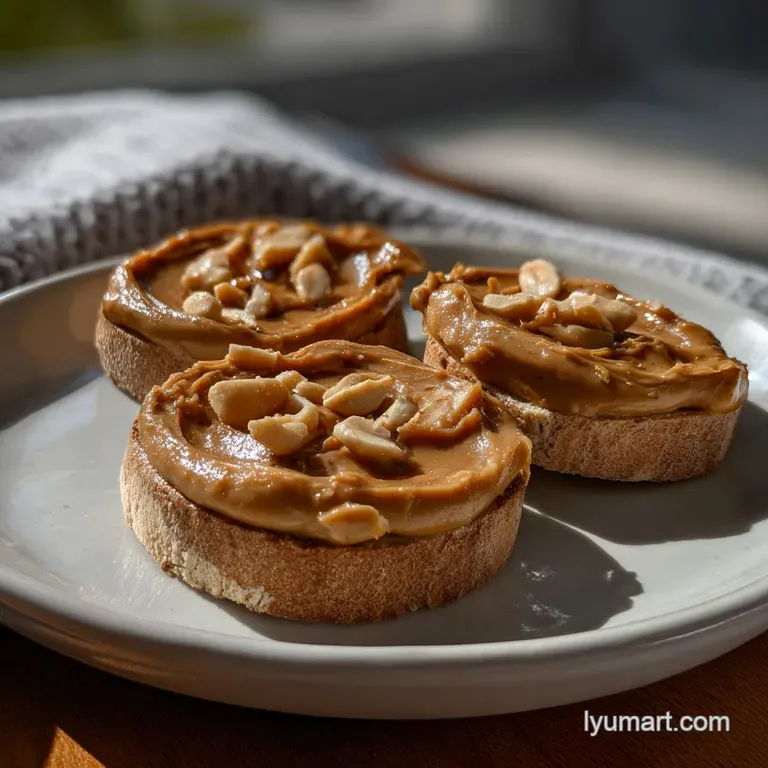
Imagine biting through a thin, glass like shell of 70% dark chocolate only to hit a center so velvety it practically melts. That is the magic of these treats. For years, I struggled with the traditional buckeyes recipe, finding them far too sweet and often quite gritty from the mountain of confectioners' sugar required to make them hold their shape.
Honestly, I wanted something that tasted like real food but looked like it belonged in a high end patisserie window.
The secret I discovered is all about the "binder" we use. By switching to finely ground oat flour, we get a structure that is stable enough to roll but retains a beautiful, fudge like moisture. It's a total shift in how we think about no bake treats.
We are moving away from the sugar bomb territory and into the world of balanced, complex flavors where the salt and the deep cocoa notes do the heavy lifting.
We are going to walk through this together, from the initial mix to that final, satisfying dip. I’ve made every mistake possible, from chocolate that seizes to centers that crumble, so you don't have to.
We are aiming for stunning results here, the kind that make your friends ask which boutique bakery you visited. Let’s get into the science of why this actually works so much better than the shortcut versions you might have seen online.
The Science Behind Perfect Results
Lipid Emulsification: The natural oils in the creamy peanut butter are stabilized by the fine particles of oat flour, creating a cohesive dough that resists "oil bleed" during the chilling phase.
Hydroscopic Absorption: Raw honey acts as a humectant, drawing in just enough moisture to keep the center supple while the starches in the oat flour provide the necessary tensile strength for rolling.
Crystallization Control: Adding 15g of coconut oil to the dark chocolate chips lowers the melting point slightly and ensures a glossy finish that snaps cleanly without being too brittle to bite.
Thermal Mass Management: Chilling the rolled centers for exactly 20 minutes creates a temperature differential that "shocks" the warm chocolate upon contact, causing it to set instantly and prevent unappealing streaks or "feet" at the base.
Core Specs for Success
| Feature | Precision Target | Why It Matters |
|---|---|---|
| Weight Accuracy | 90g Oat Flour | Prevents the center from becoming crumbly or overly sticky. |
| Chilling Time | 20 minutes (Freeze) | Ensures the chocolate sets rapidly for a smooth, professional finish. |
| Yield Count | 24 uniform spheres | Guarantees even chocolate coverage and consistent caloric density. |
When comparing methods, it is easy to see why taking the extra five minutes to use fresh ingredients pays off. Shortcut versions often rely on pre made frostings or excessive sugar which ruins the mouthfeel.
| Feature | Fresh Ingredient Method | Shortcut Method |
|---|---|---|
| Texture | Silky and fudge like | Often grainy or unpleasantly "waxy" |
| Flavor Profile | Deep nuttiness and floral honey | Dominant artificial sugar notes |
| Shelf Stability | Maintains moisture for 7 days | Tends to dry out or become greasy |
Sourcing Your Premium Components
For the best results, I always reach for Santa Cruz Organic Creamy Peanut Butter. The lack of stabilizers means the flavor is intense, but you must stir it well before measuring to ensure the fat is evenly distributed.
- 1 cup (250g) natural creamy peanut butter Why this? Provides the essential fatty base and primary flavor profile for the center.
- 0.75 cup (90g) finely ground oat flour Why this? Offers structure without the graininess of powdered sugar or the heaviness of wheat.
- 3 tbsp (60g) raw honey Why this? Adds a natural sweetness and binds the dry ingredients into a pliable dough.
- 1 tsp (5ml) pure vanilla extract Why this? Rounds out the earthiness of the peanuts with floral, aromatic top notes.
- 0.25 tsp (1.5g) fine sea salt Why this? Crucial for cutting through the richness and intensifying the dark chocolate's character.
- 1 cup (175g) dark chocolate chips (70% cacao) Why this? High cocoa solids provide the "snap" and sophisticated bitterness required for balance.
- 1 tbsp (15g) coconut oil Why this? Thins the chocolate for a professional coating and adds a subtle, brilliant shine.
| Original Ingredient | Substitute | Why It Works |
|---|---|---|
| Raw Honey | Maple Syrup (Grade A) | Similar viscosity. Note: Result will be slightly softer and have a woodsy flavor. |
| Oat Flour | Almond Flour (super fine) | High fat content. Note: Creates a much softer, more fragile ball; requires longer chilling. |
| Creamy Peanut Butter | Almond Butter (no stir) | Similar fat to protein ratio. Note: Yields a more neutral, toasted flavor profile. |
Essential Tools for Precision
To get that boutique look, I swear by my KitchenAid Hand Mixer. While you can mix by hand, the mixer aerates the peanut butter just enough to make the final texture feel lighter. You will also need a Lodge Cast Iron Skillet or a small saucepan to act as the bottom of a double boiler.
I find that gentle, indirect steam is the only way to melt chocolate without risking a scorched, grainy mess.
Don't forget a small cookie scoop (about 1 tablespoon size). It’s the difference between a tray of "peanut butter balls" that look home-made and a set that looks curated. Consistency in size ensures that every single one has the exact same ratio of chocolate to filling. Finally, grab some parchment paper.
Putting these directly on a plate is a mistake I once made, and let's just say the "shatter" happened on the plate, not in my mouth.
The Path to Plated Magic

Phase 1: Mixing Base
- Aerate the butter. Place 250g of creamy peanut butter in a bowl and whisk briefly until smooth and glossy.
- Combine wet ingredients. Add 60g raw honey and 5ml vanilla extract to the peanut butter. Note: This creates a loose emulsion that will easily accept the dry flour.
- Incorporate the solids. Sift in 90g oat flour and 1.5g fine sea salt. Note: Sifting prevents "flour pockets" which can ruin the velvety texture.
- Test the dough. Stir until a thick, pliable dough forms that pulls away from the sides of the bowl.
Phase 2: Rolling Dough
- Portion precisely. Use a small scoop to create 24 even mounds on a parchment lined tray.
- Form the spheres. Roll each mound between your palms until perfectly round and smooth.
- Flash freeze. Place the tray in the freezer for exactly 20 minutes until firm to the touch but not frozen solid.
Phase 3: Chocolate Dipping
- Melt gently. Combine 175g dark chocolate chips and 15g coconut oil in a double boiler. Cook until 90% melted, then stir until completely liquid.
- Dip and coat. Use a fork to submerge each chilled ball into the chocolate, tapping the fork against the bowl to remove excess.
- Set the shell. Place back on the parchment and chill in the fridge for 30 minutes until the chocolate shell is matte and firm.
Solving Common Texture Issues
Dough Too Sticky
If your mixture feels more like a batter than a dough, the culprit is usually the moisture content of your specific peanut butter. Some natural brands are much oilier than others. I’ve had days where the humidity in the kitchen even seemed to play a role.
Don't panic and dump in a cup of flour; that’s how you get dry, sandy centers.
Chocolate Sliding Off
This usually happens because the centers were too cold or too oily. If the chocolate doesn't "grip" the ball, it pools at the bottom, creating a messy base. You want a temperature middle ground.
If you see condensation forming on the peanut butter balls after taking them out of the freezer, wipe them gently with a paper towel before dipping.
Fixing Cracked Shells
Cracks appear when the center expands or contracts at a different rate than the chocolate shell. This often happens if you move them from a very cold freezer to a warm room too quickly. The solution is a slow temper. Let them sit in the fridge for an hour before bringing them to room temperature for serving.
| Problem | Cause | Fix | Pro Tip |
|---|---|---|---|
| Grainy Filling | Under mixed flour | Use a hand mixer for 2 mins | Sift oat flour twice for ultimate silkiness. |
| Dull Chocolate | Overheated cocoa | Melt over simmering water only | Stop heat when few lumps remain; stir to finish. |
| Soft Centers | Excess honey/oil | Add 1 tbsp extra oat flour | Chill dough for 10 mins before rolling. |
Creative Flavor Adaptations
Adding Extra Texture
If you are a fan of crunch, you can replace the creamy peanut butter with a "crunchy" variety, though I find the result a bit less "stunning" visually. A better way to add texture is to fold in 20g of cacao nibs or finely chopped toasted peanuts to the dough. It provides a sophisticated snap that mimics the chocolate shell. For a texture reminiscent of a No Bake Cheesecake Recipe, you can even fold in a tiny amount of softened cream cheese, though this will change the shelf life significantly.
Festive Holiday Variations
For the "christmas peanut butter balls" vibe, I love to top the wet chocolate with a tiny pinch of crushed candy canes or freeze dried raspberry powder. The red against the dark chocolate is gorgeous. Another trick is to use a white chocolate drizzle over the dark base.
It looks like a professional striped truffle and only takes an extra two minutes of work.
Different Nut Butter Options
Sunbutter (sunflower seed butter) is a fantastic 1:1 swap if you have a peanut allergy in the house. It has a slightly earthier, more "green" flavor that pairs exceptionally well with a pinch of cinnamon.
Cashew butter is another luxurious choice, though it is much sweeter, so I usually drop the honey back by 10g to keep the balance right.
Preserving That Fresh Snap
These treats are surprisingly hardy, but they do have enemies: heat and air. I recommend storing them in an airtight container with layers separated by parchment paper. In the fridge, they will stay fresh and keep that perfect snap for up to 7 days.
If you're a "meal prep" person, these are a dream because they actually taste better on day two once the flavors have had time to meld.
For long term storage, you can freeze them for up to 3 months. The trick to freezing is the thaw. Never take them straight from the freezer to the counter, or the chocolate will bloom (get those white dusty streaks). Move them to the fridge for 24 hours first.
If you find yourself with leftover melted chocolate, don't throw it out! Drizzle it over some pretzels or stir it into your morning coffee for a mocha style treat. Zero waste is always the goal in my kitchen.
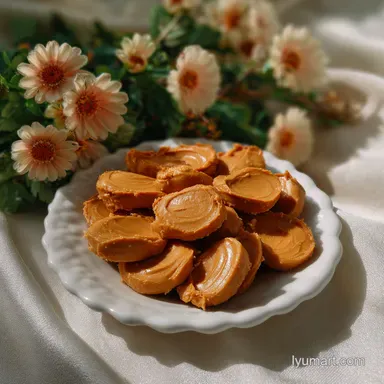
Presenting Your Stunning Creation
When it comes to serving, the "presentation" author in me can't just put these on a plain plate. We want these to look like art. Use a slate board or a dark ceramic platter to make the chocolate pop.
If you're feeling fancy, a light dusting of cocoa powder or a single flake of Maldon salt on top of each ball tells your guests that these are "grown up" sweets.
Three Levels of Plating
| Level | Technique | Visual Result |
|---|---|---|
| Simple | Arranged in a tight grid on a white plate | Clean, modern, and approachable |
| Polished | Placed in gold mini cupcake liners | Classic confectionery boutique style |
| Restaurant | Smear of peanut butter, 3 balls, cocoa dust | High end deconstructed dessert look |
Pairing with Dark Coffee
The bitterness of a well pulled espresso or a dark roast coffee is the perfect foil for the richness of the nut butter. It cleanses the palate between bites so you can truly taste the vanilla and honey. If you're putting together a full spread, these pair beautifully alongside a Chocolate Chip Cookies recipe, offering a nice contrast between a baked texture and a silky, no bake one.
The Grand Dessert Board
If you really want to wow people, build a "Dessert Charcuterie." Place these "peanut butter balls" in the center, and surround them with fresh raspberries, shards of sea salt chocolate, and perhaps some Homemade Vanilla Cupcakes. The variety of shapes and textures creates a visual feast that looks much more difficult to assemble than it actually is.
Kitchen Truths Debunked
One of the biggest myths I hear is that you must use powdered sugar to get the right texture. People think the cornstarch in the sugar is the only thing that can stabilize the peanut butter. That’s just not true.
Oat flour, especially when finely ground, provides more fiber and a better structure without the chalky aftertaste. It’s a more modern approach to a classic.
Another common misconception is that "natural" peanut butter won't work because it's too runny. While it is true that it's more liquid at room temperature, that's exactly why we use the oat flour and the chilling step. The "no stir" commercial brands often contain palm oil or hydrogenated fats to keep them solid.
By using the natural stuff and controlling the temperature ourselves, we get a much cleaner flavor and a superior mouthfeel.
Right then, you are ready to create something truly special. Trust the process, watch your chocolate temperature, and don't be afraid to get your hands a little messy during the rolling phase. It’s all part of the magic. Let me know how they turn out I have a feeling they won't last long on the counter!

Recipe FAQs
Can I substitute almond butter for the peanut butter?
Yes, with a caveat. Almond butter is naturally sweeter and higher in fat, resulting in a softer center, so reduce the honey slightly or chill the dough longer.
What is the crucial chilling time for the filling before dipping?
Exactly 20 minutes in the freezer. This brief, hard chill creates the necessary temperature differential to ensure the melted chocolate sets instantly upon contact, creating that crisp shell.
Why is my chocolate coating dull or streaky after it sets?
The chocolate was likely overheated or seized slightly. You must melt it gently over indirect steam and remove it from the heat while a few lumps remain; stir those residual lumps into smoothness. If you master this gentle tempering, the same concept applies to achieving a glossy finish on a sauce like in our Creamy Garlic Pasta Recipe: Velvety Finish.
Can these be made entirely without honey?
No, not successfully. Honey acts as a vital binder and humectant; swapping it for something like maple syrup changes the final texture significantly. If you are avoiding all sugars, focus on recipes utilizing oats as the binder, such as our [Overnight Oats for Meal Prep: 10-Minute Hydration], but the structure will be completely different.
My dough is too soft to roll into perfect spheres; what went wrong?
Your peanut butter likely contained excess oil or moisture. Place the entire bowl in the refrigerator for 30 minutes to firm up the fats before attempting to roll again; this firms the base enough to handle.
How long will the finished peanut butter balls stay fresh?
They keep well for up to 7 days refrigerated. Store them in an airtight container layered with parchment paper to prevent sticking, as the natural oils can make them sweat at room temperature.
Is oat flour necessary, or can I use regular all-purpose flour?
Oat flour is strongly recommended for texture. All-purpose flour develops gluten when mixed, which can make the center tough instead of the desired fudge like texture.
If you enjoy working with techniques that build delicate structure, mastering the gentle mixing here is similar to getting the perfect batter consistency for our [Homemade French Toast Recipe: Custard Center].
No Bake Peanut Butter Balls
Ingredients:
Instructions:
Nutrition Facts:
| Calories | 133 kcal |
|---|---|
| Protein | 3.7 g |
| Fat | 9.2 g |
| Carbs | 9.9 g |
| Fiber | 1.4 g |
| Sugar | 4.1 g |
| Sodium | 42 mg |
