Velvety Homemade Hot Chocolate Sticks
- Time: Active 15 minutes, Passive 4 hours, Total 25 minutes
- Flavor/Texture Hook: Fudgy, ultra dark, and intensely chocolatey
- Perfect for: Holiday gifting, winter cozy nights, or DIY party favors
- Stop Overpaying for Boutique Hot Chocolate Stick Gifts
- Unwrapping the Magic of a Decadent Chocolate Stick
- The Secret to Achieving a Silky Smooth Set
- Precision Checkpoints for Your Perfect Hot Chocolate Stick
- Curating Your Pantry for Professional Quality Chocolate Sticks
- Essential Tools for Crafting These Sweet Treats
- A Step by Step Walkthrough for This Recipe
- Avoiding Common Mistakes and Fixing Kitchen Disasters
- Smart Substitutions and Festive Flavor Variation Ideas
- Best Storage Practices and Zero Waste Kitchen Tips
- Final Touches to Elevate Your Presentation Strategy
- Recipe FAQs
- 📝 Recipe Card
Stop Overpaying for Boutique Hot Chocolate Stick Gifts
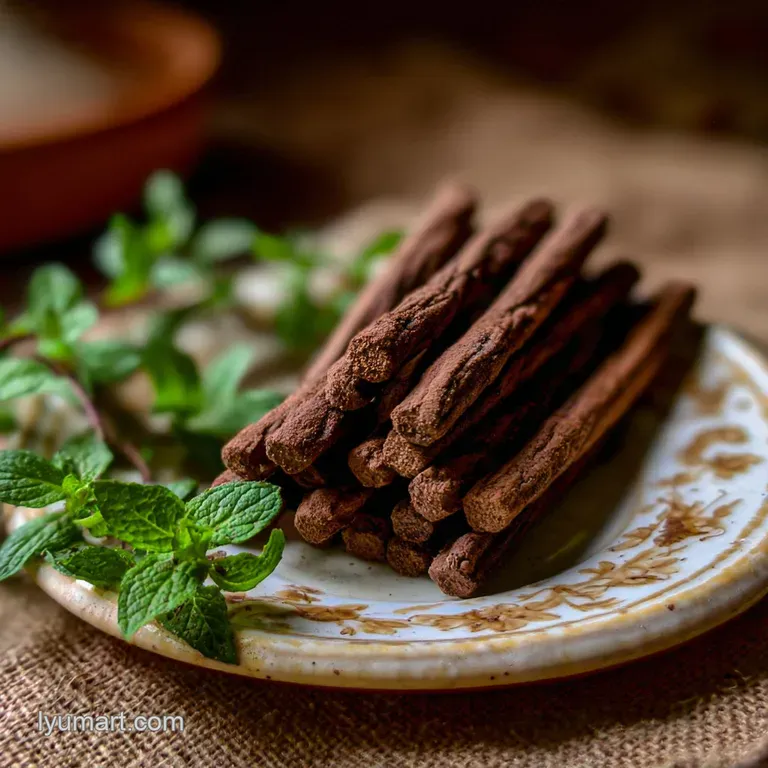
The aroma of darkening cocoa and simmering cream always reminds me of those crisp December mornings when the kitchen feels like a sanctuary. I used to stare at those expensive, cellophane wrapped chocolate stirrers in high end boutiques, wondering why they cost five dollars a pop.
Then I realized I could make 14 of them in my own kitchen for a fraction of the price, and honestly, the homemade version is much more magical. There is something truly special about watching a solid block of chocolate slowly dissolve into a steaming mug of milk, leaving behind a thick, glossy swirl of sweetness.
We are going for a texture that sits somewhere between a truffle and a fudge. You want it firm enough to hold its shape on a stick, but soft enough to surrender instantly when it hits hot liquid. It's a quick win for anyone who loves gifting but hates spending hours over a hot stove.
In just 25 minutes of active time, you'll have a batch of treats that look like they came from a professional chocolatier. Let's get into the rhythm of whisking and melting to create some winter magic.
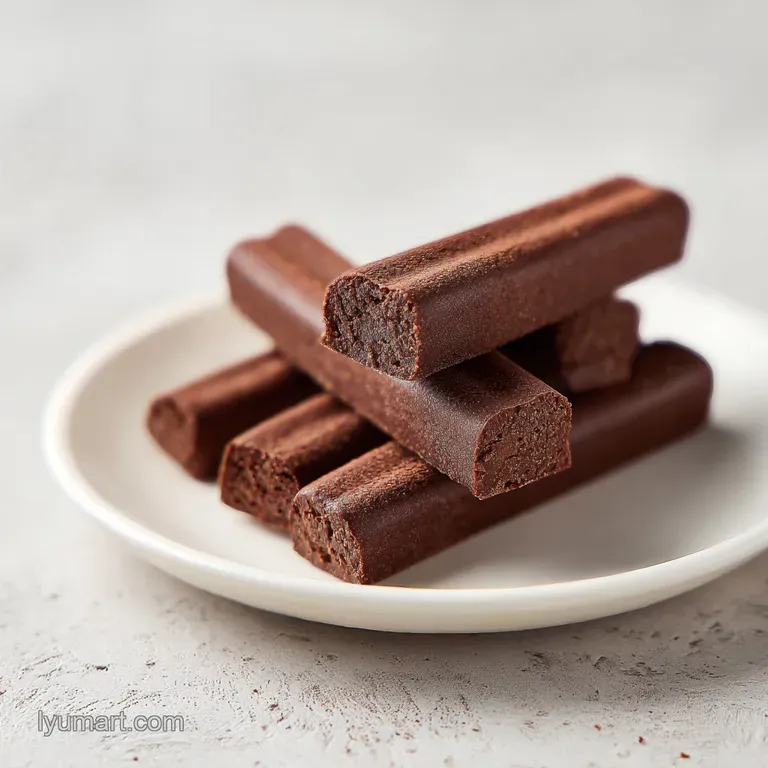
Unwrapping the Magic of a Decadent Chocolate Stick
This Hot Chocolate Stick is not just a piece of candy, it is a concentrated cocoa base designed to emulsify perfectly into dairy. Unlike plain melted chocolate, which can sometimes clump or leave a waxy film, this recipe uses a blend of heavy cream and sweetened condensed milk to ensure a silky transition from solid to liquid.
It is the ultimate comfort in a cup, providing a richness that powdered mixes simply cannot replicate. When you gift these, you aren't just giving a sweet treat, you're giving someone a cozy experience.
The secret lies in the color balance and the garnish strategy. I love the contrast of the deep, dark chocolate against three specific color accents. First, the creamy white of mini marshmallows added immediately after pouring.
Second, a dusting of vibrant ruby red freeze dried raspberry powder or a tiny dried rosebud for an elegant pop. Third, a shimmering touch of gold from sea salt flakes or edible luster dust once they have set. These tiny details are what make people ask, "Wait, you actually made these?"
The Secret to Achieving a Silky Smooth Set
What makes this recipe stand out is how we handle the fat and sugar suspension. By simmering the heavy cream and condensed milk together, we create a stable base that prevents the chocolate from "blooming" or turning grey over time.
The condensed milk acts as a humectant, which means it keeps the chocolate fudge like and prevents it from becoming brittle or chalky. This ensures that even after a week in a gift basket, the stick remains luscious and ready to melt.
- Stable Emulsion
- The proteins in the heavy cream bind with the cocoa fats, creating a texture that dissolves without graininess.
- Controlled Hydration
- Using condensed milk reduces the water content compared to whole milk, which prevents the chocolate from seizing while keeping it soft.
- Texture Bloom Prevention
- Salt and vanilla act as flavor enhancers that also help stabilize the crystalline structure of the semi sweet chips.
| Method | Time | Texture | Best For |
|---|---|---|---|
| This Fudgy Method | 25 minutes | Soft, truffle like | High end gifting and creamy drinks |
| Pure Melted Bar | 10 minutes | Hard and brittle | Quick snacks, but melts poorly in milk |
| Cocoa Powder Paste | 15 minutes | Grainy and thin | Last minute cravings only |
The choice between a fresh, homemade base and a shortcut method is all about the "meltability." When you use a shortcut, like just sticking a square of a chocolate bar on a stick, it often sinks to the bottom of the mug and stays there.
Our method ensures the chocolate incorporates into the milk for a uniform, velvety experience.
Precision Checkpoints for Your Perfect Hot Chocolate Stick
To get that professional finish, you need to hit a few specific numbers. First, ensure your cream and milk mixture reaches exactly 180°F (82°C) or a gentle simmer where bubbles just begin to crown the edges.
Second, give the chocolate chips exactly 3 minutes of "undisturbed" sitting time in the hot liquid; this allows the centers to soften without the fats separating. Finally, the setting time of 4 hours is non negotiable if you want them to pop out of the molds with clean, sharp edges.
| Component | Science Role | Pro Secret |
|---|---|---|
| Heavy Cream | Provides fat for a velvety mouthfeel | Use room temp cream to avoid thermal shock |
| Dutch Cocoa | Adds deep color and intense chocolate flavor | Sift it to avoid stubborn bitter clumps |
| Semi Sweet Chips | Provides the structural "set" of the stick | Use 60% cacao for the best sugar to fat balance |
Leveraging High Fat Stabilizers
The heavy whipping cream isn't just for flavor. Its high fat content (usually around 36%) provides the necessary structure to keep the cocoa powder in suspension. If you were to use skim milk, the chocolate would likely separate and look oily on top of the mug.
This fat is what coats the back of a spoon and makes the drink feel like a "hug in a mug."
Balancing Cocoa Solids
We use both cocoa powder and chocolate chips to get the best of both worlds. The powder provides the punchy, dark "darkness" that we love in hot cocoa, while the chips provide the cocoa butter needed for that "shatter" when you bite into it, or the smooth melt when stirred.
It is a delicate balance of solids and fats that we've tuned to perfection.
Curating Your Pantry for Professional Quality Chocolate Sticks
When gathering your ingredients, quality is the most important factor. Since there are so only a few components, you will taste every single one. I always recommend using a high-quality Semi Sweet Chocolate Chip, preferably something with 60% cacao.
This provides a sophisticated sweetness that isn't cloying but still feels like a treat. If you're feeling adventurous, you could even try this with a dark chocolate base for a more intense experience.
- 1 cup Heavy Whipping Cream: The foundation for our creamy texture. Why this? High fat content ensures the stick dissolves into a rich, velvety drink.
- Substitute: Full fat coconut milk for a slightly tropical, dairy-free version.
- 14 oz Sweetened Condensed Milk: This provides sweetness and a fudge like consistency. Why this? It creates a smooth, shelf stable texture that won't get grainy.
- Substitute: Thickened coconut condensed milk for a vegan friendly alternative.
- 3 cups Semi Sweet Chocolate Chips: These provide the structure. Why this? 60% cacao offers the perfect balance of richness and sweetness.
- Substitute: Dark chocolate chunks for a more bitter, intense flavor profile.
- 1 cup Unsweetened Dutch process Cocoa Powder: For that deep, dark chocolate color. Why this? Dutch process is less acidic and dissolves more easily than natural cocoa.
- Substitute: Raw cacao powder if you prefer a more "earthy" and fruity chocolate note.
- 1/4 tsp Fine Sea Salt: To balance the sugar. Why this? Salt heightens the perception of chocolate and cuts through the richness.
- Substitute: Smoked sea salt for a sophisticated, campfire style twist.
- 1 tbsp Pure Vanilla Extract: For aromatic depth. Why this? Vanilla rounds out the sharp edges of the cocoa powder.
- Substitute: Almond extract for a flavor reminiscent of a classic marzipan treat.
- 1/2 cup Mini Marshmallows: The classic topping. Why this? They add visual appeal and a nostalgic creamy finish to the drink.
- Substitute: Crushed candy canes for a festive, peppermint infused holiday version.
For those who love this flavor profile but want something even easier to whip up, you might want to try a Peanut Butter Rice Krispie Treat as a side snack. The salty sweet crunch is the perfect companion to a warm mug of chocolate.
Essential Tools for Crafting These Sweet Treats
You don't need a high tech lab to make these, but a few specific tools will make your life much easier. A medium heavy bottomed saucepan is vital. Thin pans have "hot spots" that can scorch the condensed milk in seconds, ruining the entire batch. A silicone square mold is also a game changer.
While you can use an ice cube tray, silicone allows you to pop the sticks out without breaking the chocolate or the wooden sticks.
For the Chocolate Base
You'll want a sturdy whisk to incorporate the cocoa powder. If you have a fine mesh sieve, use it to sift the cocoa directly into the pan. This simple step prevents those tiny, dry pockets of powder that are impossible to whisk out later.
A rubber spatula is also helpful for the final stirring stage to ensure you get every bit of melted chocolate off the sides of the pan.
For the Aromatics & Toppings
Wooden treat sticks or even vintage style wooden spoons are perfect for the "handle" of your Hot Chocolate Stick. If you want to get fancy, you can use candy cane sticks or cinnamon sticks, though they can be a bit more fragile.
Have your mini marshmallows and any other garnishes ready in small bowls before you start, as the chocolate begins to set fairly quickly once it's off the heat.
A step-by-step Walkthrough for This Recipe
- Warm the base. In a medium heavy bottomed saucepan, combine the heavy cream and sweetened condensed milk over medium low heat. Note: This low heat prevents the milk proteins from burning on the bottom.
- Simmer gently. Whisk constantly until small bubbles appear around the edges. Do not let it reach a rolling boil, as this can change the texture of the milk.
- Incorporate cocoa. Sift the cocoa powder directly into the warm milk mixture. Note: Sifting is the only way to guarantee a lump free, silky drink later.
- Whisk and remove. Whisk vigorously until the liquid is smooth and dark, then remove the pan from the heat immediately.
- Softent the chips. Add the chocolate chips and salt to the hot liquid. Let it sit undisturbed for 3 minutes until the chocolate is fully softened.
- Stir to a gloss. Stir in slow circles with a rubber spatula until the mixture is glossy and uniform.
- Add aromatics. Fold in the vanilla extract gently to preserve its delicate scent.
- Fill the molds. Pour the mixture into silicone square molds. Tap the mold gently until air bubbles rise to the surface.
- Garnish and stick. Top with mini marshmallows and insert wooden treat sticks or spoons.
- Set the treats. Let set for at least 4 hours in a cool place until completely firm to the touch.
Avoiding Common Mistakes and Fixing Kitchen Disasters
Even the best of us run into trouble sometimes. The most common issue with a Chocolate Stick is seizing, which happens when a tiny bit of water gets into the chocolate while it's melting. This turns your silky mixture into a grainy, clumpy mess. If this happens, don't panic!
You can usually save it by adding a tablespoon of warm heavy cream and whisking vigorously until it comes back together.
Why Your Chocolate Seized
If your mixture suddenly becomes thick and grainy, it's usually due to moisture or overheating. Chocolate is very temperamental. If you are using a damp spatula or if steam from a nearby pot gets into the bowl, the sugar and cocoa particles will clump together. Always ensure your tools are bone dry before you start.
| Problem | Root Cause | Solution |
|---|---|---|
| Grainy Texture | Cocoa wasn't sifted or chocolate overheated | Sift cocoa and keep heat medium low |
| Stick Falls Out | Inserted too early or mold wasn't full | Wait 10 mins for chocolate to thicken before inserting |
| White Spots (Bloom) | Temperature fluctuations during setting | Set in a cool, stable place, not the freezer |
If you ever find yourself with leftover melted chocolate that didn't quite make it into the molds, you can easily turn it into a velvety chocolate syrup by whisking in a little extra warm milk. It’s a great way to ensure nothing goes to waste in your kitchen.
Common Mistakes Checklist
- ✓ Ensure all equipment (pan, whisk, spatula) is completely dry before starting.
- ✓ Sift the cocoa powder; skipping this leads to bitter, dry lumps in the final drink.
- ✓ Don't boil the cream mixture; a gentle simmer is all you need to melt the chips.
- ✓ Give the chocolate chips the full 3 minutes to rest before stirring.
- ✓ Tap the molds on the counter to remove air pockets for a professional finish.
Smart Substitutions and Festive Flavor Variation Ideas
One of the best things about this recipe is how easy it is to customize. You can adapt the base to suit almost any dietary need or flavor preference. If you want a festive twist, try adding a half teaspoon of peppermint extract or a pinch of cayenne pepper for a "Mexican Hot Chocolate" vibe.
The key is to keep the ratios of fat and solids the same so the stick still sets properly.
| Original Ingredient | Substitute | Why It Works |
|---|---|---|
| Heavy Cream | Full fat Coconut Milk | Similar fat content. Note: Adds a subtle tropical flavor. |
| Semi Sweet Chips | White Chocolate Chips | Same structural role. Note: Result will be much sweeter. |
| Vanilla Extract | Spiced Rum | Adds warmth and depth. Note: Alcohol won't fully cook out. |
Infusing Festive Flavors
If you want to create a "Grown Up" version, you can substitute the vanilla for a tablespoon of bourbon or Irish cream. Just be aware that the extra liquid might make the set slightly softer, so you may need an extra hour of chilling time.
For a holiday look, I love dipping the finished, set sticks into a bit of melted white chocolate and then rolling them in crushed candy canes.
Achieving the Perfect Ratio
If you are scaling the recipe down for just a few people, use a smaller saucepan to prevent the cream from evaporating too quickly. For scaling up, remember that you don't need to double the salt or vanilla linearly; 1.5x the amount is usually plenty for a double batch.
This keeps the flavors balanced without becoming overwhelming.
Best Storage Practices and Zero Waste Kitchen Tips
To keep your Hot Chocolate Stick fresh and glossy, store them in a cool, dry place. Room temperature is usually fine if your house isn't too warm, but for long term storage, the refrigerator is best.
Wrap each stick individually in cellophane or parchment paper to prevent them from sticking together or absorbing odors from the fridge.
- Fridge: Up to 3 weeks in an airtight container.
- Freezer: Up to 2 months. Note that the marshmallows may become a bit chewy after thawing.
- Zero Waste: If you have broken pieces or "ugly" sticks, chop them up and use them as a decadent topping for oatmeal or fold them into cookie dough. You can also rinse and reuse the wooden sticks for future baking projects!
Final Touches to Elevate Your Presentation Strategy
Presentation is where you can truly show off your personality. To make these look like they came from a high end bakery, pay attention to the color accents. I mentioned earlier that adding a "shimmer" is a great way to finish.
A tiny pinch of flaky sea salt not only looks like fallen snow but also makes the chocolate taste twice as intense.
Chef's Tip: For a perfectly smooth "top" on your sticks, use a hair dryer on the lowest, coolest setting for 5 seconds over the surface of the poured chocolate to pop any stubborn micro bubbles before adding the marshmallows.
When it's time to serve, tell your guests to heat 8 oz of whole milk until steaming (but not boiling). Place the stick in the mug and let it sit for 30 seconds before slowly stirring. The joy of watching the marshmallows float to the top as the milk turns a rich, mahogany brown is a sweet treat in itself.
Whether you're making these for a party or just a quiet night in, this recipe brings a little bit of chocolate magic to everyone.

Recipe FAQs
How to use hot chocolate on a stick?
Stir one stick into a mug of 8-10 ounces of steaming hot milk. Continue stirring steadily until the chocolate base has completely melted and incorporated into the liquid to create a creamy beverage.
Can you eat hot chocolate on a stick?
Yes, it is essentially a solid piece of fudge. While designed to melt into milk, the mixture of semi sweet chocolate, heavy cream, and sweetened condensed milk is perfectly safe and delicious to consume directly.
What is hot Belgian chocolate on a stick?
It is a high-quality, dense chocolate concentrate intended for stirring. By using Dutch process cocoa and premium chocolate chips, this version provides a similar decadent mouthfeel and intense cocoa profile often associated with luxury European confectionery.
Can I drink hot chocolate with diabetes?
No, this recipe is not suitable for a diabetic diet. It contains high concentrations of sugar from the sweetened condensed milk and chocolate chips, which will significantly impact blood glucose levels.
How to prevent lumps when making the cocoa base?
Sift the cocoa powder directly into the warm milk mixture. Whisking vigorously immediately after sifting ensures the powder hydrates properly, creating the smooth consistency required for a professional creamy fudge texture.
Is it true I should boil the milk mixture to make it thicken faster?
No, this is a common misconception. Boiling can scorch the dairy and alter the protein structure; always keep the heat at medium low to maintain a gentle simmer until small bubbles appear at the edges.
How long should the chocolate rest before stirring?
Let the mixture sit undisturbed for exactly 3 minutes. This waiting period allows the residual heat from the cream to soften the chocolate chips evenly, ensuring they emulsify into a glossy, uniform liquid when you finally stir with your spatula.
Velvety Hot Chocolate Stick
Ingredients:
Instructions:
Nutrition Facts:
| Calories | 346 kcal |
|---|---|
| Protein | 5.7 g |
| Fat | 20.3 g |
| Carbs | 44.2 g |
| Fiber | 4.5 g |
| Sugar | 34.3 g |
| Sodium | 100 mg |
