Easy Brownies Recipe from Scratch
- Time: Active 15 minutes, Passive 25 minutes, Total 40 minutes
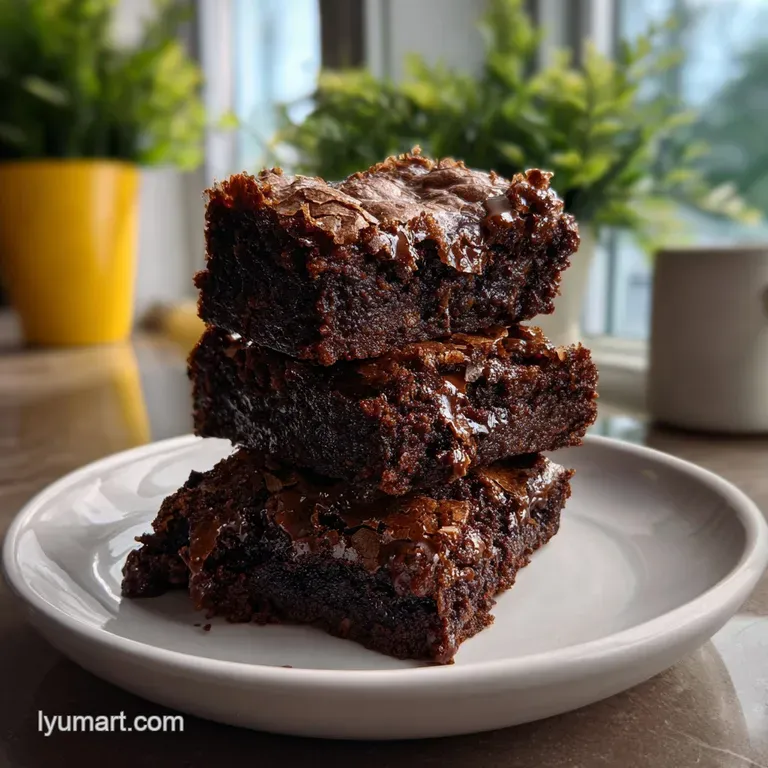
- Flavor/Texture Hook: Fudgy, decadent center with a shattering, crackly crust
- Perfect for: Impressive dinner parties, holiday dessert tables, or beginner bakers
- Achieving an easy brownies recipe from scratch
- Science of The Fudgy Texture
- Key Metrics and Preparation Times
- Shopping for Top Quality Ingredients
- Essential Tools for Successful Baking
- Step by Step Mixing Guide
- Fixing Common Baking Errors
- Simple Dietary Modifications
- Storage and Waste Prevention
- Stunning Pairings and Toppings
- Answers to Common Questions
- The Ultimate Comparison
- Recipe FAQs
- 📝 Recipe Card
Achieving an easy brownies recipe from scratch
The aroma of dark chocolate filling a kitchen is a specific kind of magic that no box mix can ever replicate. We have all been there, standing in the baking aisle, reaching for the red or blue box because it feels safer.
But once you realize that a truly stunning result only requires one bowl and about fifteen minutes of work, you will never go back. I remember my first attempt at a recipe from scratch; the top didn't just crackle, it shattered like thin glass under my knife. It was a discovery that changed how I viewed dessert.
This easy brownies recipe from scratch focuses on that elusive balance between a velvety, molten interior and a paper thin, glossy crust. There is no need for fancy equipment or a laundry list of ingredients.
By using simple pantry staples like unsweetened cocoa powder and butter, we are creating a deep, complex flavor that isn't masked by the preservatives found in store-bought options. It is about the purity of the cocoa and the richness of the fat.
Whether you are preparing a treats platter for a weekend gathering or just need a Tuesday night win, this method is your reliable companion. It's much more satisfying than reaching for a mix, and the results are consistently more impressive. If you are looking for a full spread, these pair beautifully with a Fluffy Pancakes From Scratch recipe for a decadent weekend brunch or a celebratory breakfast.
Science of The Fudgy Texture
Understanding the physics of baking helps us move from "following a recipe" to "knowing how to bake." When we look at this recipe from scratch, several chemical reactions are happening simultaneously to create that specific dense mouthfeel.
- Sugar Solubilization: Whisking sugar into warm butter begins the process of dissolving the crystals, which eventually migrate to the surface to form a thin, meringue like crust.
- Gluten Suppression: By keeping the all purpose flour volume low and folding it in gently, we prevent long gluten chains from forming, which ensures the texture stays fudgy rather than bread like.
- Emulsification Strategy: Adding room temperature eggs to the warm fat creates a stable emulsion, allowing the batter to hold onto moisture without becoming greasy.
- Fat to Protein Balance: The high ratio of unsalted butter to the minimal protein in the flour creates a structure that stays soft and moist even after cooling.
Key Metrics and Preparation Times
| Metric | Measurement |
|---|---|
| Preparation Time | 15 minutes |
| Baking Duration | 25 minutes |
| Total Time | 40 minutes |
| Yield | 16 individual squares |
| Baking Temperature | 350°F (175°C) |
Shopping for Top Quality Ingredients
The quality of your components will dictate the final outcome of this easy brownies recipe from scratch. Since the ingredient list is short, each item has a large role to play in the flavor profile.
- Unsalted Butter (1/2 cup/115g): Use a high-quality brand like Kerrygold for a higher fat content and better flavor. Why this? Provides the essential moisture and carries the cocoa flavor across the palate.
- Granulated Sugar (1 cup/200g): Standard white sugar is best here for achieving that crackly top. Why this? It dissolves and migrates to the top of the batter during baking.
- Large Eggs (2): Ensure they are at room temperature to avoid curdling the melted butter. Why this? Acts as the primary leavening agent and provides structure.
- Vanilla Extract (2 tsp): Pure extract is superior to imitation for a deeper aromatic profile. Why this? Enhances the chocolate notes and rounds out the sweetness.
- Dutch processed Cocoa Powder (1/2 cup/45g): This cocoa has been treated to reduce acidity, giving it a darker color and smoother taste. Why this? Provides a velvety texture and a stunning, deep chocolate hue.
- All purpose Flour (1/2 cup/65g): I prefer King Arthur flour for its consistent protein levels. Why this? Just enough to hold the ingredients together without adding weight.
- Fine Sea Salt (1/4 tsp): A fine grain like Diamond Crystal ensures even distribution. Why this? Balances the sugar and intensifies the chocolate’s natural profile.
- Semi sweet Chocolate Chips (1/2 cup/85g): Ghirardelli chips melt beautifully for pockets of richness. Why this? Adds texture and a secondary layer of chocolate intensity.
| Original Ingredient | Substitute | Why It Works |
|---|---|---|
| Unsalted Butter | Coconut Oil | Same fat ratio but adds a subtle nutty, tropical flavor profile. |
| Granulated Sugar | Coconut Sugar | Results in a deeper, caramel like flavor but a less crackly top. |
| All purpose Flour | Almond Flour | Creates a very moist, gluten-free option. Note: Crumb will be much softer. |
| Chocolate Chips | Chopped Walnuts | Adds a crunchy texture and earthy flavor to balance the sweetness. |
Essential Tools for Successful Baking
You don't need a professional kitchen for this recipe from scratch, but a few specific tools make the process much smoother. I always reach for my 8x8-inch Pyrex glass baking dish because it distributes heat evenly.
A sturdy whisk is essential for incorporating the sugar and eggs properly. If you want that velvety batter, don't be afraid to put some muscle into the whisking. A silicone spatula is also helpful for folding in the flour, ensuring you don't overwork the gluten.
Finally,, lining your pan with parchment paper is a non negotiable step for me; it allows you to lift the entire block out for clean, precise cuts once cooled.
step-by-step Mixing Guide

Preparing the Foundation
Preheat your oven to 350°F and line an 8x8-inch pan with parchment paper, leaving an overhang on the sides. Note: This ensures the heat is ready the moment the batter is mixed.
Emulsifying with Warmth
Melt the 1/2 cup of Kerrygold unsalted butter in a microwave safe bowl until it is liquid and warm. Note: Warm butter helps dissolve the sugar crystals faster.
Mixing the Base
Pour the 1 cup of granulated sugar into the warm butter and whisk vigorously for about one minute. The mixture should look slightly gritty but cohesive.
Aerating the Batter
Add the 2 large eggs and 2 tsp of vanilla extract to the butter mixture, whisking until the batter becomes smooth and glossy. Note: This step builds the structure that supports the fudgy center.
Sifting the Dry Components
Sift in the 1/2 cup of Dutch processed cocoa powder, 1/2 cup of King Arthur all purpose flour, and 1/4 tsp of fine sea salt. Note: Sifting prevents cocoa lumps, which are difficult to whisk out later.
Folding the Dry Elements
Use a spatula to gently fold the dry ingredients into the wet batter until just combined. Stop the moment you no longer see white streaks of flour.
Adding Texture
Gently fold in the 1/2 cup of Ghirardelli semi sweet chocolate chips. Note: These chips create pockets of molten chocolate in every bite.
Navigating the Bake
Spread the batter evenly into the prepared pan and bake for 25 minutes. Check for a slight jiggle in the center and a crackly surface.
Achieving the Shattering Crust
Remove the pan from the oven and place it on a wire rack to cool completely before slicing. Note: The brownies continue to set as they cool, which is vital for the texture.
Fixing Common Baking Errors
Even with an easy brownies recipe from scratch, things can go slightly awry if the timing or temperature is off. I once pulled a batch out too early, and while it tasted great, I had to eat it with a spoon!
Avoiding the Cakey Trap
If your brownies turned out more like chocolate bread than fudge, you likely over measured the flour or over whisked the eggs. Flour provides structure, and too much of it creates a sturdy, dry crumb. To fix this, always use a scale or the "spoon and level" method for your flour.
Fixing a Dull Surface
A dull, matte top usually means the sugar didn't dissolve enough into the fat and eggs. Ensure your butter is quite warm when you add the sugar, and don't skip the vigorous whisking. That shiny, crackly top is actually a very thin layer of meringue formed by the sugar and egg whites.
Rescuing Over baked Edges
If the edges are hard and dry while the middle is fine, your oven might be running hot, or you used a dark metal pan which absorbs more heat. Next time, try reducing the oven temp by 25°F or use a glass baking dish.
| Problem | Cause | Fix | Pro Tip |
|---|---|---|---|
| Oily Surface | Butter was too hot | Let butter cool slightly before eggs | Use room temp eggs to stabilize |
| Crumbling Center | Over baking | Reduce time by 3-5 mins | Pull when center has a tiny jiggle |
| Lumpy Batter | Un sifted cocoa | Sift all dry ingredients | Use a fine mesh sieve for cocoa |
Simple Dietary Modifications
Swapping for gluten-free
To make this easy brownies recipe from scratch gluten-free, replace the all purpose flour with a high-quality 1 to-1 gluten-free baking blend. Look for one that contains xanthan gum to help with the binding. The result will be slightly softer but just as fudgy.
Modifying for Plant Based Needs
You can substitute the butter with melted coconut oil and use a commercial egg replacer or "flax eggs" (1 tbsp flax meal + 3 tbsp water per egg). Note that the texture will be denser and you will lose the crackly top, as that relies heavily on the protein in real egg whites.
Chef's Tip: To get a professional, deep chocolate flavor, add 1/2 teaspoon of espresso powder to the dry ingredients. It won't make the brownies taste like coffee, but it will make the cocoa taste twice as intense.
Storage and Waste Prevention
Keeping your brownies fresh is easy if you follow a few simple rules. Store them in an airtight container at room temperature for up to 4 days. If you find they are starting to dry out, a quick 10 second zap in the microwave will bring back that velvety, molten texture.
For longer storage, these freeze beautifully. Wrap individual squares in plastic wrap and then place them in a freezer bag for up to 3 months. When the craving hits, just let them thaw on the counter for an hour. If you have leftover crumbs or broken pieces, don't throw them away! They make an incredible topping for vanilla bean ice cream or can be folded into a batch of Scrambled Eggs Recipe — wait, no, definitely don't do that. Save the brownie scraps for a trifle or a chocolate milkshake instead.
Stunning Pairings and Toppings
While these are spectacular on their own, you can easily turn them into a show stopping dessert for a dinner party. A simple dusting of powdered sugar or a sprinkle of flaky Maldon sea salt can change the entire experience.
If you are looking for a more substantial meal before diving into dessert, these brownies are the perfect follow up to a savory main. For a comforting evening, try serving them after a bowl of Creamy Mac and recipe. The saltiness of the cheese creates a wonderful contrast to the deep, dark chocolate. For a fancy touch, serve the brownies warm with a dollop of crème fraîche and some fresh raspberries. The acidity of the berries cuts through the richness of the Dutch processed cocoa.
Answers to Common Questions
Cocoa vs. Melted Chocolate
Using cocoa powder in this recipe from scratch allows for a more controlled fat to sugar ratio, leading to a much fudgier result. Melted chocolate bars contain extra cocoa butter and sugar, which can make the batter more temperamental and sometimes results in a greasier finish.
Butter vs. Oil Choice
Butter provides a much better flavor and helps create the structured, crackly top. Oil makes for a very moist brownie, but it lacks the dairy notes that make a brownie feel truly decadent. Stick with butter for that "bakery style" finish.
Homemade vs. store-bought
The biggest difference is the control over ingredients. store-bought mixes often use palm oil and artificial flavorings. By making this easy brownies recipe from scratch, you are getting pure butter, real vanilla, and high-quality cocoa, which results in a much more sophisticated flavor.
Metal vs. Glass Pans
Metal pans heat up quickly and result in crispier, chewier edges. Glass pans (like Pyrex) take longer to heat but provide more even baking throughout. If you use a dark metal pan, watch your timer closely as they tend to bake about 5 minutes faster.
Fresh vs. Day Old
Honestly, these brownies often taste even better the next day. As they sit, the flavors meld together and the fudgy center firms up into a dense, truffle like consistency. If you can resist eating them all immediately, try saving a few for tomorrow's lunch!
The Ultimate Comparison
| Feature | Fresh From Scratch | Box Mix Shortcut |
|---|---|---|
| Flavor Profile | Deep, dark, and complex cocoa | Mostly sweet with artificial vanilla |
| Texture Quality | Dense, fudgy, and velvety | Often airy or slightly spongy |
| Ingredient Control | 100% natural, high-quality fats | Contains preservatives and oils |
- Decision Shortcut
- If you want X, do Y
- If you want a more chewy edge
- Use a light colored metal baking pan.
- If you want an extra fudgy center
- Under bake by 2 minutes and chill in the fridge before cutting.
The beauty of this recipe from scratch is its simplicity. By mastering a few basic principles like not over mixing and using warm butter you can produce a dessert that rivals any high end bakery.
It’s about taking those few extra minutes to sift the cocoa and whisk the sugar, ensuring every bite is a perfect balance of texture and taste. Trust me, once you see that first batch come out of the oven with its shimmering, crackly top, you'll never look at a box mix the same way again.
Let's crack on and get baking!

Recipe FAQs
Can I substitute oil for the butter in this easy brownies recipe?
No, stick with butter for the best result. Butter provides superior flavor and helps create the necessary structured, crackly top that oil cannot achieve.
Why is my brownie top dull instead of shiny and crackly?
No, you did not whisk the sugar and butter vigorously enough. The crackly top forms from the sugar dissolving into the warm fat and egg mixture, essentially creating a thin meringue layer.
How can I ensure my brownies are fudgy and not cakey?
Yes, keep the flour amount low and fold gently. The high fat ratio relative to the minimal flour volume prevents long gluten chains from forming, which maintains the dense, soft center.
Do I need to use Dutch processed cocoa powder?
It is strongly recommended for optimal results. Dutch processed cocoa is less acidic, resulting in a darker color and a smoother, richer chocolate taste compared to natural cocoa.
Can I use room temperature eggs if I am in a hurry?
No, make sure your eggs are room temperature. Adding cold eggs to warm melted butter can cause the batter to curdle, leading to a less stable emulsion and potentially a greasy texture.
How do I get perfectly clean, non-crumbly squares when cutting?
No, you must cool the brownies completely before slicing. Allowing them to set fully, preferably chilling them for a short time after cooling, firms up the fudgy interior for precise, clean cuts.
Can I substitute all purpose flour with almond flour?
Yes, you can substitute almond flour for a gluten-free option. Be aware that the resulting crumb will be noticeably softer and moister because almond flour lacks the structural gluten found in wheat flour.
Easy Brownies From Scratch
Ingredients:
Instructions:
Nutrition Facts:
| Calories | 156 kcal |
|---|---|
| Protein | 2.1 g |
| Fat | 8.4 g |
| Carbs | 20.7 g |
| Fiber | 1.3 g |
| Sugar | 15.1 g |
| Sodium | 38 mg |
