Birthday Cake Puppy Chow: a Crunchy Celebration
- Time: Active 10 minutes, Passive 5 minutes, Total 15 minutes
- Flavor/Texture Hook: Shattering crunch with a velvety cake batter finish
- Perfect for: Birthday parties, movie nights, or quick no bake gifting
- Creating the Most Memorable Birthday Cake Puppy Chow Recipe
- The Secret to That Signature Cake Batter Snap
- A Deep Dive into Our Flavor Components
- Essential Tools for a Mess Free Kitchen
- Assembling Your Birthday Cake Puppy Chow Recipe
- The Best Substitutions for Your Pantry
- Fixing Texture and Coating Problems
- Adjusting the Batch Size Safely
- Comparing Quick Methods vs Classic Techniques
- Myths About Making Puppy Chow
- Storing Your Sweet Treats for Later
- Creative Ways to Serve Your Creation
- Recipe FAQs
- 📝 Recipe Card
Creating the Most Memorable Birthday Cake Puppy Chow Recipe
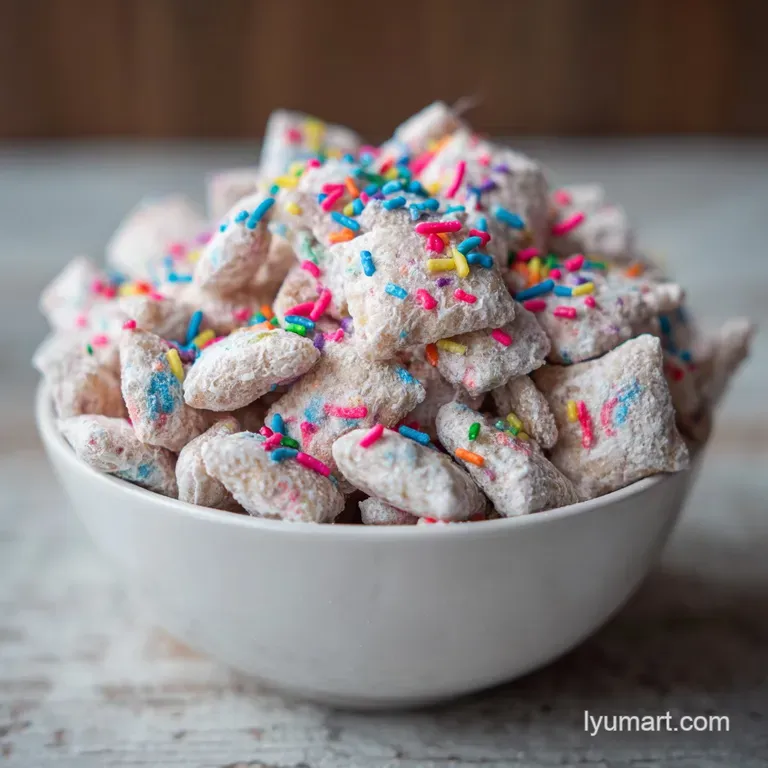
Imagine the kitchen table covered in a flurry of white sugar, like a fresh snowfall, but smelling of sweet vanilla and toasted yellow cake. It's that high energy moment right before a birthday party starts, when the air is thick with anticipation and the tiny "snap crackle" of cereal being coated in melted chocolate fills the room.
I remember the first time I brought this to a backyard bash, the bowl was polished clean before the actual cake was even sliced. There's something magnetic about that specific cake batter flavor combined with a texture that shatters when you bite into it.
We aren't just tossing cereal in sugar here. We're building layers of texture, starting with a crisp base, moving to a buttery white chocolate velvet, and finishing with a dust of "magic" cake mix. Most versions of this treat end up being a cloying, sticky pile that glues your teeth together.
This recipe is different because we balance the sugar with a hint of flaky sea salt and a quick toast of the cake mix. The result is a snack that feels light despite its indulgence, making it impossible to stop at just one handful.
You'll find that the real secret lies in the temperature and the timing. If the chocolate is too hot, it wilts the cereal. If it's too cold, it won't grab onto the cake mix. We're going for that sweet spot where every nook and cranny of the Chex is filled with flavor.
Whether you're making this for a kid's big day or just because you've got a craving for something whimsical, this method ensures a professional, high end finish every single time. Let's get into how we make this magic happen in just fifteen minutes.
The Secret to That Signature Cake Batter Snap
Most people assume the flavor comes solely from the cake mix, but it's actually about how we treat that mix before it ever touches the cereal. By briefly baking the dry mix, we remove the "floury" aftertaste and replace it with a deep, toasted vanilla aroma.
This also makes the snack safe to eat, as raw flour can sometimes carry unwanted guests.
Fat Stabilization: Adding butter to the white chocolate creates a more flexible coating that doesn't crack or flake off entirely when you shake the bag.
Crystal Control: The powdered sugar acts as a drying agent, absorbing any residual moisture from the butter to ensure the final product stays crispy for days.
| Servings | Cereal Amount | Bag Size | Prep Time |
|---|---|---|---|
| 6 People | 4.5 Cups | Large Freezer Bag | 10 minutes |
| 12 People | 9 Cups | 1 Gallon Bag | 10 minutes |
| 24 People | 18 Cups | 2 Gallon Bags | 20 minutes |
When preparing this for a larger crowd, it's vital to work in batches. If you try to shake 18 cups of cereal in one go, you'll end up with crushed crumbs at the bottom and unevenly coated pieces at the top.
Keeping the batches manageable ensures that every single square of cereal gets its fair share of that velvety chocolate hug.
A Deep Dive into Our Flavor Components
Choosing the right ingredients is the difference between a snack that tastes like a cheap candy bar and one that tastes like a gourmet bakery treat. Since white chocolate is the star of the show, I always recommend using a brand you actually enjoy eating on its own.
Low quality chips often contain too many stabilizers, which prevents them from melting into that silky, pourable consistency we need.
| Ingredient | Science Role | Pro Secret |
|---|---|---|
| White Chocolate | Structural Coating | Use almond bark for a faster, firmer set in humid climates. |
| Butter | Emulsifier & Softener | Unsalted butter lets you control the salt to sugar balance perfectly. |
| Yellow Cake Mix | Flavor Anchor | Toasting it for 5 minutes brings out a rich, buttery popcorn scent. |
Since this is such a sweet treat, the sea salt is not optional. It cuts through the sugar and makes the vanilla notes sing. If you're looking for other party ready snacks, you might also enjoy my Cookie Cake recipe which offers that same nostalgic birthday vibe in a soft, sliceable form. The contrast of the salty sweet notes in this puppy chow is what keeps people coming back for "just one more" bite.
Essential Tools for a Mess Free Kitchen
You don't need a lot of fancy gear, but a few specific items will make your life much easier. First, a very large mixing bowl is non negotiable. You need enough "headroom" in the bowl to fold the cereal without it flying over the edges.
I prefer a glass or stainless steel bowl because they hold heat better than plastic, keeping your chocolate melted longer.
A high-quality rubber spatula is your best friend here. You want something flexible enough to scrape the very bottom of the bowl, ensuring no chocolate is left behind. For the "shake" portion of the recipe, a gallon sized zip top bag is traditional, but if you're trying to be eco friendly, a large Tupperware container with a very tight sealing lid works just as well.
Just make sure there's plenty of air space in the container so the cereal can tumble freely.
Finally,, have a large rimmed baking sheet lined with parchment paper ready to go. This is where the puppy chow will "cure" or set. Without the parchment, you risk the chocolate sticking to the metal as it cools, which leads to a lot of broken pieces and a very frustrated cook.
Assembling Your Birthday Cake Puppy Chow Recipe
Before you start melting anything, get your station ready. This process moves fast once the chocolate is liquid, and you don't want to be hunting for a spatula while your coating is seizing up.
- Heat treat the mix. Preheat your oven to 350°F (175°C). Spread the 1 1/2 cups of yellow cake mix on a parchment lined tray and bake for 5 minutes. Note: This step is crucial for both safety and for developing a deeper, toasted flavor profile.
- Cool the powder. Let the cake mix cool completely before mixing it with the 1/2 cup of powdered sugar in your gallon bag.
- Prepare the cereal. Measure out 9 cups of Chex cereal into your largest mixing bowl. Set it aside so it's ready for the "pour."
- Melt the base. Combine the 12 oz white chocolate chips and 1/4 cup of unsalted butter in a microwave safe bowl.
- Heat in intervals. Microwave for 30 seconds, stir, and repeat until the mixture is a velvety, smooth liquid. Watch for a glossy sheen to know it is ready.
- Add the aromatics. Stir in 1 tsp vanilla extract and 1/2 tsp flaky sea salt. The salt should look like tiny diamonds suspended in the white cream.
- Coat the crunch. Pour the mixture over the cereal. Use a folding motion to coat every piece until no dry cereal remains visible.
- The big shake. Transfer the wet cereal to the bag with the sugar and cake mix. Seal it tight and shake vigorously for 30 seconds.
- Color burst. Add 1/2 cup of rainbow sprinkles to the bag and give it one more gentle shake until the colors are evenly distributed.
- The set. Spread the mixture back onto your baking sheet. Let it rest for 15-20 minutes until the coating feels dry and firm to the touch.
Chef's Tip: If your kitchen is particularly warm, pop the baking sheet into the fridge for 5 minutes. This "shocks" the chocolate into setting, creating a much crispier exterior.
The Best Substitutions for Your Pantry
Sometimes you're halfway through a recipe before realizing you're out of a key item. Don't panic! This recipe is surprisingly forgiving if you understand how the ingredients behave. If you want a different flavor profile, you could even try a Strawberry Earthquake Cake inspired version by swapping the yellow cake mix for strawberry mix and adding dried berry bits.
| Original Ingredient | Substitute | Why It Works |
|---|---|---|
| White Chocolate Chips | Vanilla Almond Bark | Melts smoother and sets harder at room temperature. |
| Unsalted Butter | Coconut Oil (Solid) | Provides a similar fat content with a subtle tropical hint. |
| Yellow Cake Mix | Funfetti Cake Mix | Includes built in sprinkles and a slightly sweeter profile. |
If you choose to use coconut oil, make sure it is the refined version unless you want a strong coconut flavor. The goal is to maintain that 1/4 cup fat ratio so the coating doesn't become brittle.
Also, if you use almond bark, you can often skip the butter entirely as it contains more vegetable fats, though the final taste won't be quite as rich.
Fixing Texture and Coating Problems
The most common issue I hear about is the cereal turning into one giant, soggy brick. This usually happens if the cereal was still warm from a nearby oven or if the butter to chocolate ratio was off. If your puppy chow feels "greasy," it usually means it hasn't had enough time to set or the room is too humid.
Another frustration is "bald" cereal, where the powder doesn't stick. This happens if the chocolate cooled too much before you put it in the bag. You want the cereal to be tacky, not runny, when it hits the sugar. If it's already dry, the powder will just sit at the bottom of the bag.
| Problem | Root Cause | Solution |
|---|---|---|
| Soggy Cereal | Too much liquid/butter | Increase cereal by 1 cup to absorb excess moisture. |
| Clumpy Mess | Adding sugar too fast | Shake in smaller batches to ensure even separation. |
| Dull Colors | Adding sprinkles too early | Only add sprinkles after the sugar coating is applied. |
Common Mistakes Checklist
- ✓ Never skip the heat treating of the cake mix; it's a safety and flavor essential.
- ✓ Ensure the bowl used for melting is bone dry; a single drop of water can cause chocolate to seize.
- ✓ Don't over microwave the chocolate; once it's 80% melted, stir it the rest of the way.
- ✓ Avoid using "cold" cereal straight from a chilly pantry, as it will make the chocolate set too fast.
- ✓ Let the final product set completely on a tray before bagging it up for storage.
Adjusting the Batch Size Safely
Scaling this recipe up for a big graduation or down for a solo movie night is easy, but you have to watch your ratios. When cutting the recipe in half, it’s best to still use a full gallon bag for shaking. You need that extra air space to ensure the cereal can move enough to get fully coated.
If the bag is too small, the cereal just clumps together in the corners.
If you're doubling the recipe, do not try to melt 24 oz of chocolate in one bowl unless you have a very large microwave safe container. It's much safer to do two separate batches. This prevents the chocolate at the edges from burning while the center is still solid.
Also, remember that spices and extracts don't always need to be doubled exactly; I usually go with 1.5x the vanilla when doubling to keep the flavor from becoming overwhelming.
Comparing Quick Methods vs Classic Techniques
There are two main ways to approach this snack. The "Fast" method skips the baking and uses almond bark, while the "Classic" method (which we are doing) focuses on depth of flavor and safety.
| Feature | Fast Method | Classic Method |
|---|---|---|
| Prep Time | 5 minutes | 15 minutes |
| Flavor Profile | Very sweet, waxy | Toasted, buttery, complex |
| Safety | Raw flour risk | Heat treated for safety |
| Shelf Life | 2-3 days | 5-7 days |
While the fast method is tempting when you're in a rush, the five extra minutes spent toasting the cake mix and using real butter pays off in the final texture. The classic method results in a "cleaner" crunch that doesn't leave a film on the roof of your mouth.
Myths About Making Puppy Chow
One of the biggest myths is that you have to use brand name Chex. While the texture of the name brand is very consistent, many store brand rice cereals work just as well. The key is to look for a "lattice" structure that can trap the chocolate and sugar.
Avoid flake style cereals, as they will simply shatter into dust during the shaking process.
Another misconception is that you need a huge amount of powdered sugar to make it look "white." In reality, using too much sugar makes the snack dusty and unpleasant to eat. The cake mix provides most of the color and flavor; the powdered sugar is just there to help everything dry down and provide that snowy appearance.
Storing Your Sweet Treats for Later
Because of the butter and chocolate, this snack is sensitive to heat. Always store it in an airtight container in a cool, dark place. At room temperature, it stays fresh and crispy for about 5 days.
If you live in a very warm climate, the fridge is actually a great place for it just make sure the container is truly airtight so the cereal doesn't absorb any "fridge smells."
You can also freeze this! In fact, many people prefer eating it straight from the freezer. It will keep for up to 2 months in a heavy duty freezer bag. When you're ready to eat it, just let it sit on the counter for 5 minutes, though the extra cold crunch is quite a treat on a summer afternoon.
To avoid waste, save the leftover "dust" (the sugar and cake mix at the bottom of the bag). It's essentially a toasted, sweet topping that is incredible stirred into vanilla yogurt or sprinkled over a scoop of ice cream. It's far too flavorful to just toss away!
Creative Ways to Serve Your Creation
This isn't just a "bowl on the table" kind of snack. For a birthday party, try serving it in individual paper cupcake liners. It looks like a little mini cake and keeps kids from digging their hands into one communal bowl.
You can also use it as a garnish for a milkshake or as a crunchy topping for a birthday sundae bar.
If you're giving this as a gift, clear cellophane bags tied with a bright ribbon make for a beautiful presentation. Since this recipe looks so festive with the rainbow sprinkles, it's a great "no bake" option for teacher gifts or party favors.
The contrast between the white "snow" and the bright confetti colors always earns a few "oohs" and "aahs" when people see it for the first time. It truly is the ultimate celebratory snack that brings a little bit of magic to any ordinary day.

Recipe FAQs
Why is it necessary to heat treat the cake mix?
Heat treating eliminates potential bacteria in raw flour. You must spread the mix on a sheet and bake it at 350°F for 5 minutes; if you enjoyed mastering this safety step, you can apply similar logic to our no bake cheesecake recipe to ensure high-quality, safe ingredients in every bite.
How to prevent the white chocolate from seizing?
Keep your bowl bone dry and avoid overheating. A single drop of water can ruin the texture, so stir the chocolate and butter in 30-second intervals until it is 80% melted, then stir until smooth.
Is it true I can use cold cereal straight from the pantry?
No, this is a common misconception. Cold cereal causes the chocolate to set too rapidly, which results in uneven coating; always ensure your cereal is at room temperature before you begin.
How to store birthday cake puppy chow?
Keep it in an airtight container in a cool, dark place. It will stay fresh and crispy for up to 5 days at room temperature, though you can also freeze it for up to 2 months.
How to ensure a uniform coating on the cereal?
Pour the melted chocolate mixture gradually and fold gently. Using a rubber spatula ensures every piece of cereal is coated without crushing the fragile grains before you add the sugar and cake mix coating.
Can I speed up the setting process?
Spread the coated mixture onto a baking sheet. Allowing the pieces to rest in a single layer for 15-20 minutes promotes even airflow and ensures the chocolate firms up properly before you pack it away.
What if I don't have rainbow sprinkles?
Omit them or swap for an alternative garnish. While rainbow sprinkles add the classic birthday cake aesthetic, the recipe remains perfectly delicious and structurally sound without them.
Birthday Cake Puppy Chow
Ingredients:
Instructions:
Nutrition Facts:
| Calories | 372 kcal |
|---|---|
| Protein | 3.6 g |
| Fat | 14.7 g |
| Carbs | 57.6 g |
| Fiber | 0.8 g |
| Sugar | 38.4 g |
| Sodium | 233 mg |
