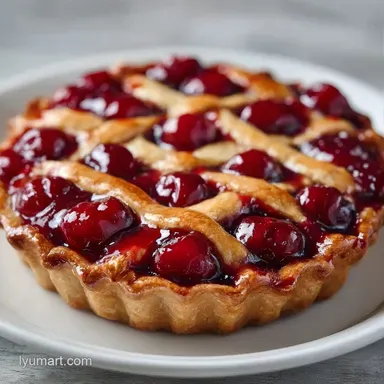
Classic Homemade Cherry Pie: Flaky and Tart
- Time: 30 min active + 1 hr chilling
- Flavor/Texture Hook: Tangy, bubbling cherries in a flaky, buttery shell
- Perfect for: Holiday dinners, Sunday baking, or impressive dessert gifts
The smell of bubbling cherries and toasted butter is enough to make anyone walk into the kitchen without being called. But let's be honest, many of us have had a nightmare experience with fruit pies.
You pull it out of the oven and the bottom crust is a pale, gummy mess, or the filling is so runny it floods the plate the second you cut a slice.
That's exactly why I changed how I approach this. Instead of just dumping raw fruit and starch into a crust and hoping for the best, I treat the filling like a proper preserve. We cook it down first. This ensures the starch is fully activated and the fruit is concentrated.
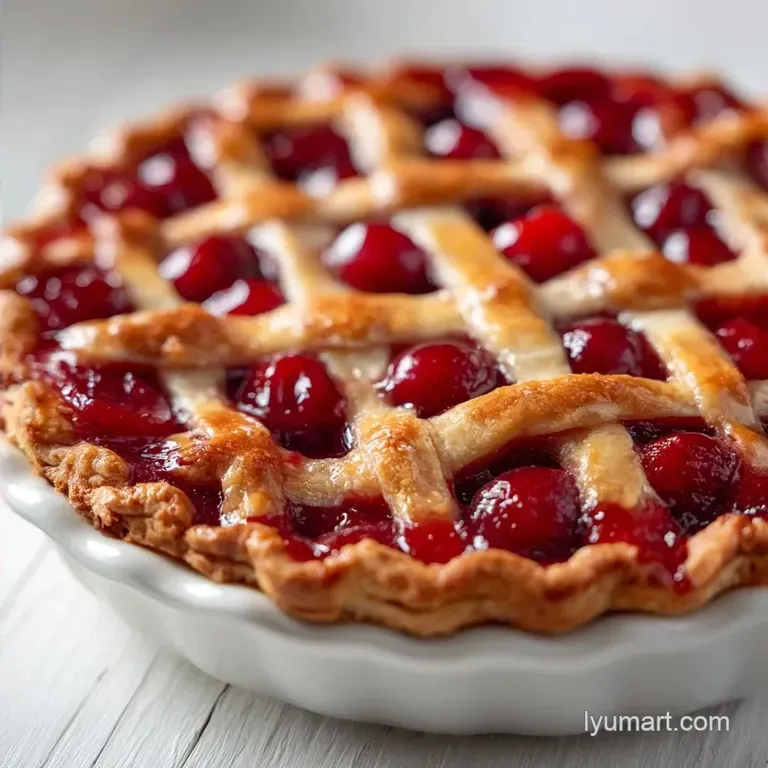
The result is a Classic Homemade Cherry Pie that actually holds its shape. You get a clean slice and a crust that cracks when you hit it with a fork. It's a bit more work up front, but it's the only way to get that professional, bakery style finish at home.
Classic Homemade Cherry Pie
The magic here happens in the temperature. Most people let their butter get too soft, which means the fat blends into the flour instead of staying in little clumps. When those clumps hit the heat, they melt and create steam, which pushes the dough up into layers. That's the science of the flake.
- Cold Fat
- Chilled butter prevents the dough from becoming tough and ensures a light, airy texture.
- Starch Activation
- Pre cooking the cornstarch ensures the filling sets properly and doesn't leak during the bake.
- Acid Balance
- The lemon juice cuts through the sugar, making the cherries taste brighter and more natural.
The difference between a rushed pie and a traditional one usually comes down to how the filling is handled.
| Feature | Fast Method (Raw Fill) | Classic Method (Pre cooked) | Impact |
|---|---|---|---|
| Filling Texture | Runny/Loose | Thick/Jammy | Better slices |
| Bottom Crust | High risk of sogginess | Stays crisp | Better mouthfeel |
| Bake Time | Longer to set starch | Shorter final bake | More control |
What Makes the Flavor Work
Every ingredient has a specific job. If you skip the salt or use warm water, the whole structure changes. Here is the breakdown of why we use these specific components.
| Ingredient | What It Does | Best Swap |
|---|---|---|
| All Purpose Flour | Provides the structural base | Pastry flour for a more tender crumb |
| Unsalted Butter | Creates steam pockets for flakiness | Vegetable shortening for a crispier, less flavorful crust |
| Sour Cherries | Provides the essential tart punch | Frozen pitted cherries (thawed) |
| Cornstarch | Thickens the fruit juices | Arrowroot powder (use slightly less) |
For the fruit, I always suggest sour cherries. According to USDA FoodData, the acidity in sour cherries provides a sharper contrast to the sugar than sweet cherries do. This keeps the Classic Homemade Cherry Pie from tasting like candy.
The Gear You'll Need
You don't need a professional kitchen, but a few tools make this way easier. A food processor is my go to for the crust because it keeps the butter cold by reducing the time your hands are touching the dough. If you don't have one, a pastry cutter or two forks work just fine.
You'll also need a 9 inch deep dish pie plate. A glass or ceramic dish is great for seeing if the bottom is browning, but a metal pan usually delivers a slightly crispier base. Don't forget a rolling pin and a bit of parchment paper to prevent sticking.
How to Build Your Pie
Right then, let's get into the actual process. Keep your ingredients cold and don't overwork the dough.
Phase 1: Crafting the Shattering Crust
- Combine flour, sugar, and salt in a food processor. Pulse in chilled butter cubes until the mixture resembles coarse crumbs with some pea sized pieces remaining. Note: Those pea sized bits are what create the flakes.
- Drizzle in ice water one tablespoon at a time, pulsing briefly, until the dough just begins to clump together.
- Divide the dough into two discs, wrap in plastic, and refrigerate for at least 1 hour. Note: This relaxes the gluten so the crust doesn't shrink.
Phase 2: Preparing the Thick Filling
- In a saucepan, combine cherries, sugar, lemon juice, and spices. Heat over medium for 5-8 minutes.
- Slurry the cornstarch with a small amount of water, stir into the simmering cherries, and cook until the liquid is clear and glossy.
- Stir in 1 tbsp of butter, then remove from heat to cool slightly. Note: Cooling the filling prevents the bottom crust from melting before it bakes.
Phase 3: Assembly and Lattice Work
- Roll out the first dough disc to a 13 inch circle and press it firmly into a 9 inch deep dish pie plate.
- Pour the cooled cherry mixture into the crust.
- Roll out the second disc and cut into strips for a lattice top, or roll it whole and cut slits for steam.
- Beat the egg and heavy cream together, brush over the crust, and sprinkle with granulated sugar.
Phase 4: The Golden Bake
- Bake at 400°F (200°C) for 55 minutes until the crust is deep golden and the filling is bubbling.
- Remove from the oven and let it cool for at least 2 hours before slicing. Note: Slicing too early is the fastest way to ruin a Classic Homemade Cherry Pie.
Chef's Tip: If you notice the edges of your crust browning too fast, cover them with a strip of foil around the 30 minute mark. This keeps the edges from burning while the center finishes.
Fixing Common Pie Problems

Even the most experienced bakers hit a snag now and then. Usually, it's a matter of temperature or timing.
Why Your Crust Shrinks
If your crust pulls away from the edges of the pan, it's usually because the gluten was overworked or the dough didn't rest long enough. When you roll the dough, do it gently. If you feel the dough resisting you, put it back in the fridge for 10 minutes.
The Dreaded Soggy Bottom
This happens when the fruit releases too much moisture or the oven temperature is too low. Pre cooking the filling for this Classic Homemade Cherry Pie solves most of this. To be even safer, place your pie plate on a preheated baking sheet to send heat directly into the bottom crust.
Filling is Still Runny
If the filling doesn't set, the cornstarch might not have reached the necessary temperature to activate. Ensure the filling reaches a simmer before adding it to the crust.
| Problem | Root Cause | Solution |
|---|---|---|
| Gummy Crust | Too much water/Over mixing | Use ice water; stop pulsing as soon as it clumps |
| Burnt Edges | Oven heat too high | Use a pie shield or foil strips |
| Pale Crust | Not enough egg wash | Use a mix of egg and heavy cream |
Fun Flavor Variations
The beauty of a Classic Homemade Cherry Pie is how well it plays with other flavors. If you want to change things up, try adding a pinch of almond extract to the filling. Almond and cherry are a natural pair that makes the dessert feel a bit more sophisticated.
For those who like a bit of crunch, you can sprinkle a cinnamon sugar crumble on top of the fruit before adding the top crust. If you're feeling adventurous, serve a slice with a scoop of Homemade Cherry Garcia Ice Cream for a double cherry experience.
2 Flavor Twists
- Bourbon Cherry: Add 2 tablespoons of bourbon to the filling while simmering for a smoky, adult twist.
- Orange Zest: Grate one organic orange into the sugar mixture for a citrusy lift.
2 Diet Swaps
- gluten-free: Use a 1:1 GF baking flour blend. Note: The crust will be more fragile and may need 5 more minutes of baking.
- Lower Sugar: Replace granulated sugar with a monk fruit sweetener. Note: This may affect the glossiness of the filling.
Adjusting the Batch Size
Scaling a pie is trickier than scaling a cake because the surface area of the pan matters. If you're changing the size, keep these rules in mind.
Scaling Down (Small Tart): If you use a 6 inch pan, halve all ingredients. Reduce the baking time by about 20%, but still look for those bubbling juices. Since you can't use half an egg, beat one egg in a small bowl and use roughly 2 tablespoons of it for the wash.
Scaling Up (Two Pies): When doubling the recipe for two Classic Homemade Cherry Pies, don't just double the spices. Use 1.5x the cinnamon and nutmeg so they don't overpower the fruit. Work in batches with your food processor to avoid overheating the butter.
For the crust, if you're baking two pies at once, lower the oven temperature to 375°F (190°C) and extend the bake time by 10-15 minutes. This ensures both pies brown evenly without the top one burning.
Pie Baking Truths
There are a few things people say about baking that just aren't true. Let's clear them up so you can bake with confidence.
Blind baking the bottom crust is often called a necessity for fruit pies. In reality, if you pre cook your filling and keep your butter cold, you don't need to blind bake. The pre cooked filling has less water, which means the crust doesn't need a "head start" to stay crisp.
Another myth is that you should use the cheapest butter possible for flakiness. Actually, a butter with a higher fat content (like European style butter) produces a more rich, flavorful crust. According to King Arthur Baking, the fat to water ratio in butter is what determines the final texture of your pastry.
Storage and Waste Tips
A Classic Homemade Cherry Pie is great the day it's made, but it stays good for a while if stored correctly. Keep it on the counter for up to 2 days, covered loosely with foil. For longer storage, keep it in the fridge for 5 days.
To reheat, avoid the microwave. Put a slice in a 350°F (175°C) oven for about 10 minutes. This brings the crust back to life without making the cherries rubbery.
Freezing Guidelines: You can freeze the entire pie (unbaked) for up to 3 months. Wrap the disc or the assembled pie tightly in plastic wrap and foil. Bake it directly from frozen, but add about 15-20 minutes to the cooking time.
Zero Waste Tips: Don't throw away those scraps of dough from the edges. Roll them into small balls, sprinkle with cinnamon sugar, and bake them for 10 minutes as "pie crust cookies." They're a great treat for the baker while the main pie is cooling.
Plating and Pairing Ideas
The way you serve this dish changes the whole vibe. Whether you're hosting a casual lunch or a fancy dinner, you can adjust the presentation.
Simple Level: A warm slice on a plain white plate with a dollop of whipped cream or a scoop of vanilla ice cream. This is pure comfort.
Polished Level: A clean slice dusted with a light sprinkle of powdered sugar and a single fresh mint leaf on top for a pop of color.
Restaurant Level: A precision cut wedge placed slightly off center. Add a quenelle of mascarpone cream and a small drizzle of reduced cherry syrup around the plate. This is where you can pair it with something like a dollop of Classic Peach Jam on the side for a mixed fruit platter.
| Plating Level | Key Tweak | Vibe |
|---|---|---|
| Simple | Vanilla Ice Cream | Homey |
| Polished | Powdered Sugar & Mint | Elegant |
| Restaurant | Mascarpone Quenelle | High End |
Making a Classic Homemade Cherry Pie is all about patience and temperature. Once you stop rushing the dough and start treating the filling with a bit more care, you'll never go back to the raw fill method. It's a rewarding process that ends with a dessert that looks as good as it tastes.
Just remember to let it cool completely, or you'll be eating a delicious, cherry flavored puddle!
Recipe FAQs
How to make a homemade cherry pie from scratch?
Pulse flour, sugar, and salt with chilled butter in a food processor until coarse. Add ice water to form a dough, chill for an hour, then fill with a simmered cherry and cornstarch mixture before baking.
What is the best thickener for cherry pie?
Cornstarch is the best choice. It provides a clear, glossy finish and thickens effectively without altering the bright flavor of the sour cherries.
What's the best recipe for cherry pie crust?
Use 2.5 cups of flour and 1 cup of chilled butter. Pulse with salt and sugar, then add ice water until a dough forms. If you enjoyed mastering the chilled fat technique for this crust, see how we balance sweetness in our vanilla cupcakes.
Why did my cherry pie turn out runny?
The cornstarch slurry likely didn't reach a simmer. You must cook the filling until the liquid is clear and glossy to ensure the starch activates and sets properly.
How many cherries go in cherry pie?
Use 6 cups of pitted sour cherries. This volume ensures the deep dish pie is full and satisfying without becoming too liquidy.
How to make cherry pie filling taste better?
Stir in lemon juice, ground cinnamon, and nutmeg. These ingredients cut through the sugar and enhance the natural tartness of the fruit.
How to bake a cherry pie?
Roll out the chilled dough into a 13 inch circle and press it into a 9 inch deep dish plate. Fill with the cooked cherry mixture and bake until the crust is golden.
Classic Homemade Cherry Pie